FableVision Learning Spotlight Blog
Categories
- Animation-ish 42
- Books 21
- Civics! 2
- Classroom Spotlight 17
- Conferences and Events 20
- Creative Educator 3
- Creativity 25
- Distance Learning 13
- Dot Day 22
- FabClassroom 28
- FabFriday 19
- FabMaker Studio 66
- FabMaker Studio Classroom 13
- FableFive 7
- FableVision Games 3
- Free Educator Resources 36
- HUTCH 1
- Home Activities 5
- In the Classroom 34
- In the News 11
- International Dot Day 23
- Ish 1
- Library 1
- Mapping the World by Heart 7
- Paul Reynolds 10
- Peter H. Reynolds 54
- Professional Development 9
- STEM/STEAM 20
- Storybook Academy 2
- Teacher Spotlight 14
- The Dot 17
- The North Star 2
- Words and Their Stories 1
- Zoombinis 3

FabMaker Tip: Using Scissors to Engineer Your Project
Schools, libraries, and afterschool programs across the country have been using FabMaker Studio to design, invent, and prototype 3D projects, pop-ups and 2D creations with the help of a Silhouette paper cutter. But did you know that projects can also be completed with a printer and a pair of scissors?
Check out the video below for a quick how to:
This means the FabMaking isn’t limited to where a Silhouette is available. At home, students can print the cut & fold lines and create their FabMaker projects.
Step 1: Once the project is ready to be printed, select the Printer icon.

Step 2: On the Print Preview page select the “Print Cut & Fold Lines.” And if you don’t want to print the interior color, you can select “Remove Color Fill.” Next, select Save to PDF to start the printing process.

Step 3: Open the PDF in a reader of your choice, hit print, and grab your scissors!

What happens next is up to you. If you need a refresher on what the different lines mean, download the FabMaker Tool Tips guide.

Celebrate World Wildlife Day with FabMakerStudio!

When it comes to wildlife, the first step toward conservation may be appreciation. It’s easy for students to fall in love with nature when they explore the exciting worlds of animal life (fauna), plant life (flora), and the astounding ways in which they interrelate.
In the classroom, World Wildlife Day (March 3, 2020) provides a unique opportunity learn about the importance of biodiversity. If you’re looking to incorporate this year’s theme—Sustaining All Life on Earth—into your curriculum during the coming weeks, FabMaker Studio can serve as a fun, creative, and intuitive tool for your students.
Here’s a list of some of our favorite FabMaker Studio projects that relate to wildlife!

The Flight of the Bumblebee
There is a common myth that bumble bees defy the laws of physics as they apply to aerodynamics. How is it possible that they are able to fly? Using high-speed photography, Michael Dickinson—a professor of biology and insect flight expert at the University of Washington—researched how the bumblebee takes flight and published his findings. Through this Fab@School Maker Studio activity, your students will examine the anatomy of a bumblebee, or other flying insects.

Giraffe Masks
Did you know that the small horns on top of a giraffe’s head are called ossicones? Giraffes appear to share these skin-covered, boned protuberances with an extinct relative called the Sivatherium. (Reference: National Geographic, "Sivatherium: A giraffe with a trunk?", and ”The Biggest Giraffe of All Time.”) Even as one of the most common symbols of wildlife, giraffes are relatively little-understood creatures, whose habits and origins are still being researched and discovered!
These card stock Giraffe Mask designs are a ready-made project in FabMaker Studio. For a simple activity, they can be assembled + worn by students, or combined into a classroom/hallway display.
Alternatively, you can use the mask designs to launch a lesson about the evolution of animal features, and how fossil records help researchers to decipher the evolutionary story of a species. With the FabMaker Studio design interface, students can use their imagination to adapt the features, or dream up attributes that the giraffe’s relatives could have evolved to survive. (For example, longer or differently-shaped ossicones, pointed teeth, a trunk, and more!)

Pair a Wildlife Project with a Themed Book!
For World Wildlife Day (and beyond) teachers can use FabMaker Studio projects alongside themed books to create memorable experiences for their students - especially those who like to get hands-on while learning!
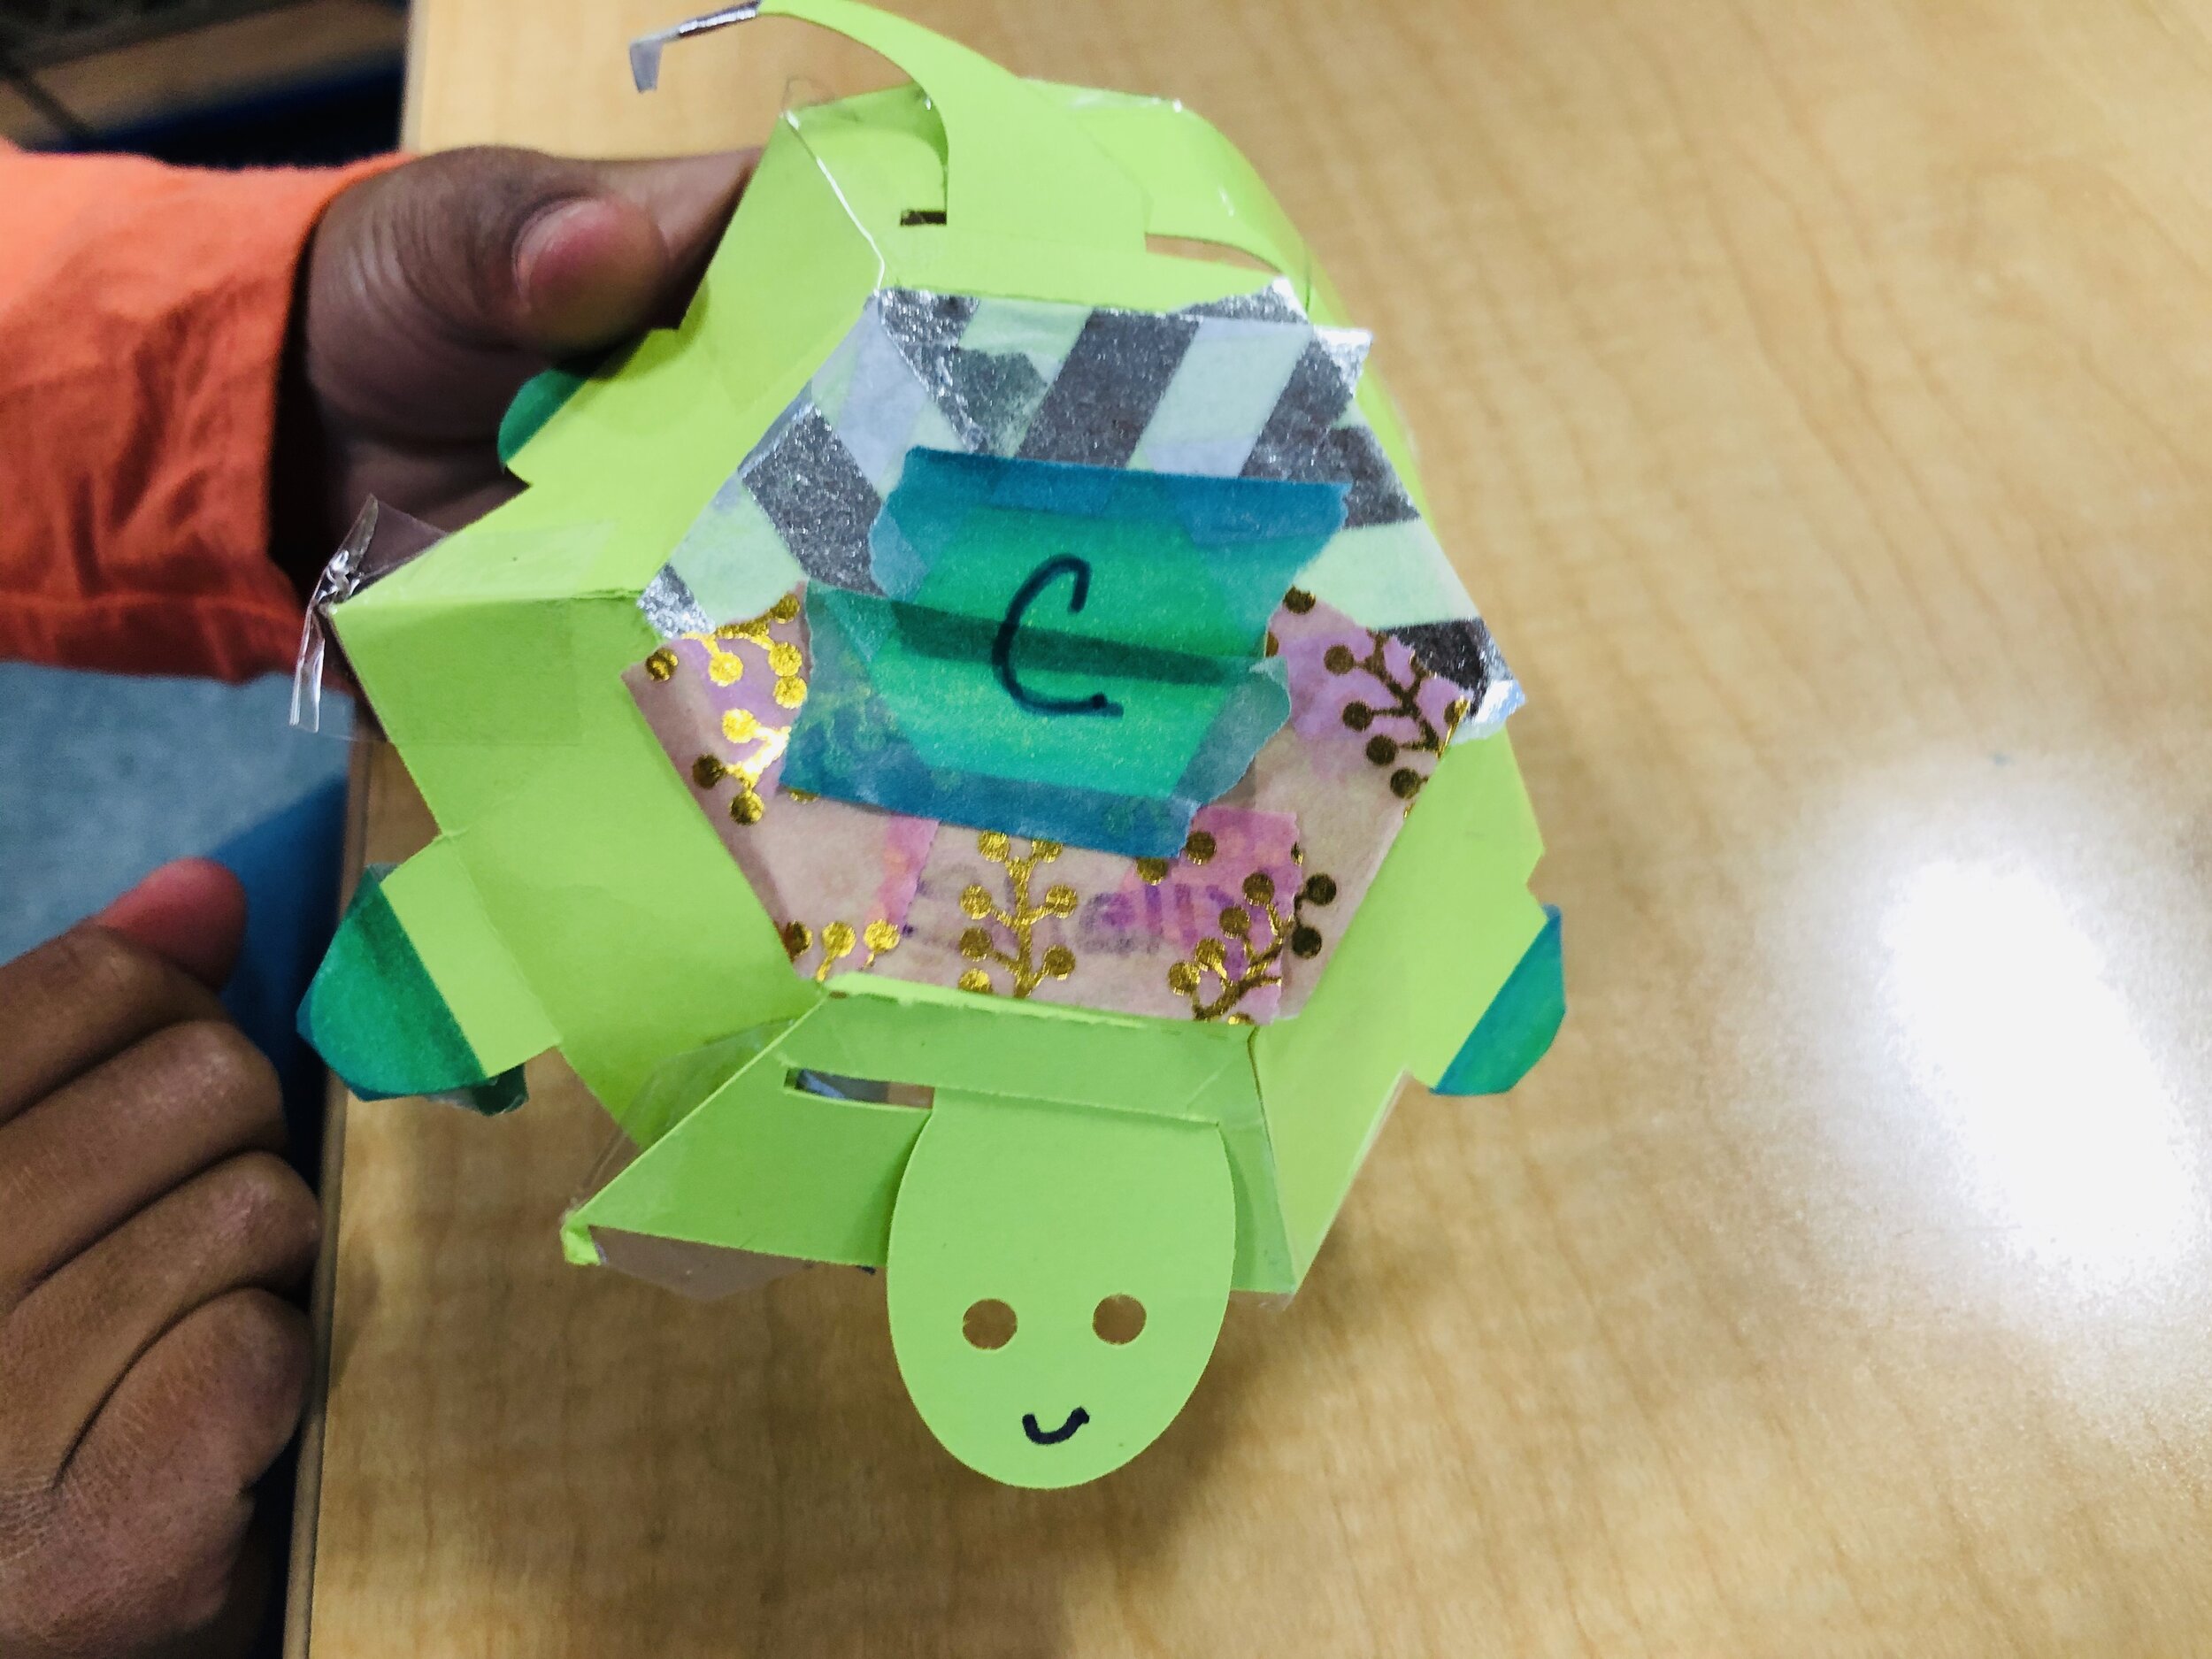
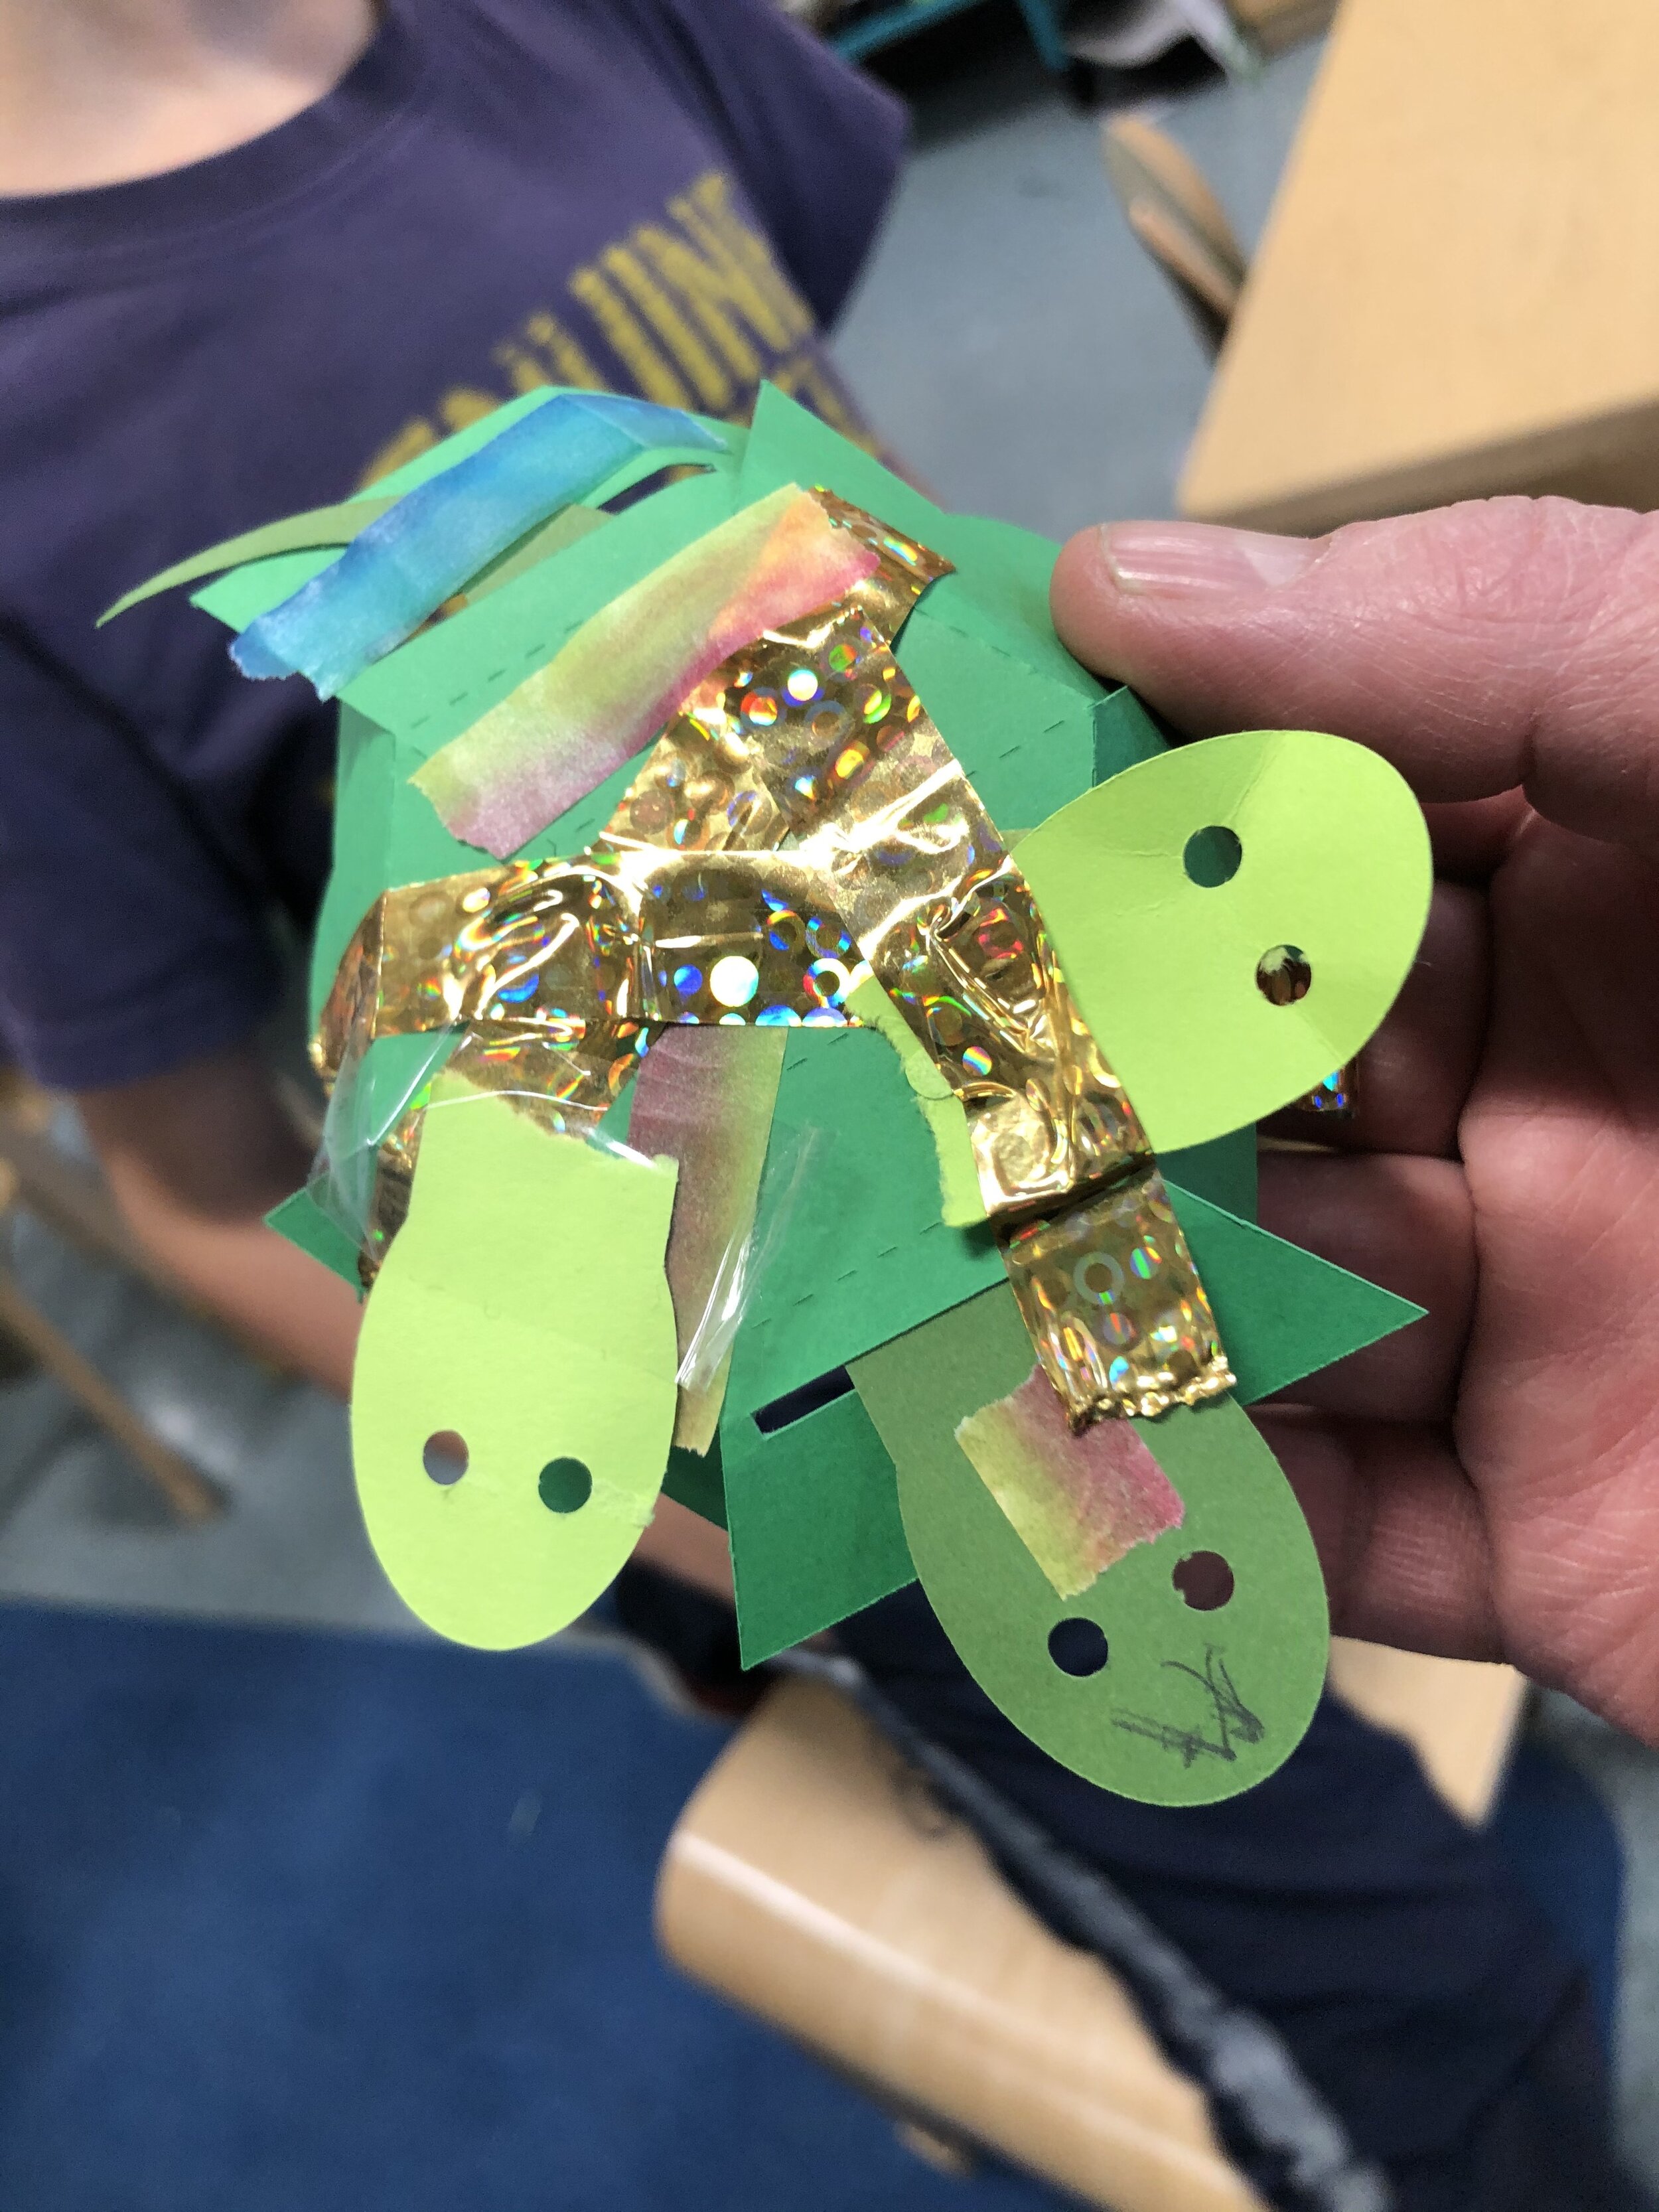
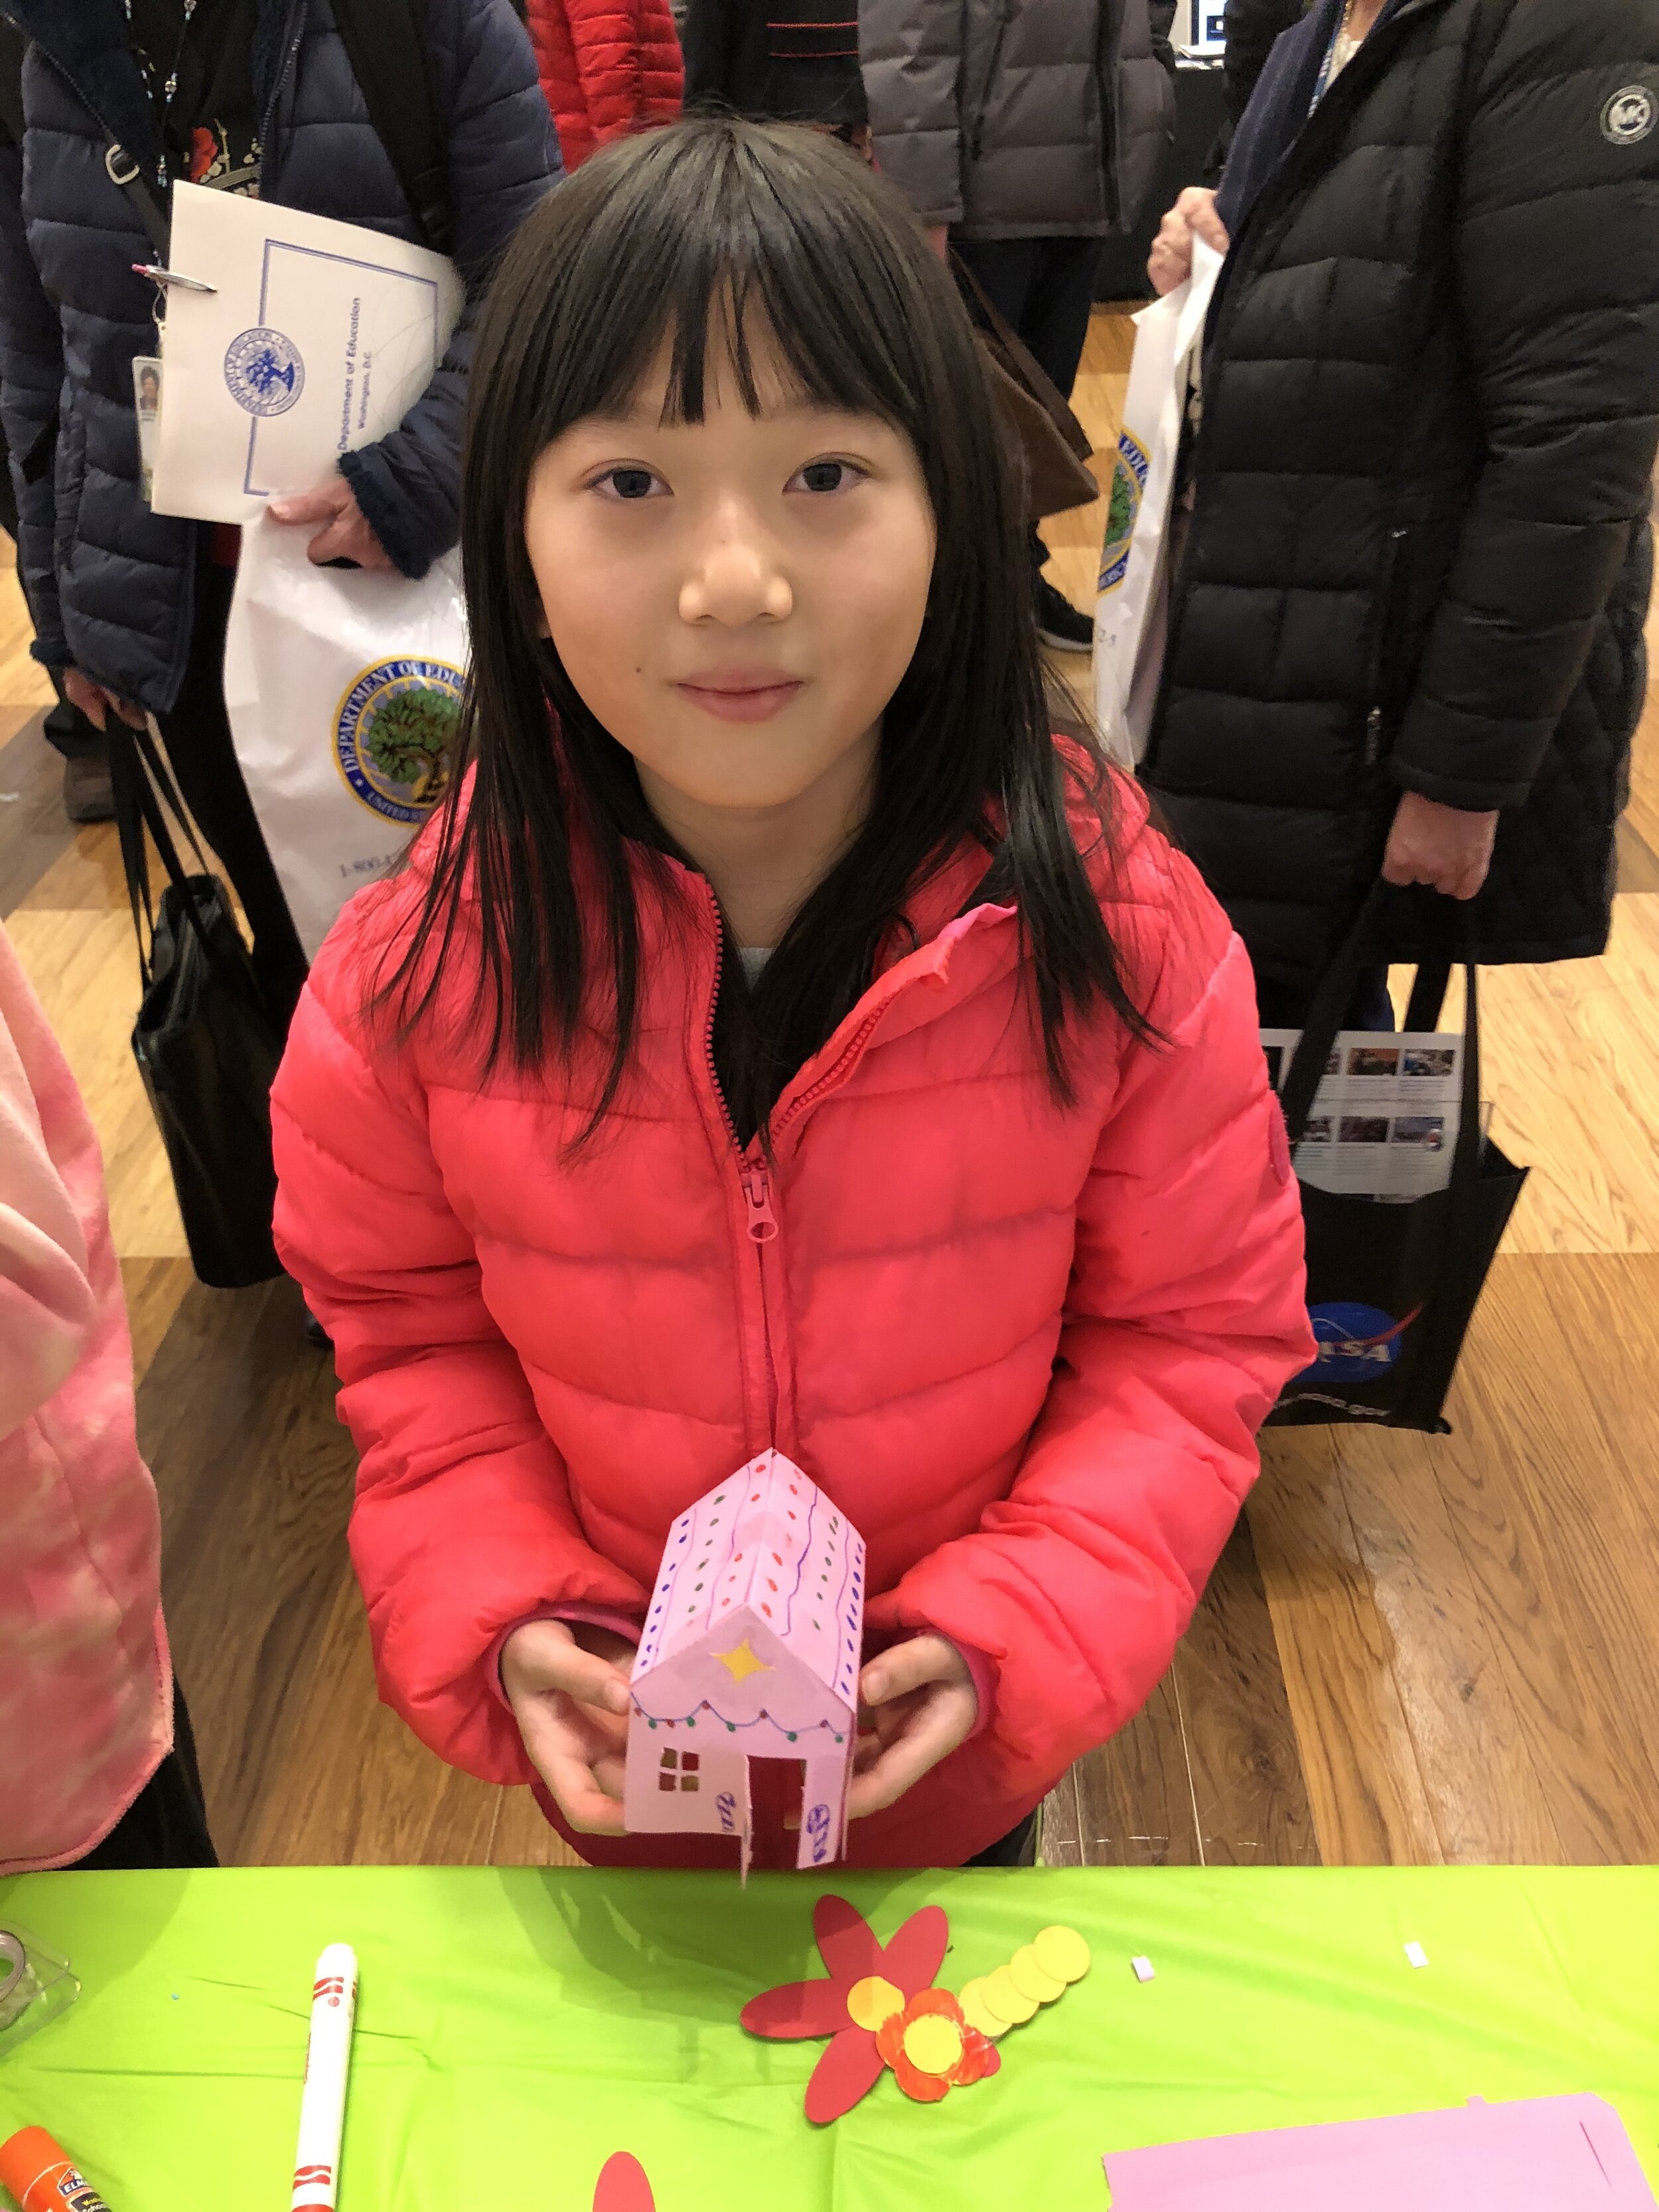
For example, this January at the School Within School at Goding in Washington, DC., FableVision/Reynolds Center TLC’s own Paul Reynolds spoke about his book, Sydney & Simon: Go Green!, which addresses the threat that ocean pollution poses to the environment and aquatic life…including sea turtles! Afterwards, the third grade students assembled 3D turtles that were created using FabMaker Studio.
When considering your plans for celebrating wildlife in the classroom, remember that FabMakerStudio offers ready-made projects that feature bears, birds, foxes, turkeys, deer, and many more! Consider which of your favorite books about wildlife could be paired with a paper fabrication project!
How will you bring the lessons of World Wildlife Day in your classroom? How will you incorporate FabMakerStudio 2D and 3D fabrication to make your lessons come alive? For a chance to be featured in our FableVision Learning Spotlight, please email info@fablevisionlearning.com!
To learn more about school visits with Peter H. Reynolds and Paul Reynolds , click here.
Click here to learn about FabMaker Studio.

Fabricating Fun for National Engineers Week

Build a snowman without the frostbite! Watch this quick time-lapse video to see how educators can introduce engineering concepts to young learners with FabMaker Studio.
FabMaker Studio is the first digital fabrication software tool developed specifically for use in the classroom. It is an easy-to-use, web-based program that invites students to experience STEM and STEAM learning in an engaging, personally meaningful way.
For more information, contact us at info@fablevisionlearning.com

FABMaker Spotlight: “Operating” with Tuscarora Intermediate Unit’s Maker Campers

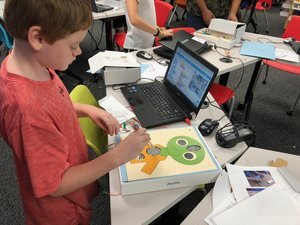
Eric Yoder’s son exploring FABMaker Studio
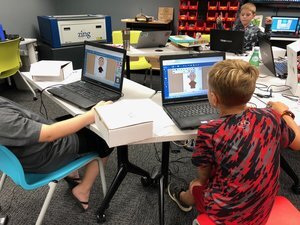
Inspired young engineers created their own Operation games this summer at Tuscarora Intermediate Unit’s Maker Camp, with the help of their instructor, Eric Yoder, the Coordinator of Educational Technology for the district.
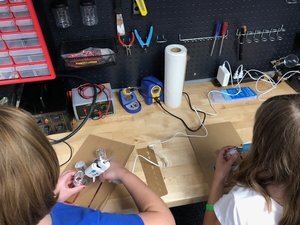
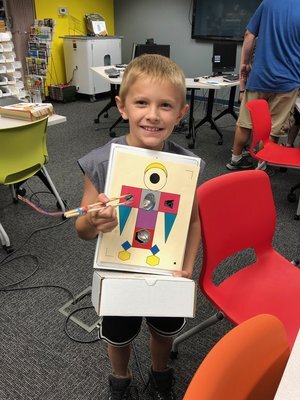
The Maker Camp, located in Central Pennsylvania, introduced the aspiring engineers to FabMaker Studio, and the Silhouette Portrait. From there, campers used their imagination to design their own characters, and cut out holes to create their organs, or game pieces. Copper tape and wired chopsticks were used as surgical tools in assisting the engineer’s characters in their “Operation.”

To make these patients come to life campers used a Makey Makey - wired to the chopsticks - and Scratch to program the custom sounds and effects. Whenever the surgeon removed a game piece the wrong way - buzz! This project was inspired by Joel Poel Smith, a DIY YouTuber, and Josh Burker.
Is your classroom a FabClassroom? We would love to highlight your school! To be featured in an upcoming post, send an email to andrea@fablevision.com. You can also tweet your photos with the hashtag #FabMakerStudio! For more posts featuring FabMaker Studio, click here.
Join the FabMaker Teacher Group here

FabMaker Spotlight: Combining 3D forms with Warm/Cool Colors

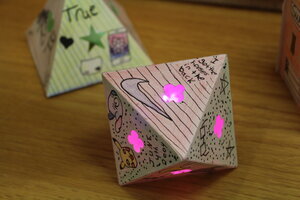
By creating 3D shapes in FabMaker Studio that also supported an LED light and battery, students at Farmington High School in New Hampshire explored design while creating a 3D self portrait.
Shannon McCracken shared about the process:
“I wanted to ‘up the level’ a little so I also had students plan a hole for an LED and a battery to be attached to it, so the forms would glow from the inside. Most students picked up the Fab Maker program and Silhouette hardware very easily. Once they mastered it I had them show someone else and so on and so forth. The students had a good time and I made most of them create their own shapes, from scratch, so they had to practice how things bent and twisted before going onto the FabMaker.”
Is your classroom a FabClassroom? We would love to highlight your school! To be featured in an upcoming post, send an email to andrea@reynoldstlc.org. You can also tweet your photos with the hashtag #FabMakerStudio! For more posts featuring FabMaker Studio, click here.

FableVision's Adventures at the 2020 ED Games Expo
For the third year, the FableVision Learning and Reynolds Center team traveled to Washington, DC for the 2020 ED Games Expo - the U.S. Department of Education’s showcase of educational learning games and technologies from across the country.


As part of the Expo, the team Created Bravely with two area schools and got hands-on with FabMaker Studio. This journey took our team to Washington, DC, Maryland, and Virginia.
First stop was School Within School at Goding in Washington, DC on Jan. 8. Working with 2 third grade classes, Paul Reynolds spoke about his book Sydney & Simon: Go Green!. Afterwards, the third grade students assembled 3D turtles that were created using FabMaker Studio.
The following day, the Reynolds Center and FableVision traveled to Maryland to create with fifth graders at Sunderland Elementary School. Using our design tool, the fifth grade class crafted spin tops. Some of the students experimented with the speed of the tops by adding paper clips and other accessories.

That evening, the team exhibited at the 2020 ED Games Expo at the JFK Center for Performing Arts. Our table included 2D and 3D FabMaker designs - attendees were able to use ready-made products or design products from scratch. The team collaborated with students, educators, and parents to discuss the skills FabMaker employs.

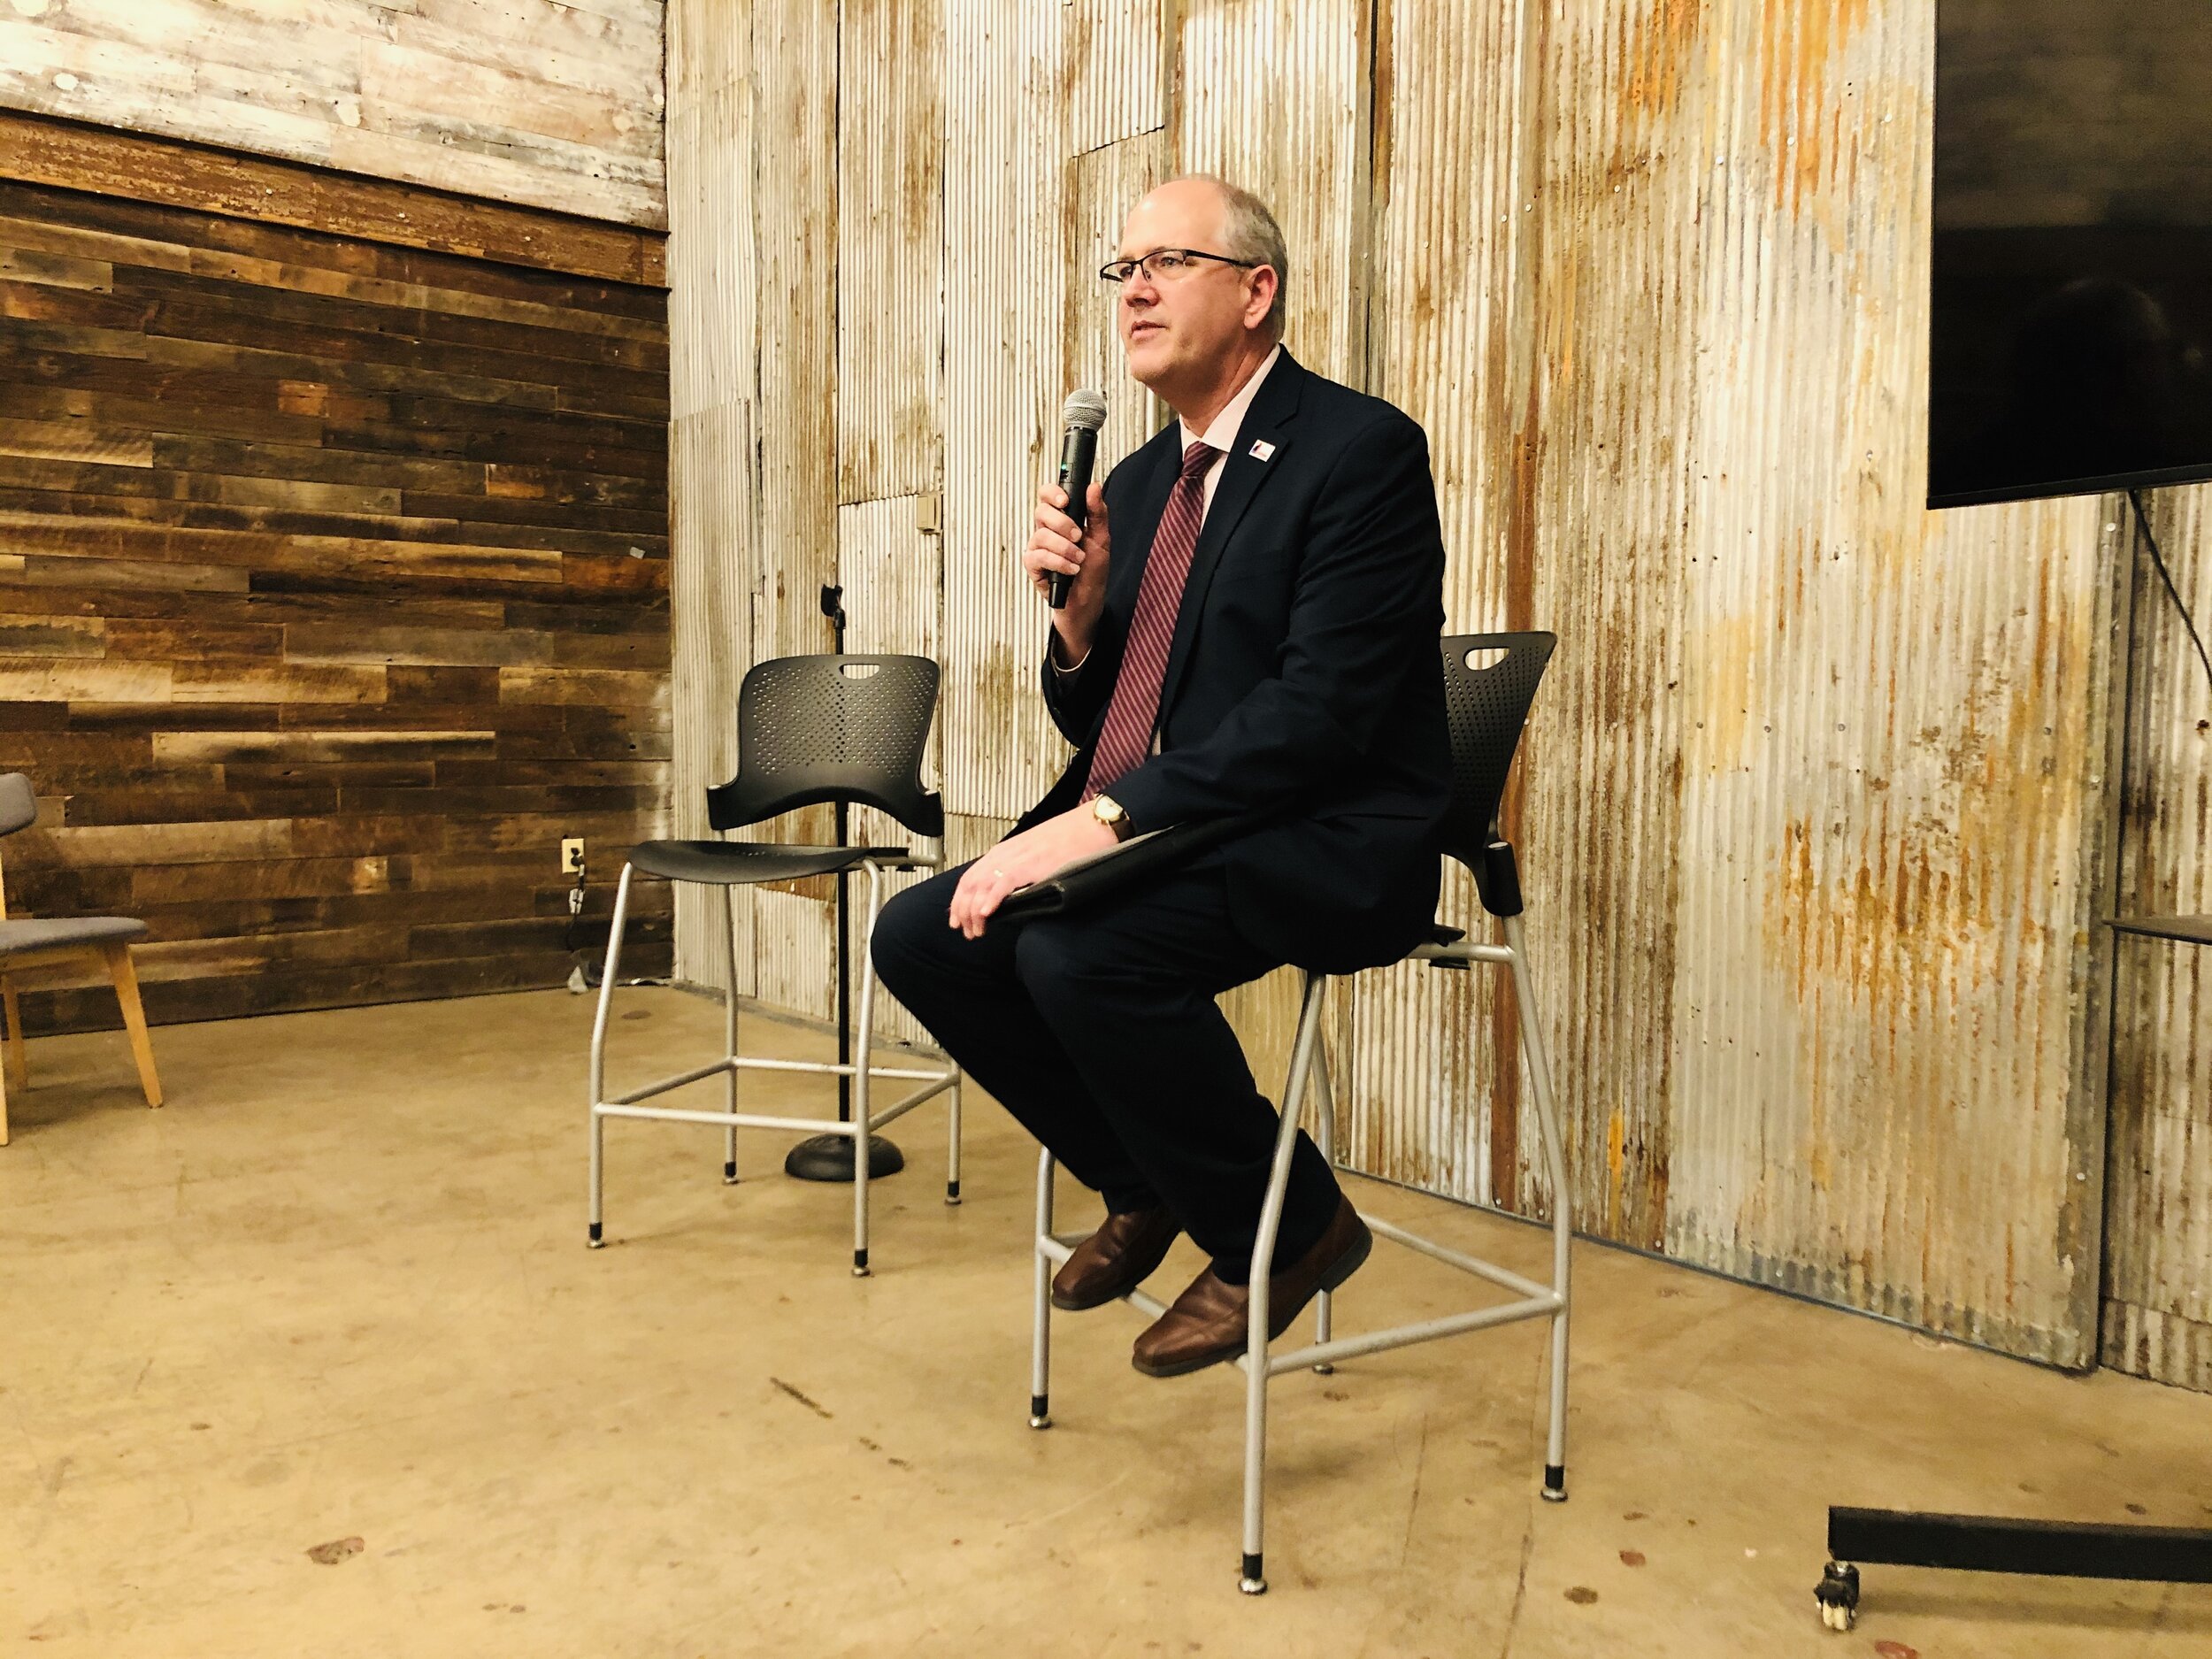
On Friday, Jan. 10, Paul Reynolds joined the Big Ideas Panel at the ED Games Expo Showcase: Making in K12 & CTE in Virginia at Building Momentum. Featured speakers included Allen Brooks of Building Momentum; Albert Palacios of the US Department of Education; Paula Gangopadhyay of the Institute of Museum of Library Services; Dorothy Jones-Davis of Nation of Makers; Digital Harbor’s Andrew Coy; Cara Lesser of Kid Museum; American University’s Ben Stokes; Recast City’s Ilana Preuss; and Alana Preuss and DJ Morneau of Games for Change. This event showcased successful ed tech products that were given a kick-start with government small business grants through the ED/IES Small Business Innovation Research program.


Click on the hyperlinks to learn more about School Visits with Peter and Paul Reynolds and FabMaker Studio.

Young FabMaker Designers Share Their Tips
Peggy Healy Stearns, Ph.D., software designer for FabMaker Studio, has spent part of her summer working with campers at the Lighthouse ArtCenter in Florida. In this videos series, she’s captured some tips and tricks on how to use FabMaker Studio from the youngest campers.
Are your students FabMaker Designers? Share their tips and tricks in our FabMaker Studio teacher group or send Andrea Calvin (andrea@fablevision.com).

FABClassroom: “Fab” ulous Cars

For this week's FabClassroom we head over to Augustine F. Maloney Elementary in Blackstone, MA. Monica Carty is an elementary technology teacher at Blackstone-Millville Regional School District. She has been using Fab@School Maker Studio in her after school STEM club. It has been so successful she will be launching an after-school club just for Fab@School! Monica shares how her students used FabMaker Studio to design some "Fab" ulous Cars!

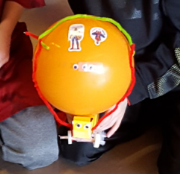
Who says learning has to be dry or boring? Or even end with the school bell? Well I do not think that ever has to be the case! In fact, I run an amazing STEM club after school thanks to my school parent organization and Fab@School Maker Studio that say different.
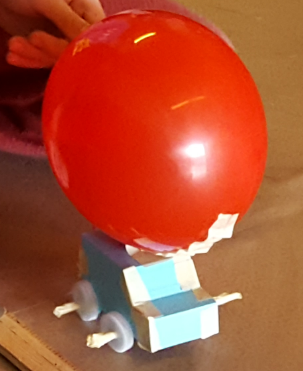
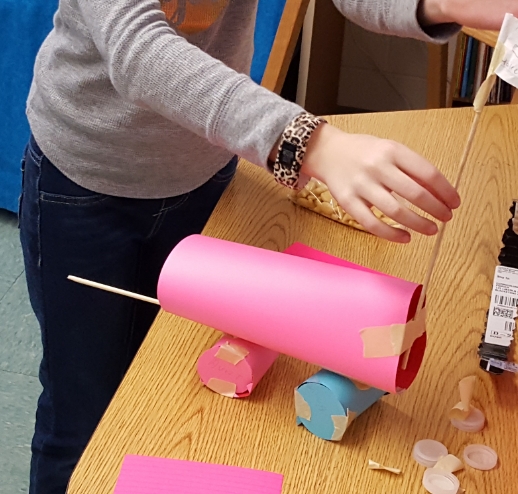
In the past my STEM clubs were always enjoyed by all the students who attended, but this year I stepped it up by adding the use of Fab@School Maker Studio. In the club’s conclusion project students designed, developed, and created balloon powered cars. Students had a wide range of tools and supplies at their disposal. The only requirement was the car had to move by balloon power!
Students quickly went to work developing a sketch, or basic blueprint, and a supply list. From their printing, cutting and building noises filled the room with laughter and smiles. When testing day came no one was nervous because at that point they felt that failure was their learning opportunity.
I highly recommend trying this with your students as you explore several science and engineering standards in your classrooms. If you want to connect to multiple subject areas you can have students do a formal write piece about their experience, or develop a descriptive writing piece for their design. If you are looking to integrate more math calculate distances, movement times, or building expensives is a great option. The fact of the matter the possibilities are only limited by your own creativity!
Is your classroom a FabClassroom? We would love to feature your school! To be featured in an upcoming post, send an email to info@fablevisionlearning.com. You can also tweet your photos with the hashtag #FabMakerStudio! For more posts featuring Fab@School Maker Studio, click here.

Explore Math with a Valentine’s Day Explosion Box!
This post was written by Peggy Healy Stearns, Ph.D., the designer of Fab@School Maker Studio and co-founder of the Fab@School coalition.
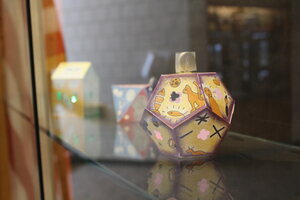
If you love pop-ups – those playful, joyful constructions that bring books and cards to life – then you’ll probably love “explosion boxes.” These popular 3D paper crafts take pop-ups to a whole new dimension.
Like pop-ups, “explosion boxes” offer an engaging way to invite students into the world of math and engineering. They encourage students to explore and work with measurement, parallel and perpendicular lines, angles, triangles, symmetry, and transformational geometry, all in the context of engaging manipulatives kids design and make themselves.
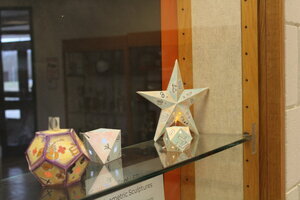
Although the deepest learning comes when students design from scratch, a Fab@School Maker Studio Ready-Made Project jumpstarts students by providing a model they can explore and customize. Once students understand the shapes, cuts, folds, and angles that make up an explosion box, they are better able to design from scratch.


The simple explosion box shown here is designed to enclose a small Valentine’s Day treat, gift, or note. It can be printed first and then cut, or cut without printing from colored card stock or plain white paper that students decorate themselves.
Encourage students to customize with color, cutouts, and other design elements. Once students have their initial model in hand, ask them to explore their constructions. Use some of the questions below to kickstart a class discussion. Then challenge students to design their own original explosion boxes.
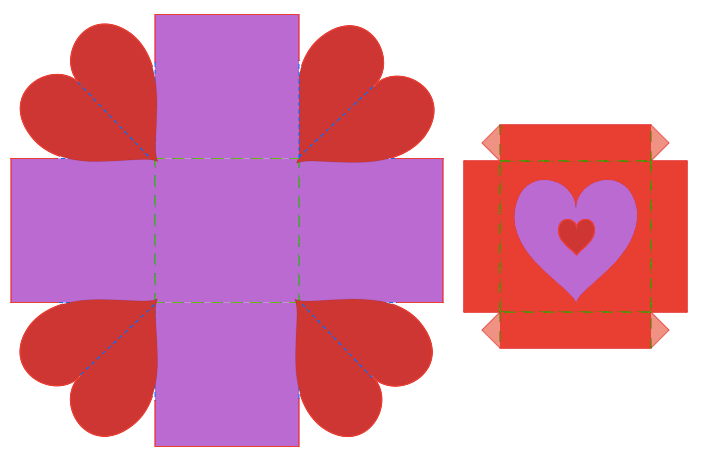
Above, is the template for the Fab@School Explosion Box Ready-Made. Check it out!
Explore the explosion box:
- How many faces does your explosion box pattern have? How do you get 9 faces to fold into a square box?
- What will fit inside the box?
- What is the volume of the box? How many M&M’s, plastic counters, or marbles will fit?
- At what angle do the square sides fold? At what angle do the hearts fold?
- Can you suggest other shapes or images that would work in place of the hearts?
- What do you like best about your explosion box? What would you like to change?
Challenge:
- Design 2D, pop-up, or 3D elements scaled to fit inside your explosion box.
- Can you resize the box to hold a different object?
- Design an original explosion box from scratch for Valentine’s Day or another occasion. Search “explosion box” on the Internet for ideas.
- Make a different shaped explosion box. Can you design a box that looks like a building, animal or other object? With a specific purpose or “client” in mind, set criteria and constraints and design a box that meets these guidelines.
Common Core Math Standards [Additional standards apply.]
- CCSS.MATH.CONTENT.K.MD.A.1
- CCSS.MATH.CONTENT.1.G.A.2
- CCSS.MATH.CONTENT.2.G.A.1
- CCSS.MATH.CONTENT.3.MD.C.5
- CCSS.MATH.CONTENT.4.G.A.3
- CCSS.MATH.CONTENT.5.MD.C.3
- CCSS.MATH.CONTENT.6.G.A.2
- CCSS.MATH.CONTENT.7.G.B.4
Next Generation Science Standards

Getting "Messy" with Fab@School at the ED Games Expo
In a room filled with amazing virtual reality stations, impressive mobile apps, and science simulations, we were the “messy table.”
On Monday, Jan. 8, FableVision Learning joined hundreds of game developers at 5th annual ED Games Expo hosted by the U.S. Department of Education at the The John F. Kennedy Center for the Performing Arts in DC. The expo was a chance to showcase learning games developed through The Small Business Innovation Research (SBIR) program to students from the DC area.
We discovered that in this digital age, youngsters were drawn the tangible. Our table was the busiest of all! Why? We were there to demo Fab@School Maker Studio, an online tool where students design with 2D shapes to create nets that when fabricated using a digital cutter become 3D objects.
The perk - it is all done with paper.
I was inundated with students all lining up to answer one simple question: “What do you want to make”? Everytime the answer was different.
- “What do you mean… make?”
- “A house.”
- “A car.”
- “A Mickey Mouse face that has stars instead of circles for ears”
- “What can I make?”
- “I want what she made, only different.”
The challenge was on and it was only 10 a.m.
Students picked a piece of colored cardstock, mounted it on a sticky mat, and patiently waited for their turn.
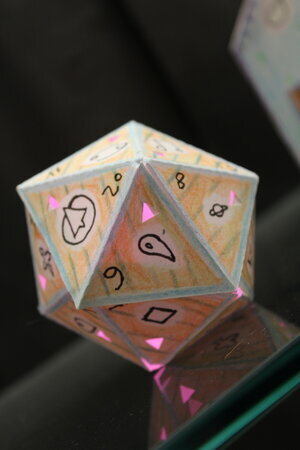
A fourth-grade girl was excited to create a dodecahedron - she just loves shapes. But wanted two sides to have a cut-out of a star. This was simple - by dragging a star from the shapes pallet onto her design she was able to see her idea come to fruition digitally and after 50 seconds though the digital cutter - she was folding her geometric shape.
One girl wasn’t impressed with the sunglasses she was wearing and wanted to create her own. As a group of young engineers we examined what shapes were used in the construction of the glasses.
“Maybe two circles with two more circles in the middle to see,” one student suggested.
“Now we need a rectangle to make them connected,” another added.
At the end of the design phase, we had a pretty nifty pair of sunglasses with very long arms. Back in Fab@School, she used the ruler tool to accurately create the perfect pair of sunglasses.
There were oohs and aahs from all folks of ages when the students snapped pulled together six squares and watched as the program’s 3D viewer showed how the shape would fold. One exhibitor remarked that Fab@School was unique because you create 2D nets to create 3D objects instead of building in a 3D environment and having the program flatten it.
Toward the end of the afternoon, teachers were giving the five-minute-until-the-bus-leaves warning to students that had been there for a good part of the day - designing, creating, and getting messy.
We left tired but excited to know we had inspired a few more future engineers.

FABClassroom: Oak Ridge School Students Construct a FAB Paper City

Meet Carly Smith, Art and Technology Teacher at Oak Ridge School. Carly fuses creativity and innovation together every day with her students to program robots, create stop-motion animations, and design in Fab@School Maker Studio.
Can you share a bit about your school and your teaching journey?
I am lucky enough to teach in the elementary school that I attended as a child, so working here feels like coming home. I am in my 8th year at this school and have worn many different hats, from special education teacher to technology integrationist and my current role as a specialist teacher teaching both art and technology. A typical day is never typical! Each day is different and that’s what I like most about my role. My technology classes are working on building computational thinking skills by coding robots so my morning is lots of troubleshooting and runaway robots. My art classes are operating on a choice-based curriculum so in the afternoon I feel like a “creativity coach” teaching mini-lessons, managing the space, and meeting with student-artists.
How are your students using Fab@School Maker Studio?
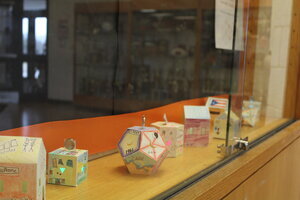
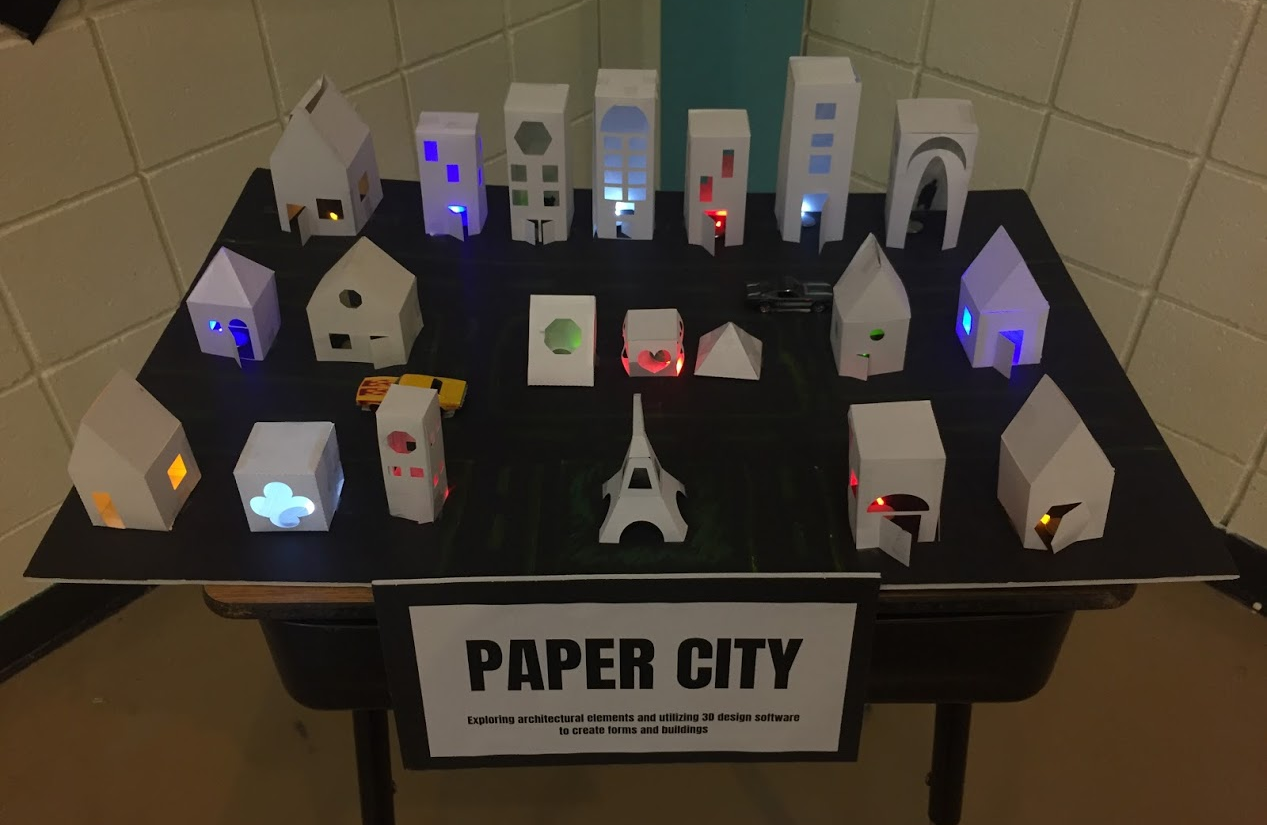
My students used Fab@School Maker Studio to create houses as part of an architecture project we did last year in art class. We looked at different types of buildings and the students designed their own to become part of a “Paper City." They created everything from monuments, to tent camping sites, to skyscrapers and one student even recreated the Eiffel Tower! After the buildings were fabricated the students used LEDs and coin cell batteries to light up the city. After this first project, some students used the software again to create stencils for an apparel design screenprinting project.
What has been the “aha” moment?
I discovered Fab@School Maker Studio at last year’s MassCUE conference. I was so excited the first time I used it because the options are limited only by the imagination of the designer. The software is the perfect combination of “kid-friendly” without being limiting. I had wanted to bring 3D printing into my classroom, but felt that my students’ experience would be diminished due to the expense of the filament and the time the printing takes for each item. Seeing how fast the paper cutter works combined with the affordability of the paper and cardstock made this so doable for my students and me. My PTA generously purchased the licenses and the paper cutter for my classroom and we began using it with Chromebooks last spring.
How are you integrating Fab@School with your current school curriculum?
This year I am hoping to expand the use of the software by having technology classes fabricate “cars” or “boats” that will be driven by the robots we are learning to program. The robots are waterproof so hopefully students will be able to design and program them to drive on dry land or be propelled through water. Check back with me in a few months and we will see how this grand plan comes to life!

As an Art/Tech teacher you really put the A in STEAM- can you share a bit about your role at Oak Ridge and how you incorporate arts with technology?
I am always looking for new ways to incorporate technology into the art curriculum and vice versa. The technology and art curriculums overlap in so many ways because creative problem solving and the design process are so critical to both content areas. In addition to the 3D design work they have done with Fab@School Maker Studio, my students have used software to edit photos or create unique compositions, iPads to create digital artwork, and digital cameras to learn about perspective, create illusions in photography as well as stop-motion animation.

This year we are experimenting with green screens to add interesting effects to our photos and videos. I find that my job is evolving to the point where I am putting students in the driver’s seat and empowering them to come up with ways to creatively use the technology available to them. I try to learn as much as I can about each tool or device so that I can help to guide them and troubleshoot problems. Often students know what they want the technology to do, and just need help getting there. Experimentation can sometimes feel scary because the teacher has to give up control, but the results are usually far beyond what I would have thought of or expected!
What is next?
I am excited to continue to connect with educators who are using this software because the sharing of ideas is so valuable. I would love to add a second printer so that more students can fabricate within a single class period (wish list item!). I am also open to bringing the software to other teachers in my district as part of a possible makerspace to be built. With this and other technology tools I will continue to be inspired by the creativity of my students!

Get Involved
Is your classroom a FabClassroom? We would love to feature your school in a blog post! To be featured in an upcoming post, send an email to info@fablevisionlearning.com. You can also share your Fab@School Maker Studio creations and ideas on social media with #FabMakerStudio! For more posts featuring Fab@School Maker Studio, click here.
But Wait, There's More!
Want to learn more about Fab@School? Fill out the contact form below and a FableVision Team member will get back to you.

FableVision Learning Intern Spotlight: Patrick's Fab@School Maker Studio Journey
Hello FableVision Learning friends and fans,
Allow me to introduce myself - I am Patrick McDonagh, a marketing intern at FableVision Learning studying English Creative Writing at Endicott College. The gamut of work at FVL challenges my formal degree skills in a fun professional learning environment.
Now at the end of my internship, it’s time to put the lessons I’ve learned into action. I have been challenged to create an easy-to-build Fab@School Maker Studio project for kids ages 5-11 for construction in a library setting. The result of this challenge, after many iterations, is a turkey mask designed in Fab@School Maker Studio and ready to debut at the Dedham Public Library.
Make A Mark

I will be honest, my first iteration of the mask did not resemble a turkey. I set out to work on my laptop early in a Peet’s Coffee tinkering with the software tools for hours trying to find shapes to form my vision. Coffee fueled my design, frustration, and perceived failure - my goal was perfection. I used the oval shape tool for feathers, then dragged and manipulated shapes for the turkey's snood. I asked a neighbor what animal they thought I had made. The response was unflattering.
Create Bravely
![TurkeyMaskDesign2 [Crop].png](https://images.squarespace-cdn.com/content/v1/54a08126e4b038053fec29c3/1510764141186-K1BYIFV1WQ0JEX3KL380/TurkeyMaskDesign2+%5BCrop%5D.png)
For my next iteration, I focused on what I had done well. In my hours of welding and manipulating shapes in Fab@School Maker Studio I grew more familiar with the tools. I made a first mark in the creative process. I paused to assuage my initial frustration by focusing on what I had learned. These were my notes:
I achieved a stylized and symmetrical 2D turkey shape by modifying Shapes with the Reflect, Align, and Weld features.
Used the Ruler, Grid, and Magnetize tool to visually interpret dimensions and distance between objects and snap them together.
Developed an understanding of each individual piece’s form and assembly across a project with multiple sheets of paper.
I saved helpful design elements for later by positioning them on the outer edges of the edit area.
Fabricated often and attempted assembly to refine project design across multiple iterations.
The first test mask I fabricated measured five inches in width. Only after I fabricated a mask that barely covered my face did I know it needed resizing. Supplies for Fab@School Maker Studio are inexpensive enough that I was able to incorporate fabrication into my prototyping process. I realized it didn’t need to be perfect right away.
Perfect-Ish
![TurkeyMaskDesign3[Crop].png](https://images.squarespace-cdn.com/content/v1/54a08126e4b038053fec29c3/1510764951816-5PW0RJE3BG780TIR7M0B/TurkeyMaskDesign3%5BCrop%5D.png)
![TurkeyMaskDesign4[Crop].png](https://images.squarespace-cdn.com/content/v1/54a08126e4b038053fec29c3/1510764979993-0IHBD24T1X4L0AZHLV5N/TurkeyMaskDesign4%5BCrop%5D.png)
I felt more at ease creating without the inhibiting goal of perfection, and instead shifted focus to simplifying the design. Each remaining shape needed a critical purpose. Project refinement is a productive exercise for students forming foundational knowledge of iterative design and fabrication with Fab@School Maker Studio. Transitioning from concept to a recognizable design was exciting.
This is the final product. I am proud to share my mask in Fab@School Maker Studio as a 3D Ready-Made project for students, teachers, and makers to fabricate.
Get Involved
Are you in the Dedham area? Join us on Thursday, Nov. 16, at 3:30 p.m. at 43 Church St. for a hands-on Fab@School workshop. Remember to #CreateBravely!