FableVision Learning Spotlight Blog
Categories
- Animation-ish 42
- Books 21
- Civics! 2
- Classroom Spotlight 17
- Conferences and Events 20
- Creative Educator 3
- Creativity 25
- Distance Learning 13
- Dot Day 22
- FabClassroom 28
- FabFriday 19
- FabMaker Studio 66
- FabMaker Studio Classroom 13
- FableFive 7
- FableVision Games 3
- Free Educator Resources 36
- HUTCH 1
- Home Activities 5
- In the Classroom 34
- In the News 11
- International Dot Day 23
- Ish 1
- Library 1
- Mapping the World by Heart 7
- Paul Reynolds 10
- Peter H. Reynolds 54
- Professional Development 9
- STEM/STEAM 20
- Storybook Academy 2
- Teacher Spotlight 14
- The Dot 17
- The North Star 2
- Words and Their Stories 1
- Zoombinis 3

FabFriday: Engineering with Classroom Materials
Welcome to FabFriday, a blog series that highlights tips and tricks for using Fab@School Maker Studio. Fab@ School Maker Studio is a web-based digital fabrication software tool that creates a more accessible, comfortable onramp for teachers to introduce STEM learning to their students. Each week we'll be posting ideas about using different materials, design tips, and construction techniques to help you offer even more fab learning to your students.

Paperclip? Check!
Straw? Check!
Popsicle stick? Check!
Wondering about this week’s FabFriday checklist? Check!
In past FabFriday posts, we’ve explored different techniques such as working with shapes, adding color, and learning about different kinds of paper. While paper construction is versatile and surprisingly robust, with a little creativity it’s possible to engineer even more, like inventions that move, animate, and go places, by using materials found in your classroom!
Fasteners: Brads, Paper Clips, Staples, Binder Clips

There are all sorts of fasteners that come in handy when engineering Fab@School Maker Studio projects. Brads (brass paper fasteners) are great for linking pieces of paper through a shared hole, and you can even create rotating or hinging parts. Paper clips can be used to join edges of paper, add weight, and when bent can be used to create unique metal elements. Staples are another way to join together paper, especially in a design that requires a lot of strength.
I used paper clips when designing my trebuchet catapult, bending them around to create a release pin on the end of the throwing arm.

Engineering in Action
Fab@School Maker Studio was demonstrated at the 2016 National Technology Leadership Summit in Washington, DC during a Making & Storytelling workshop.

Participants were introduced to the linear motor invention kit developed and piloted in the Curry School of Education at the University of Virginia and in the Laboratory School for Advanced Manufacturing. Through this activity, workshop attendees used laser cut images - created in and exported through Fab@School- to construct a moving articulated figure that expanded upon the paper version.
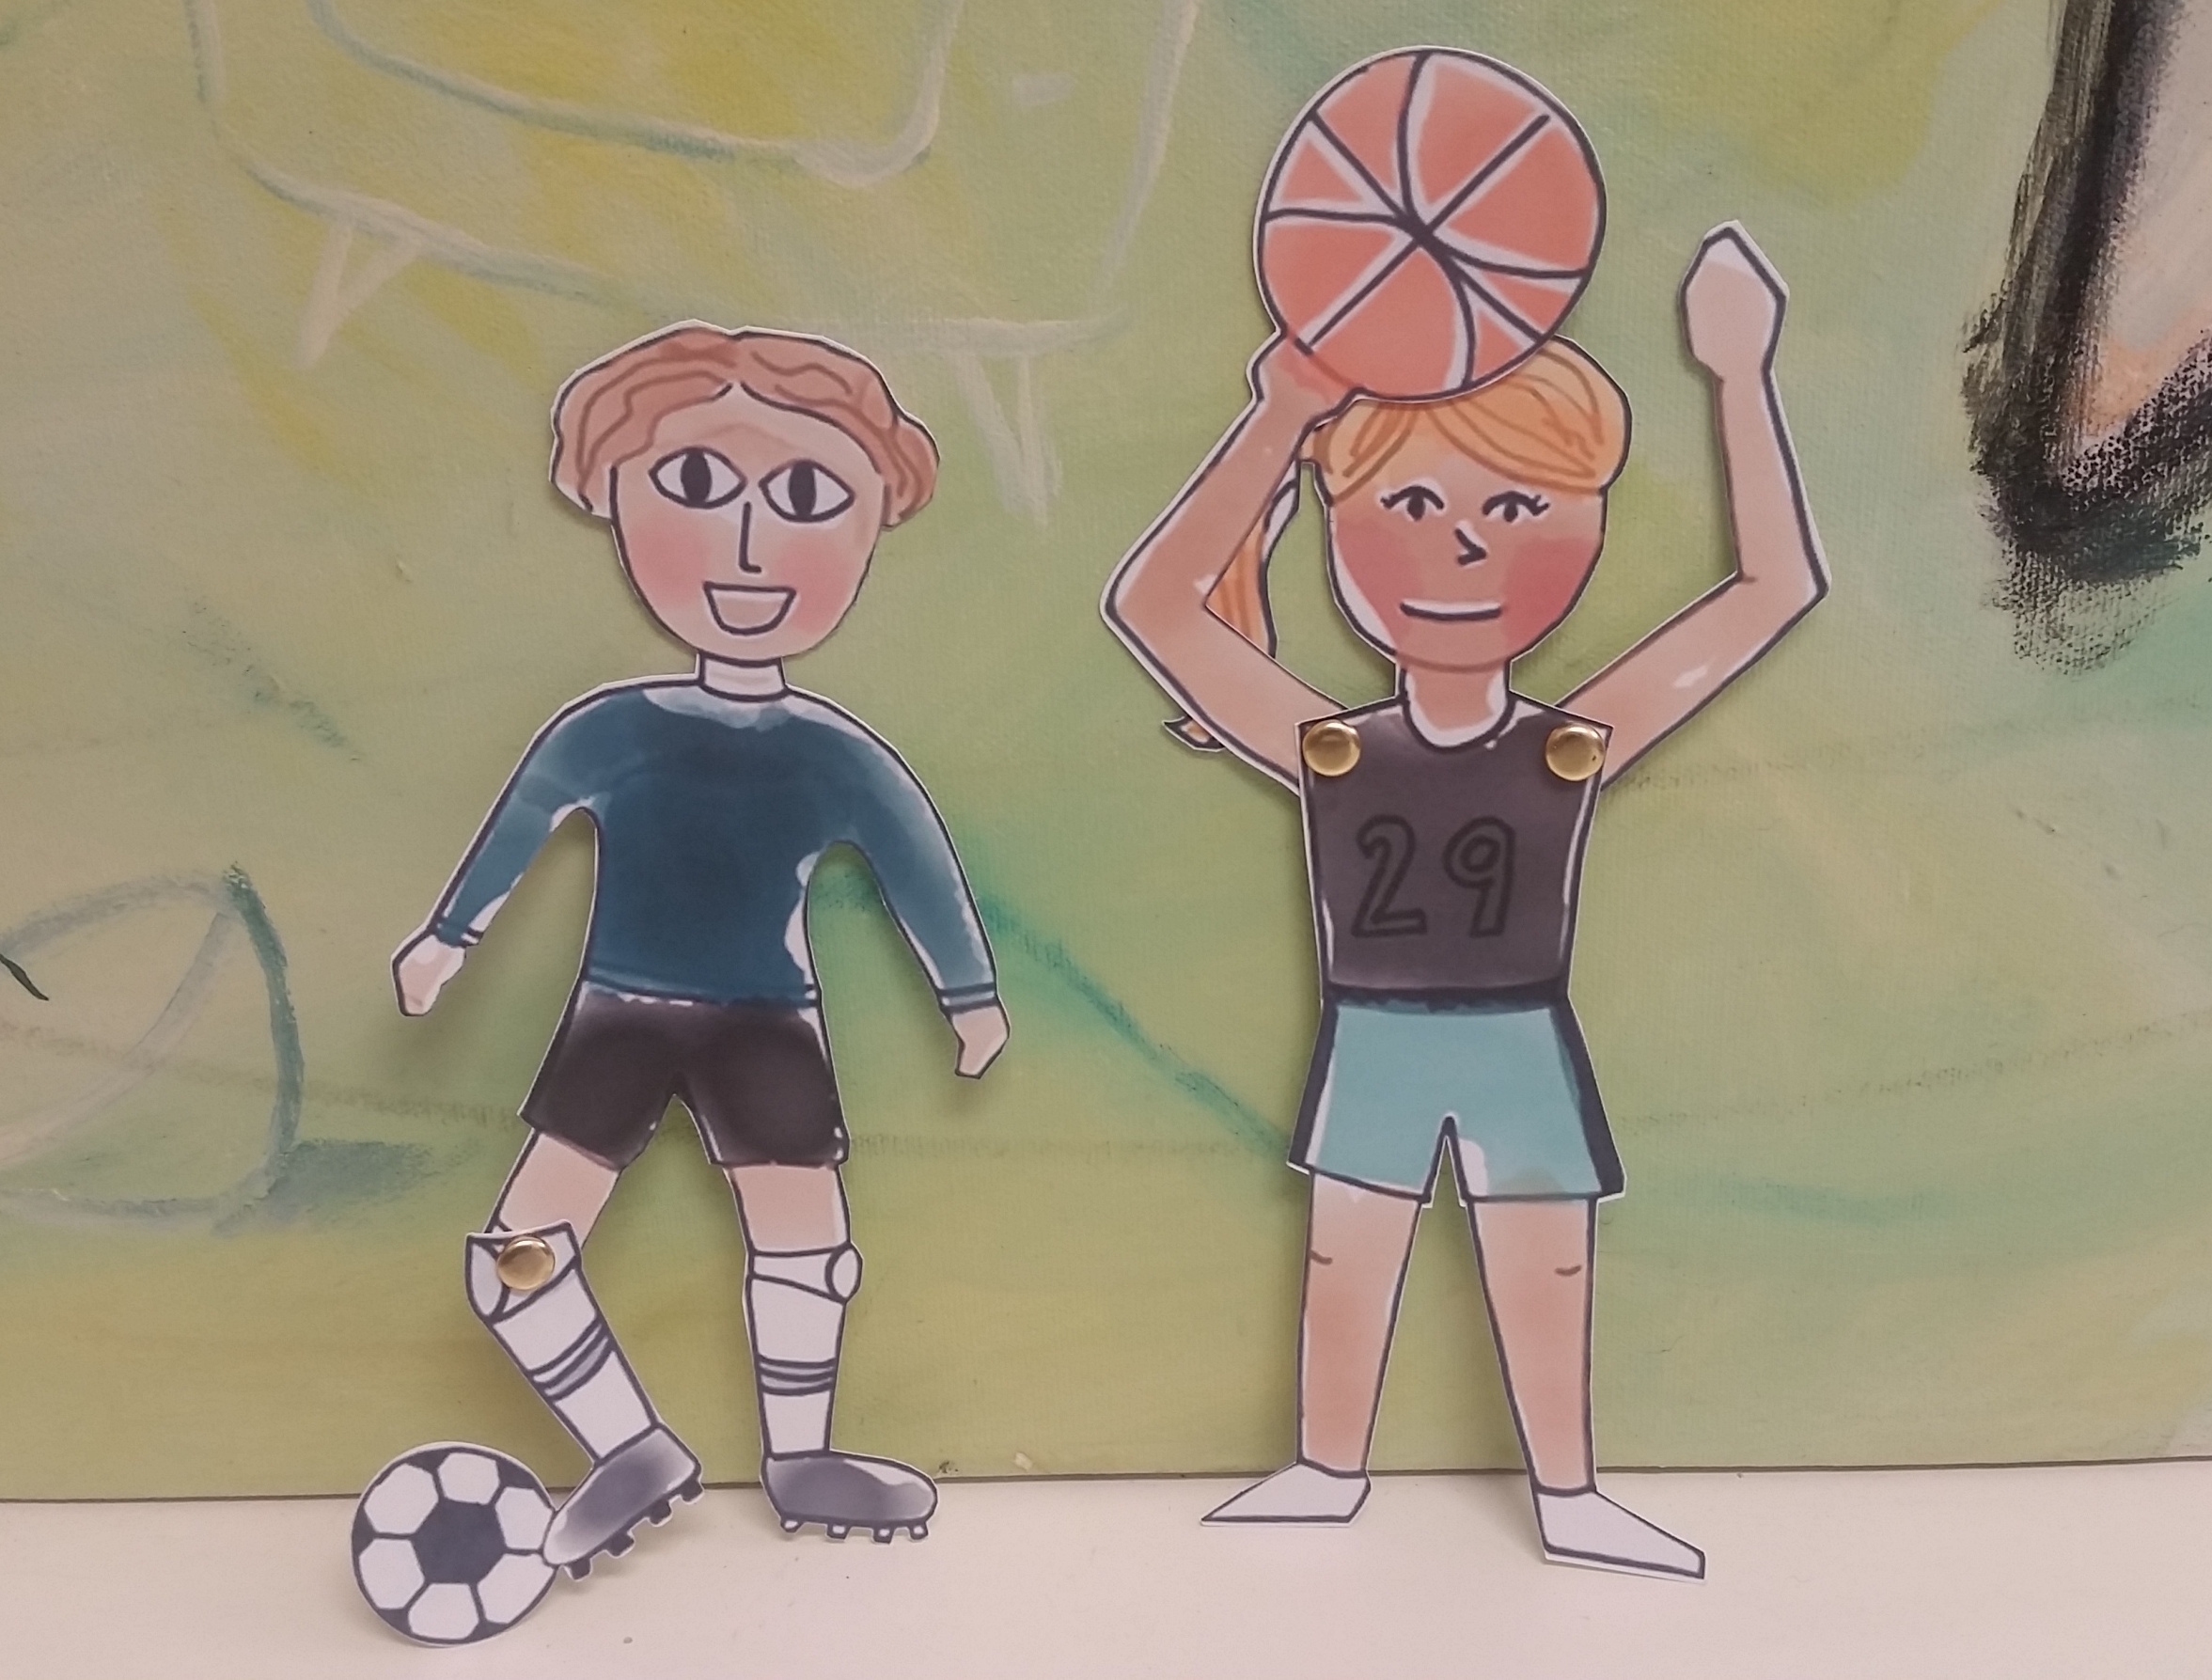
Give it a try! These paper figures use brads as joints so the soccer player can kick and the basketball player can move both her arms and make the shot! Hop into Fab@School Maker Studio and try this project with library images.
Supports: Paper/Plastic Straws, Popsicle Sticks, Splints, Dowels
If there is something that you want to build that is challenging to construct entirely out of paper, try and find materials that you can use to strengthen it. Popsicle sticks and wood splints can be used as ribs in between layers of paper to create thin and strong constructions, as well as for constructing frames to build off of.
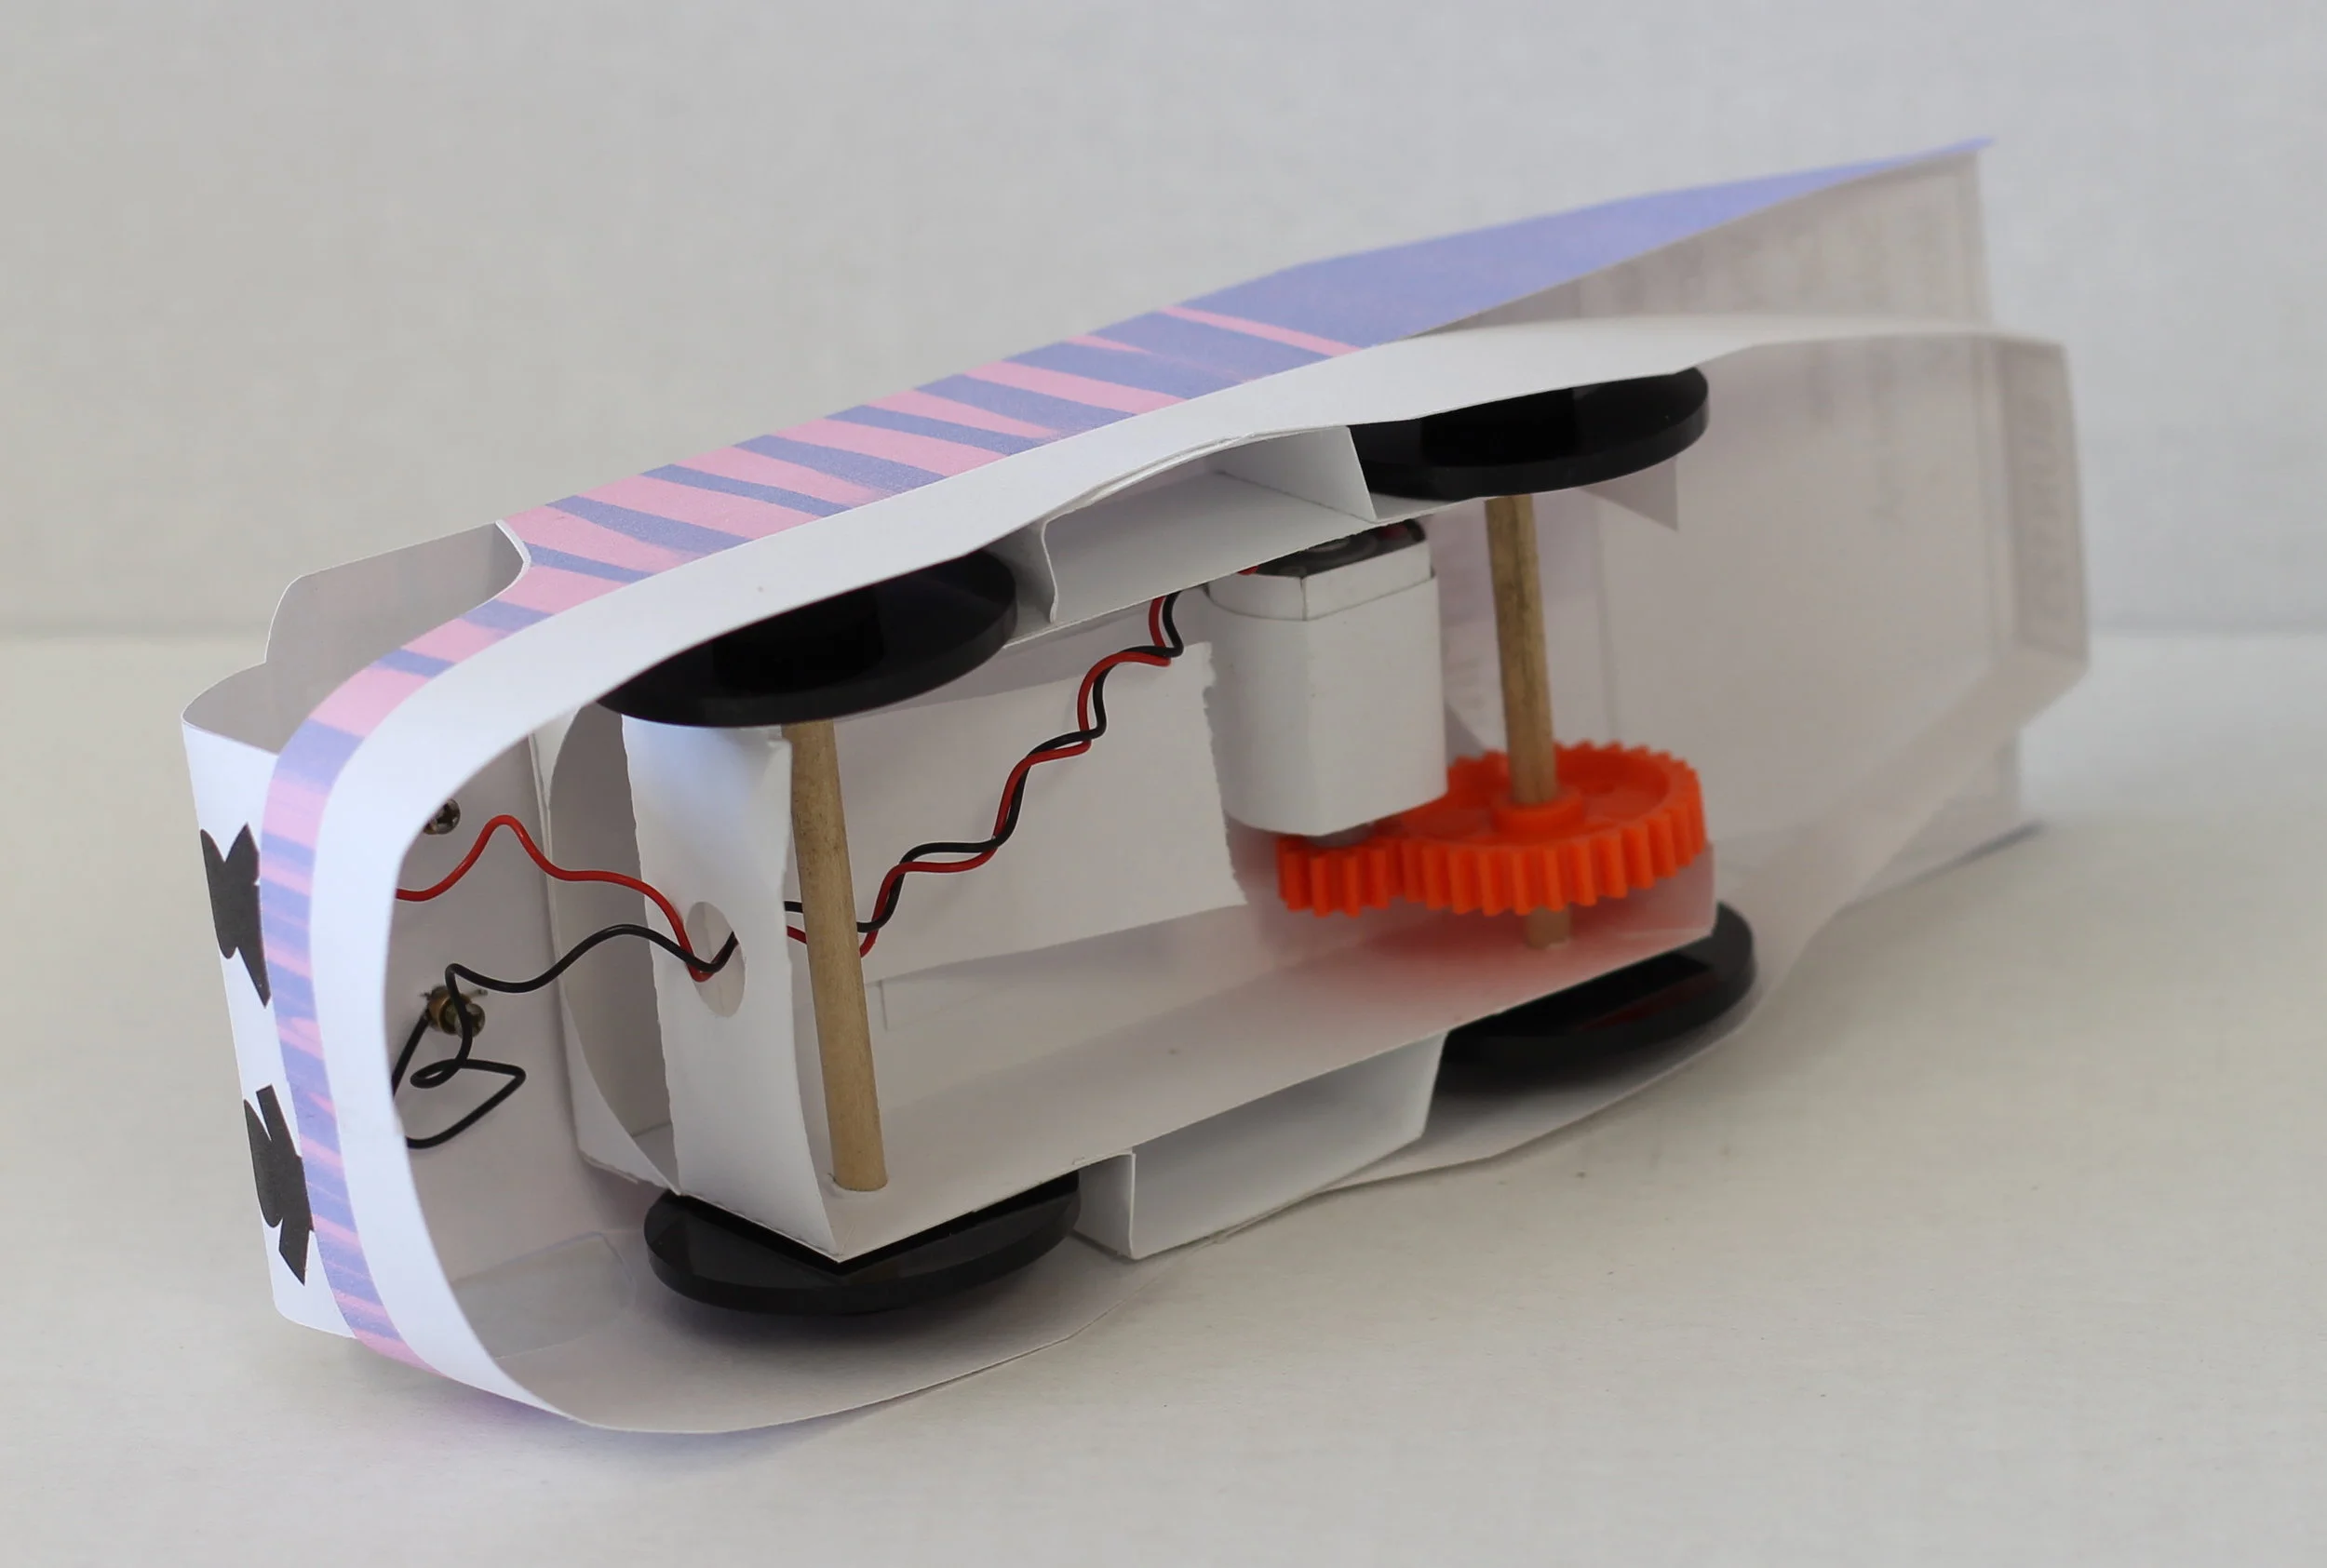
Straws and dowels are fantastic tubular supports that are light and strong. They also make great axles for wheels, gears, and lever fulcrums. Check out the dowels in the underbelly of this STEAM-Infused STELLA Solar car. This construction allows the wheels to freely rotate while remaining very strong.

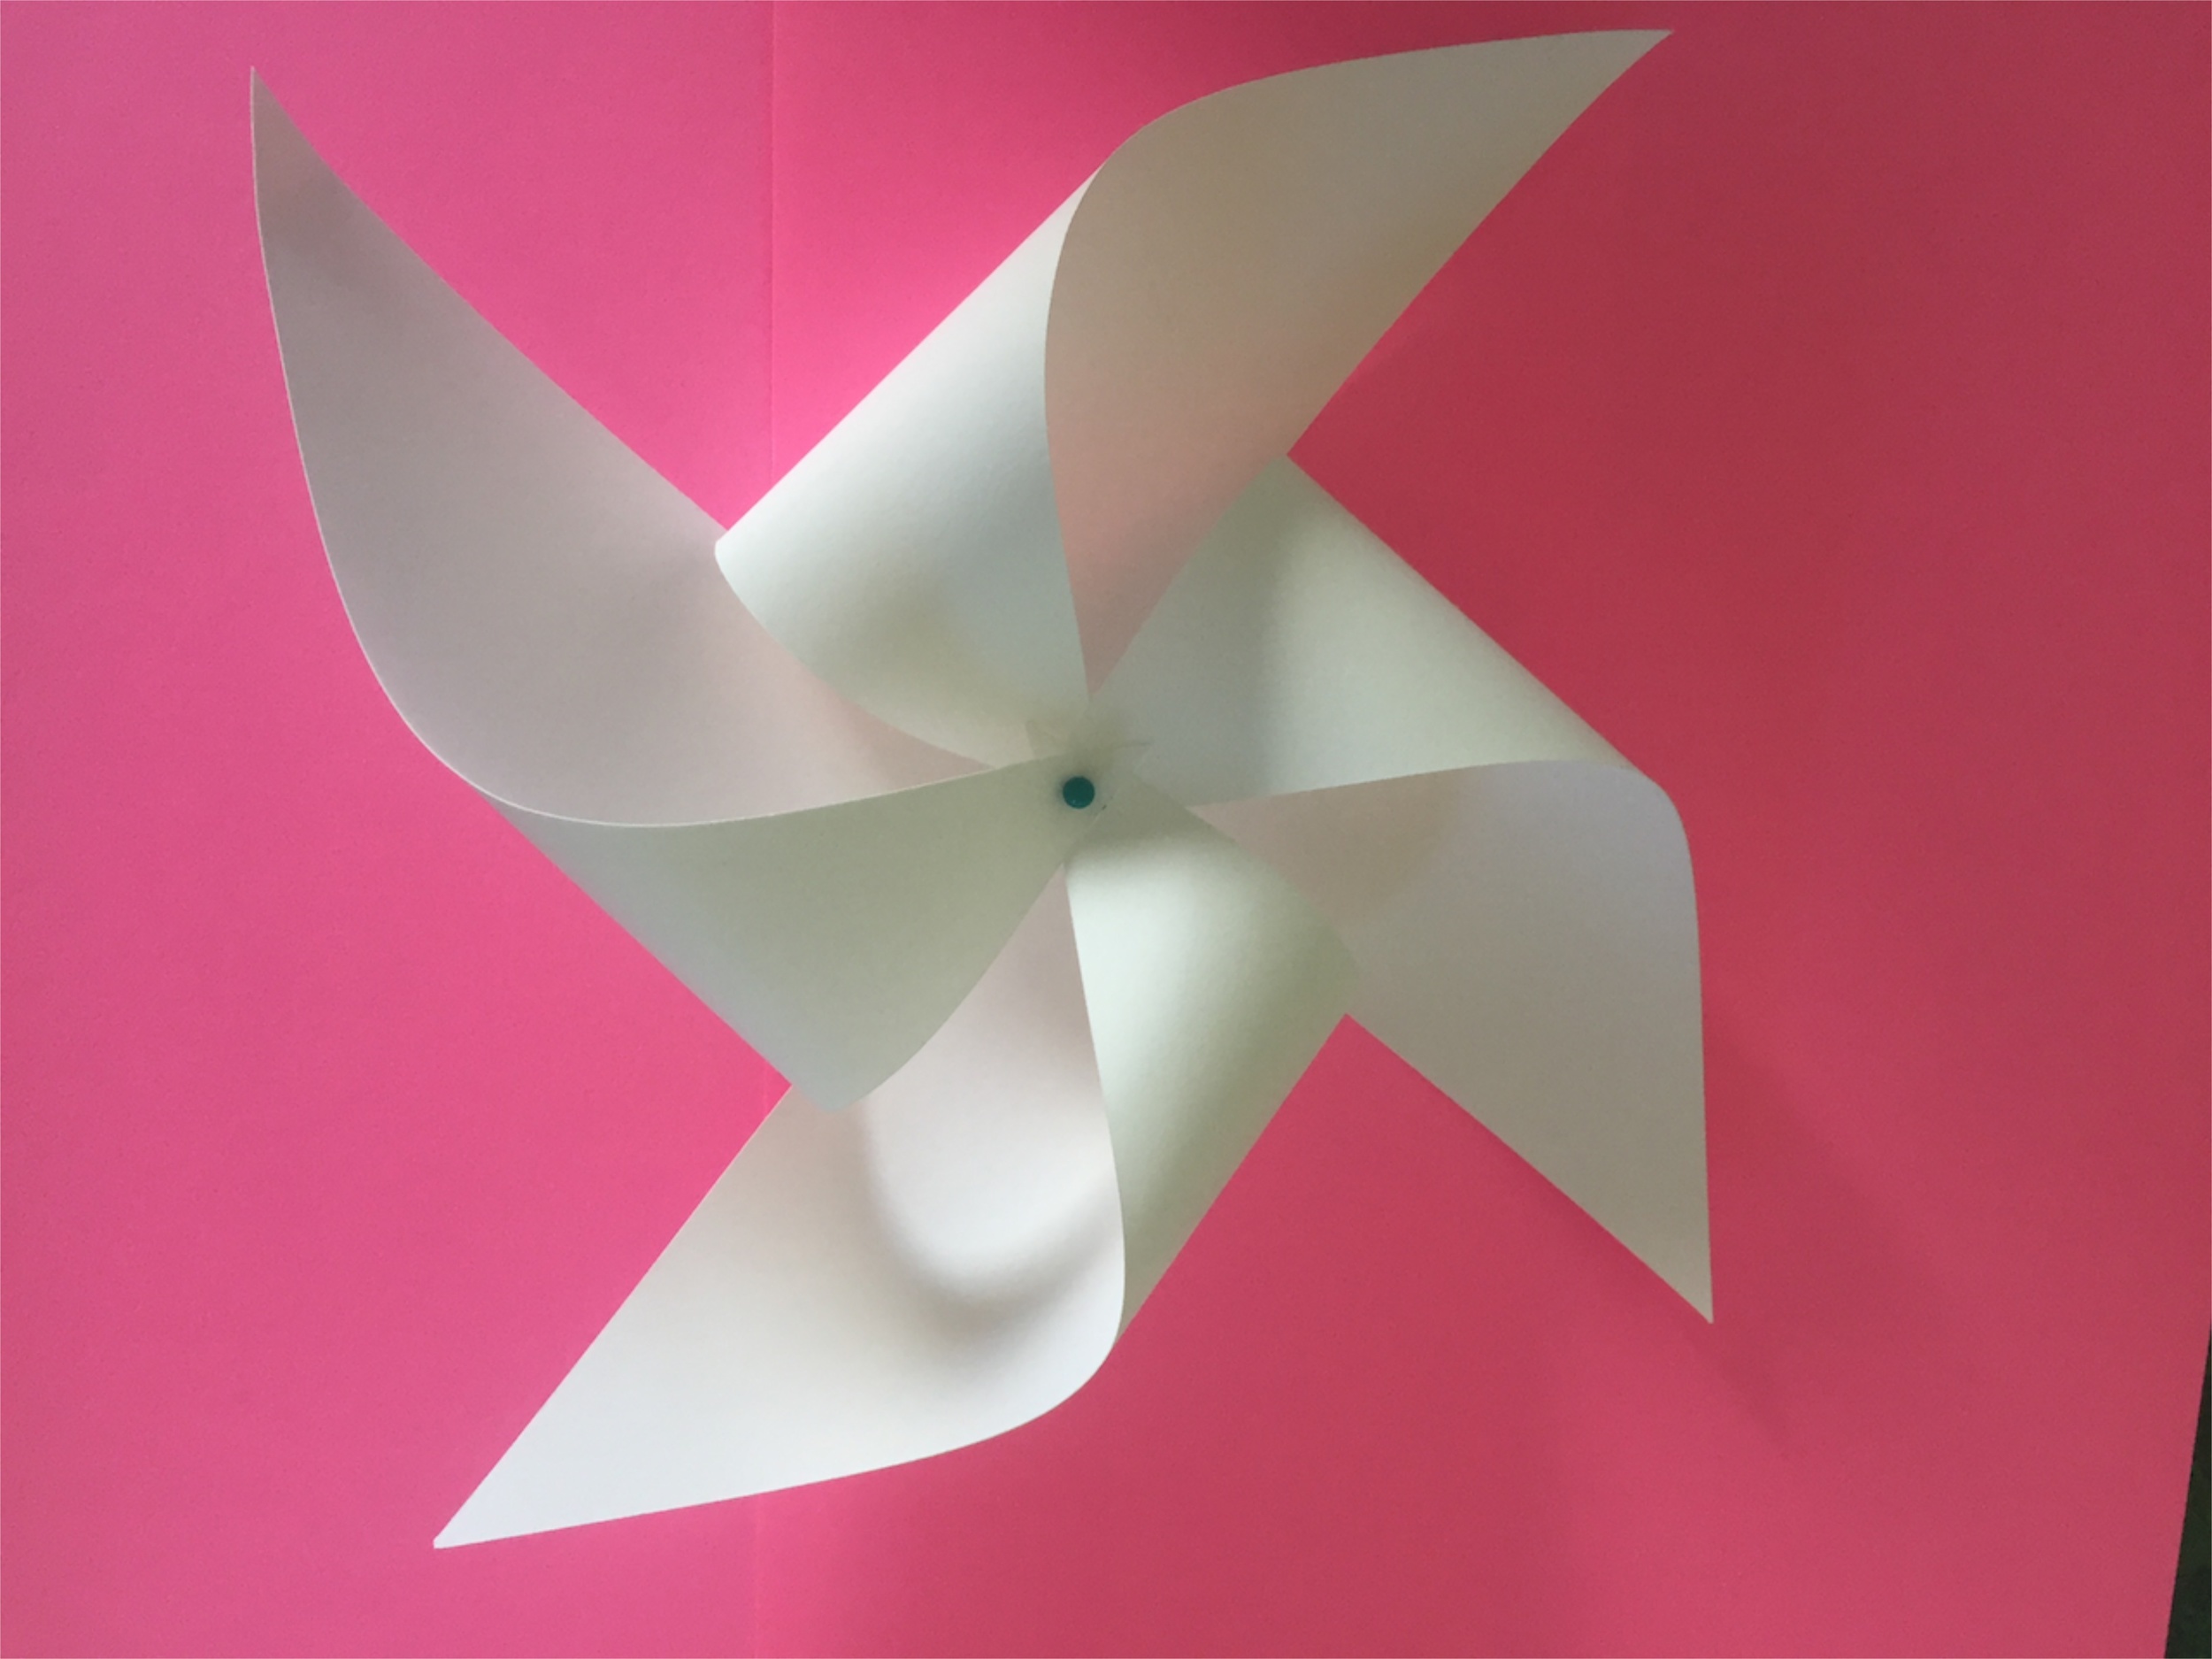
Try combining all or some of these techniques together to fully utilize all of your resources! I used both paper straws and brads to construct this wind-powered pinwheel. What can you combine together with Fab@School Maker Studio?
Look around your classroom and see what ideas spring up from your surroundings! A designer’s environment is a constant inspiration, and finding new materials fuels the inventiveness of creativity.
In future posts, we'd love to share YOUR tips and ideas about how you’re using Fab@School Maker Studio. For more FabFriday posts, click here.
Send your photos to info@FableVisionLearning.com for a chance to have them featured on the next FabFriday!

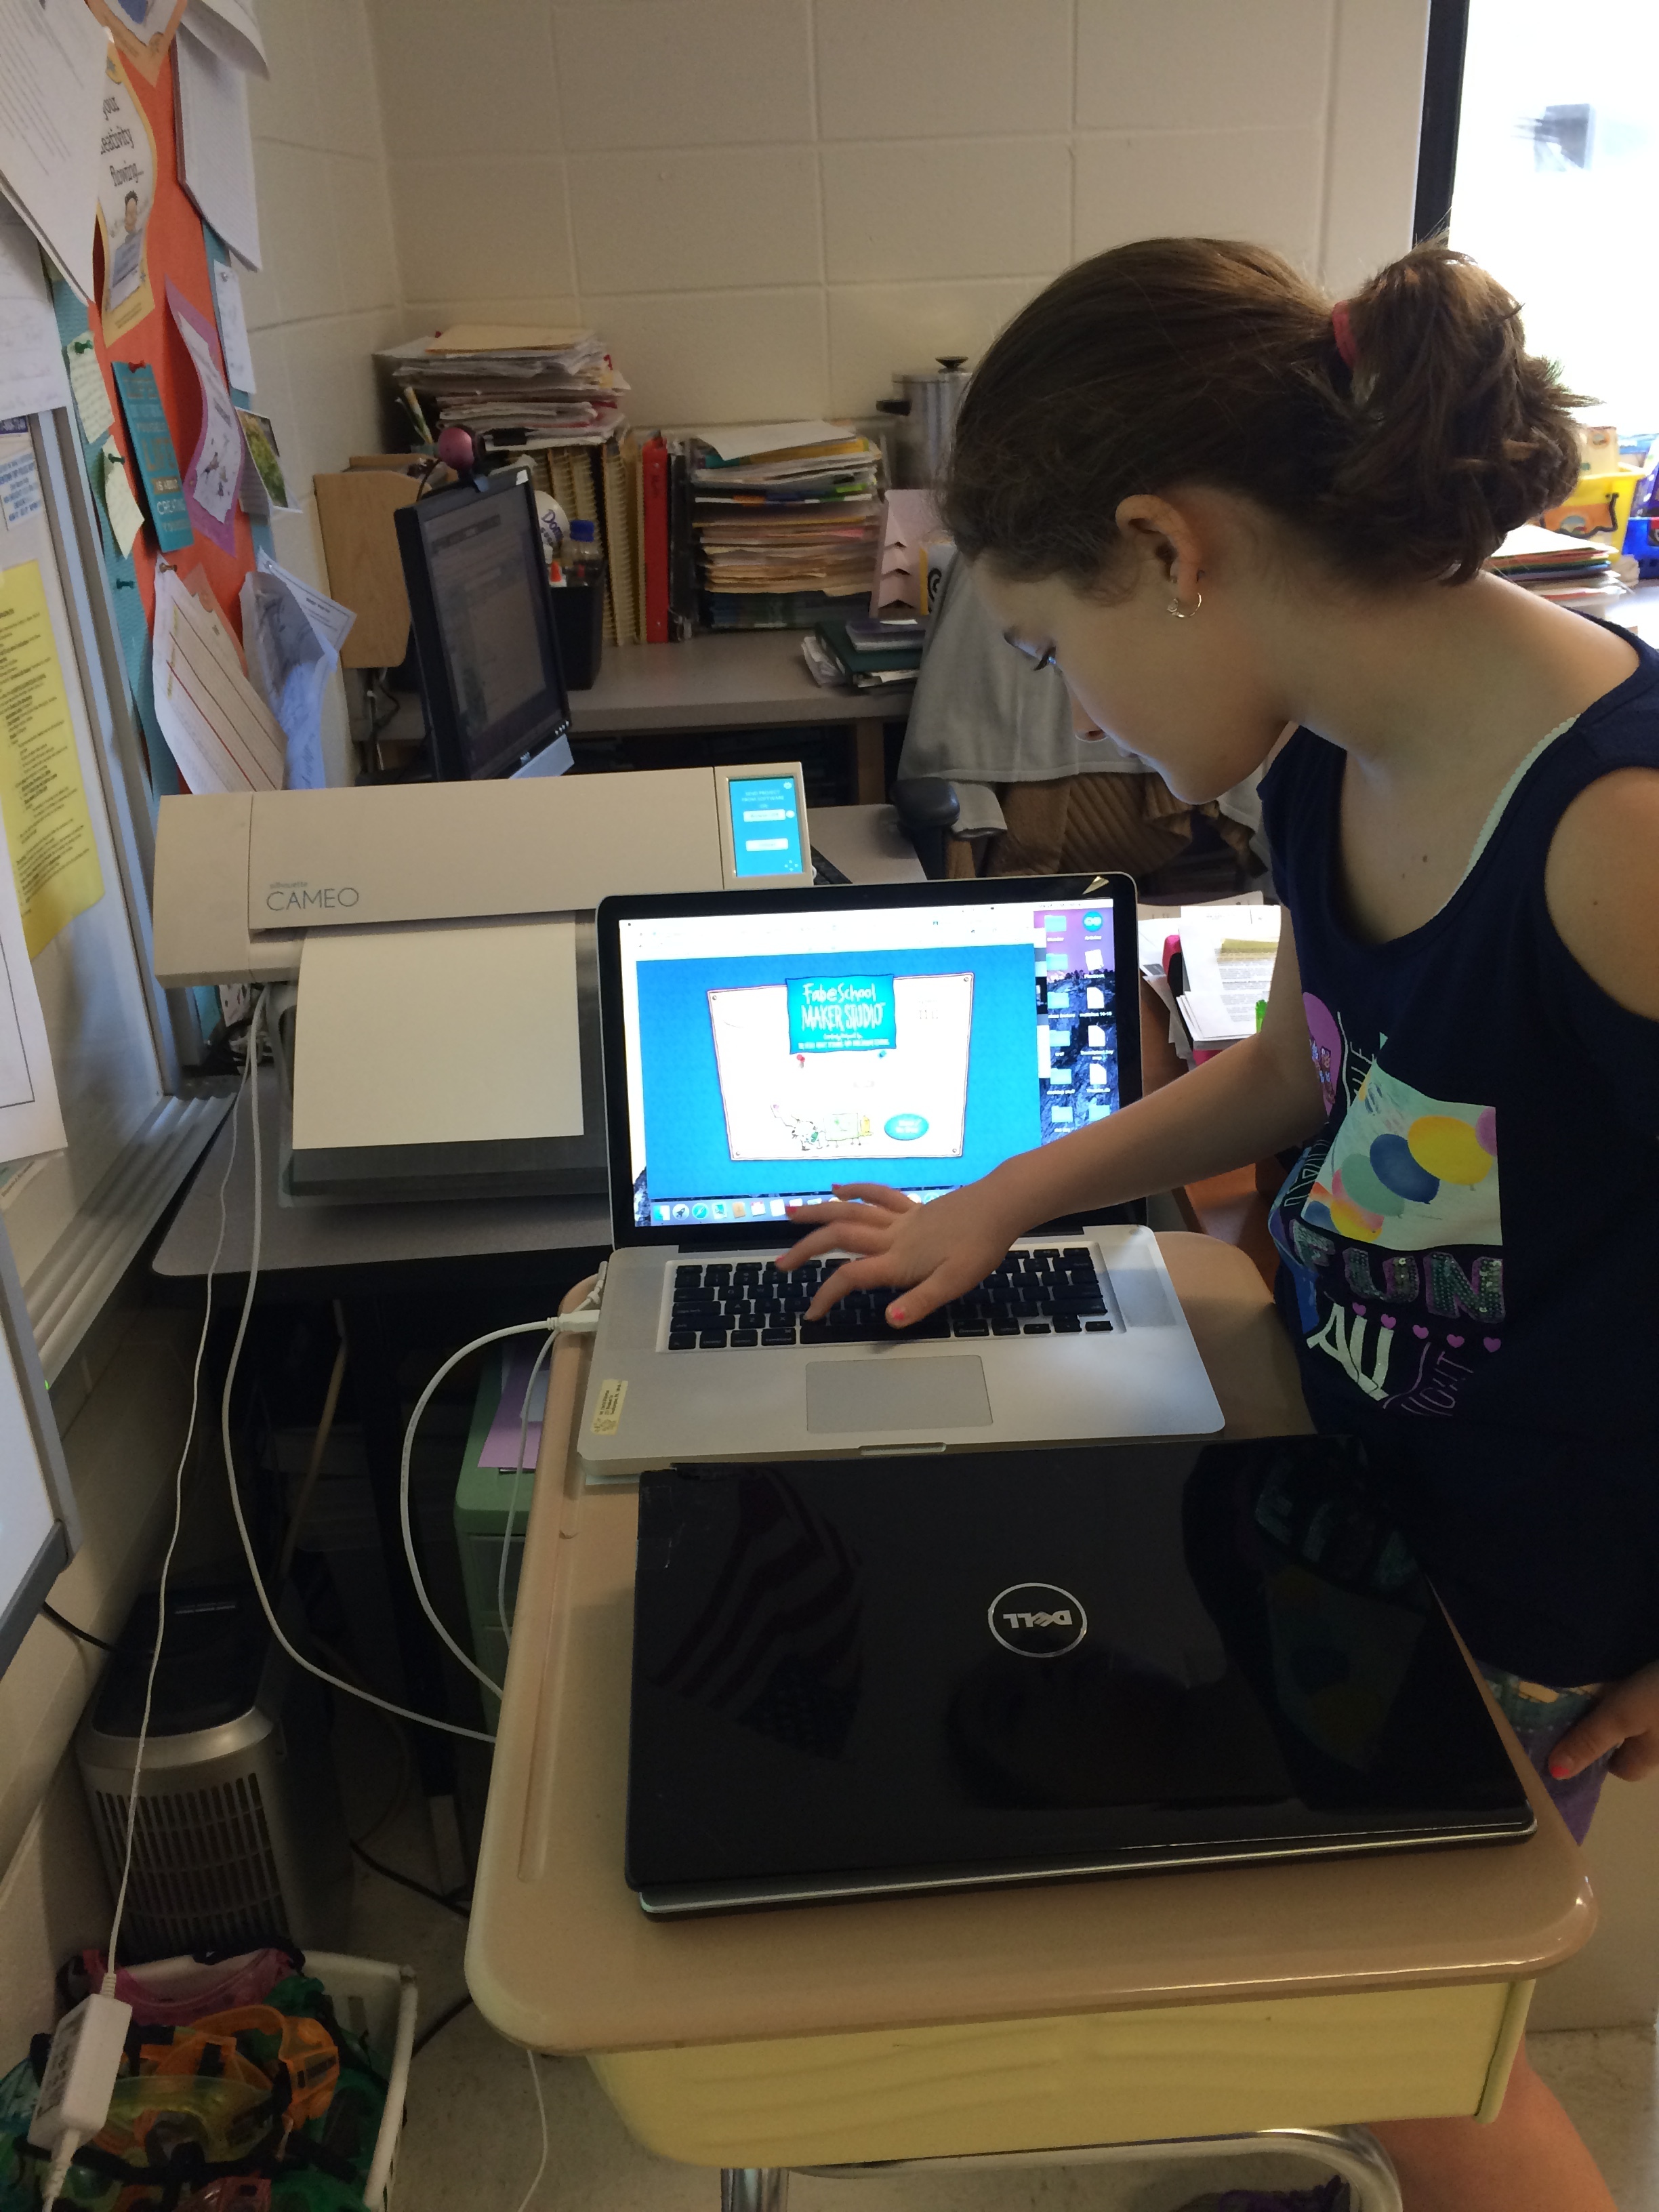
FabClassroom: Young engineers at CU Science Discovery light up the holidays with Fab@School Maker Studio

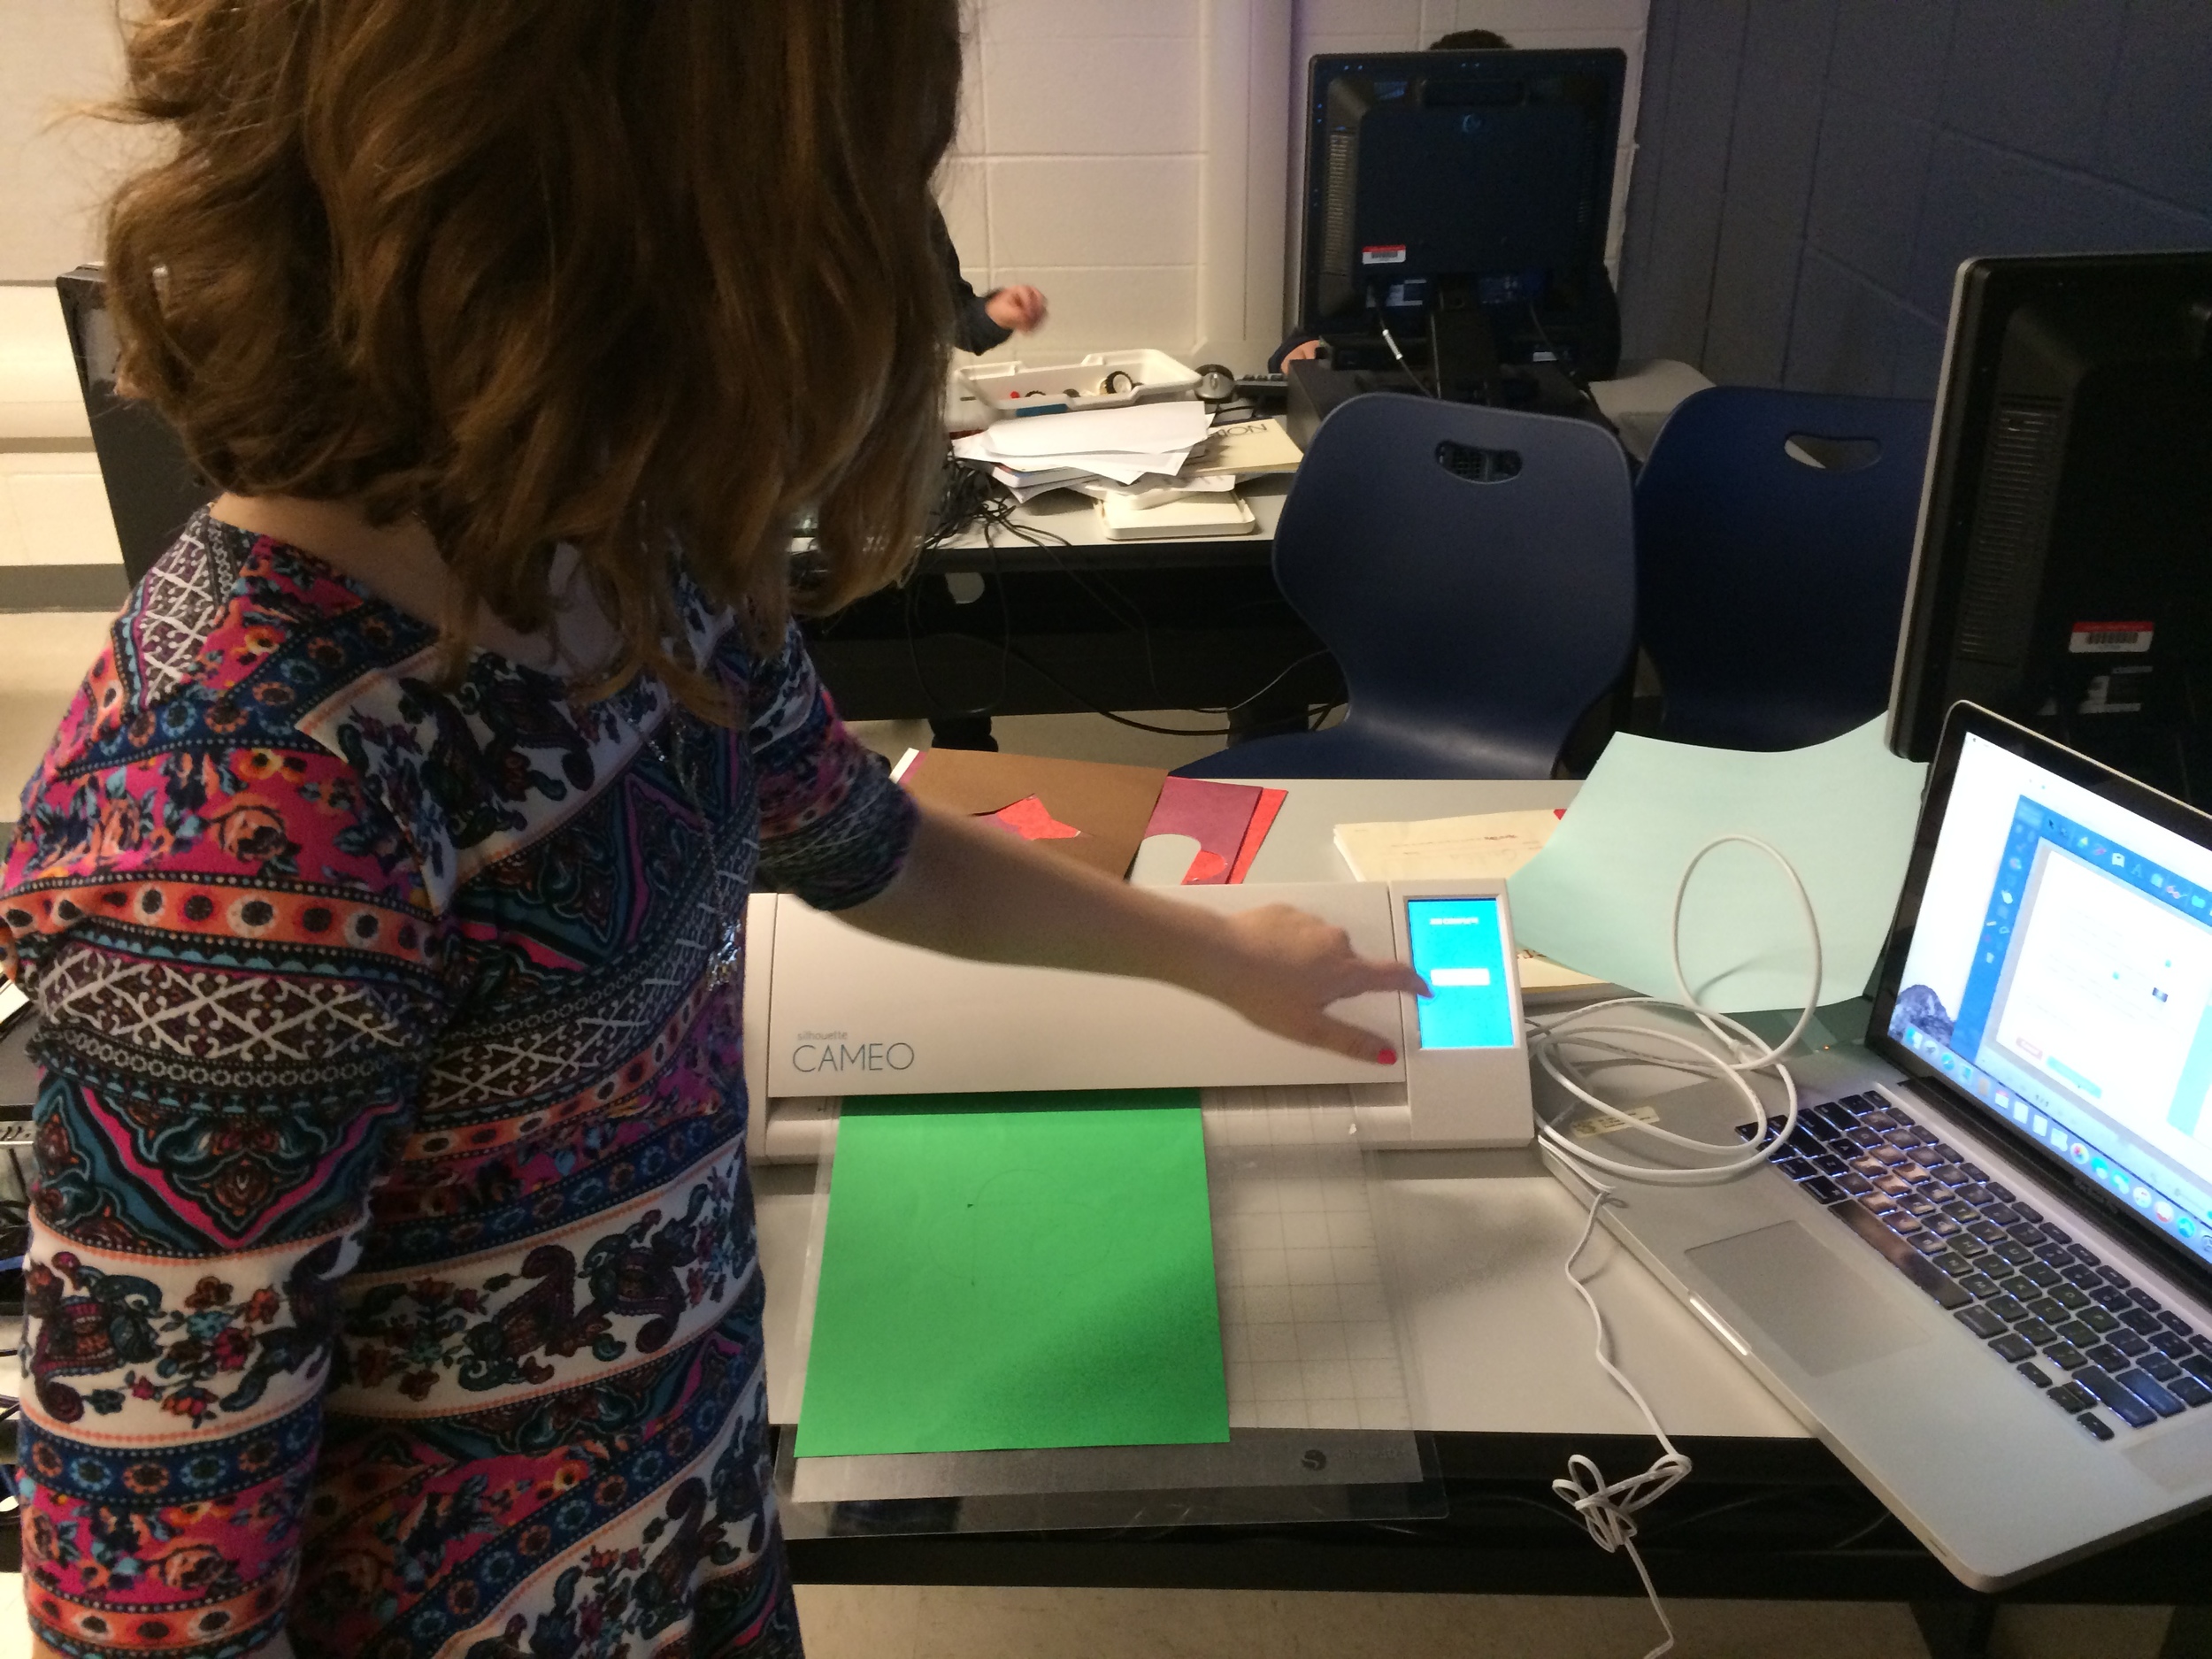
At FableVision Learning we are so excited to hear how our creative classroom tools are being used. Stacey Forsyth, Ph.D., Director, CU Science Discovery, recently shared a bit about some young engineers who used Fab@School Maker Studio to design pop-up cards.
Over the holiday break, some creative young designers spent two days at CU Science Discovery in Boulder, Colorado, designing electrifying holiday cards.
First, the students used FableVision Learning’s Fab@School Maker Studio to design cards that could be cut and folded in specific ways.


Then by sending the designs to a Silhouette Cameo, a digital craft cutter, they were able to cut and perforate their designs.
After a few introductory activities to explore the basics of circuits, designers used copper tape and LEDs to light up their cards! For some tips on creating paper circuits, check out this tutorial from our friends at Spark Fun!


After designing, cutting, folding, and lighting the lights, students had a chance to add on any final touches using an assortment of colorful craft materials.


Their finished products were simply illuminating!


How are your student’s using Fab@School Maker Studio? We would love to hear from you. Send an email to the team at info@fablevisionlearning.com.

FabFriday: Explore More Construction Materials!

Welcome to FabFriday, a blog series that highlights tips and tricks for using Fab@School Maker Studio. Fab@ School Maker Studio is a web-based digital fabrication software tool that creates a more accessible, comfortable onramp for teachers to introduce STEM learning to their students. Each week we'll be posting ideas about using different materials, design tips, and construction techniques to help you offer even more fab learning to your students. In future posts, we'd love to share YOUR tips and ideas about how your'e using Fab@School Maker Studio. For more FabFriday posts, click here.

Fab@School Maker Studio provides engaging digital fabrication/desktop manufacturing tools where elementary and middle school students can make, test, and revise 2D designs, pop-ups, 3D objects, and working machines as they learn science, technology, engineering, and math concepts in a meaningful context. Fab@School Maker Studio uses paper for most activities, allowing for a fast-paced and low-cost design experience. However, not all papers are created equal! Just like how a painter can choose between a wide variety of oils, acrylics, and watercolors, a Fab@School engineer has many choices of building materials. Let’s explore how you can use these materials to their greatest advantage and design more complex constructions!

Copy Paper
This thin white paper is most commonly used in printers. While it is not strong enough for most Fab@School projects, it can be used for prototyping to experiment with your cut, fold, and tab lines before switching to a special sheet of colored or printed paper. Thin paper is also very helpful when making windmills, airplanes, or other projects where a lighter weight construction is needed.

Check out all of these activities, which have all been created from 65lb Cardstock.
65lb Cardstock
65lb cardstock comes in a wide variety of colors, and is a fantastic mix between structural rigidity and flexibility. It is perfect for 2D, Pop-Up, and 3D construction, as well as projects with simple moving parts. It comes in packs of individual or mixed colors, making it easy to bring a splash of color to your creation. I recommend using this material most often, as it is very diverse.

This trebuchet catapult was designed with 110lb cardstock to survive the forces of the counterweight and throwing arm!
110lb cardstock
For when 65llb cardstock doesn’t quite cut it, 110lb cardstock opens up the opportunity for stronger construction, more complicated designs, and longer lasting moving parts. While it does not come in as wide of a variety of colors, it makes up for it in strength. Combine it with 65lb cardstock to reinforce critical pieces of your design, or create an entire model with 110lb cardstock for extra durability.

Pattern and Special Paper
Even decorative papers provide a potential engineering decision! You can use patterned or colored paper to customize and differentiate different parts of your design, or to make your project look more realistic! I used metallic-colored cardstock to make these cars look like they have a shiny coat of paint, and vellum paper was used to create transparent windows!

Do More With Lamination
You can combine all of these different weights of paper to customize your projects! Try gluing entire layers of paper together to create a thicker construction, or combine 65lb and 110lb cardstock to create a structural base with colored cardstock layered on top.
You can also pinpoint sections of your design that need more rigidity and layer 110lb cardstock into just these areas. Check out this STEAM-Infused STORM electric motorcycle made using lamination techniques. 110lb cardstock was used to construct the base of the motorcycle body, and then a layer of colored 65lb cardstock was glued on top to simultaneously fortify and decorate the motorcycle.
Sometimes I choose which materials to use in order to achieve a certain goal, and other times I decide what I want to build based on available materials. Experiment with as many kinds of paper and cardstock as you can, in whichever order your creative mind flows!
How are you using different kinds of paper with your Fab@School creations? In future posts, we'd love to share YOUR tips and ideas about how your'e using Fab@School Maker Studio. Send your photos to info@FableVisionLearning.com to have them featured in an upcoming FabFriday! For more FabFriday posts, click here.

FabFriday: I’m Thankful For… Shapes!
Welcome to FabFriday, a blog series that highlights tips and tricks for using Fab@School Maker Studio. Through this series, we will focus on different materials, design tips, and construction techniques to make the most out of your paper engineering experience. For more FabFriday posts, click here.
Shapes comprise almost everything you can see! Just look around you, your classroom, or your entire town. Which shape do you see the most? Breaking down everyday items into their base shapes is a fun and eye-opening exercise. You can also imagine and build with shapes!
I love shapes - you could say I am thankful for shapes! So, this Thanksgiving I am celebrating by making a festive turkey out of shapes with Fab@School Maker Studio.
Let’s begin by making a circle with the Shape Tool for the body.

Next is the turkey’s neck, which I design by combining two circles with the Weld Tool and the Edit Points Tool.


Now I need to make the face! It’s a lot of fun to experiment with how to make different expressions with shapes. Here I use a triangle for the beak, two circles for the eyes, and an oval for the “snood” draped over the turkey’s beak.

Now what turkey is complete without their magnificent feathers? I’m going to make the feathers for my turkey by creating an oval and stretching one control point with the Edit Points Tool to make a long feather-like shape.


I layered all of my shapes together to see what my turkey is going to look like once it is fabricated and assembled. When I turn on the X-Ray Tool, I can see how the overlapping shapes cause all of the red cut lines to intersect. If I were to send this project to the Silhouette cutter like this, it would cut the paper into tiny pieces!

In order to send my turkey to a Silhouette cutter, I’ll have to separate the shapes onto pages that can be cut. I made a lot of copies of the face shapes so I don’t waste paper on such tiny parts. Try using only a few sheets of paper to make enough eyes, beaks, or other parts for your entire class!


I can now fabricate my shapes to create a Fab-tastic Thanksgiving turkey! I fastened the body and neck together with a brad so that my final model can move!


How are you using shapes in your Fab@School Maker Studio creations? Share how you used these tips! Send your photos and ideas to info@FableVisionLearning.com, for a chance to have them featured in an upcoming FabFriday!

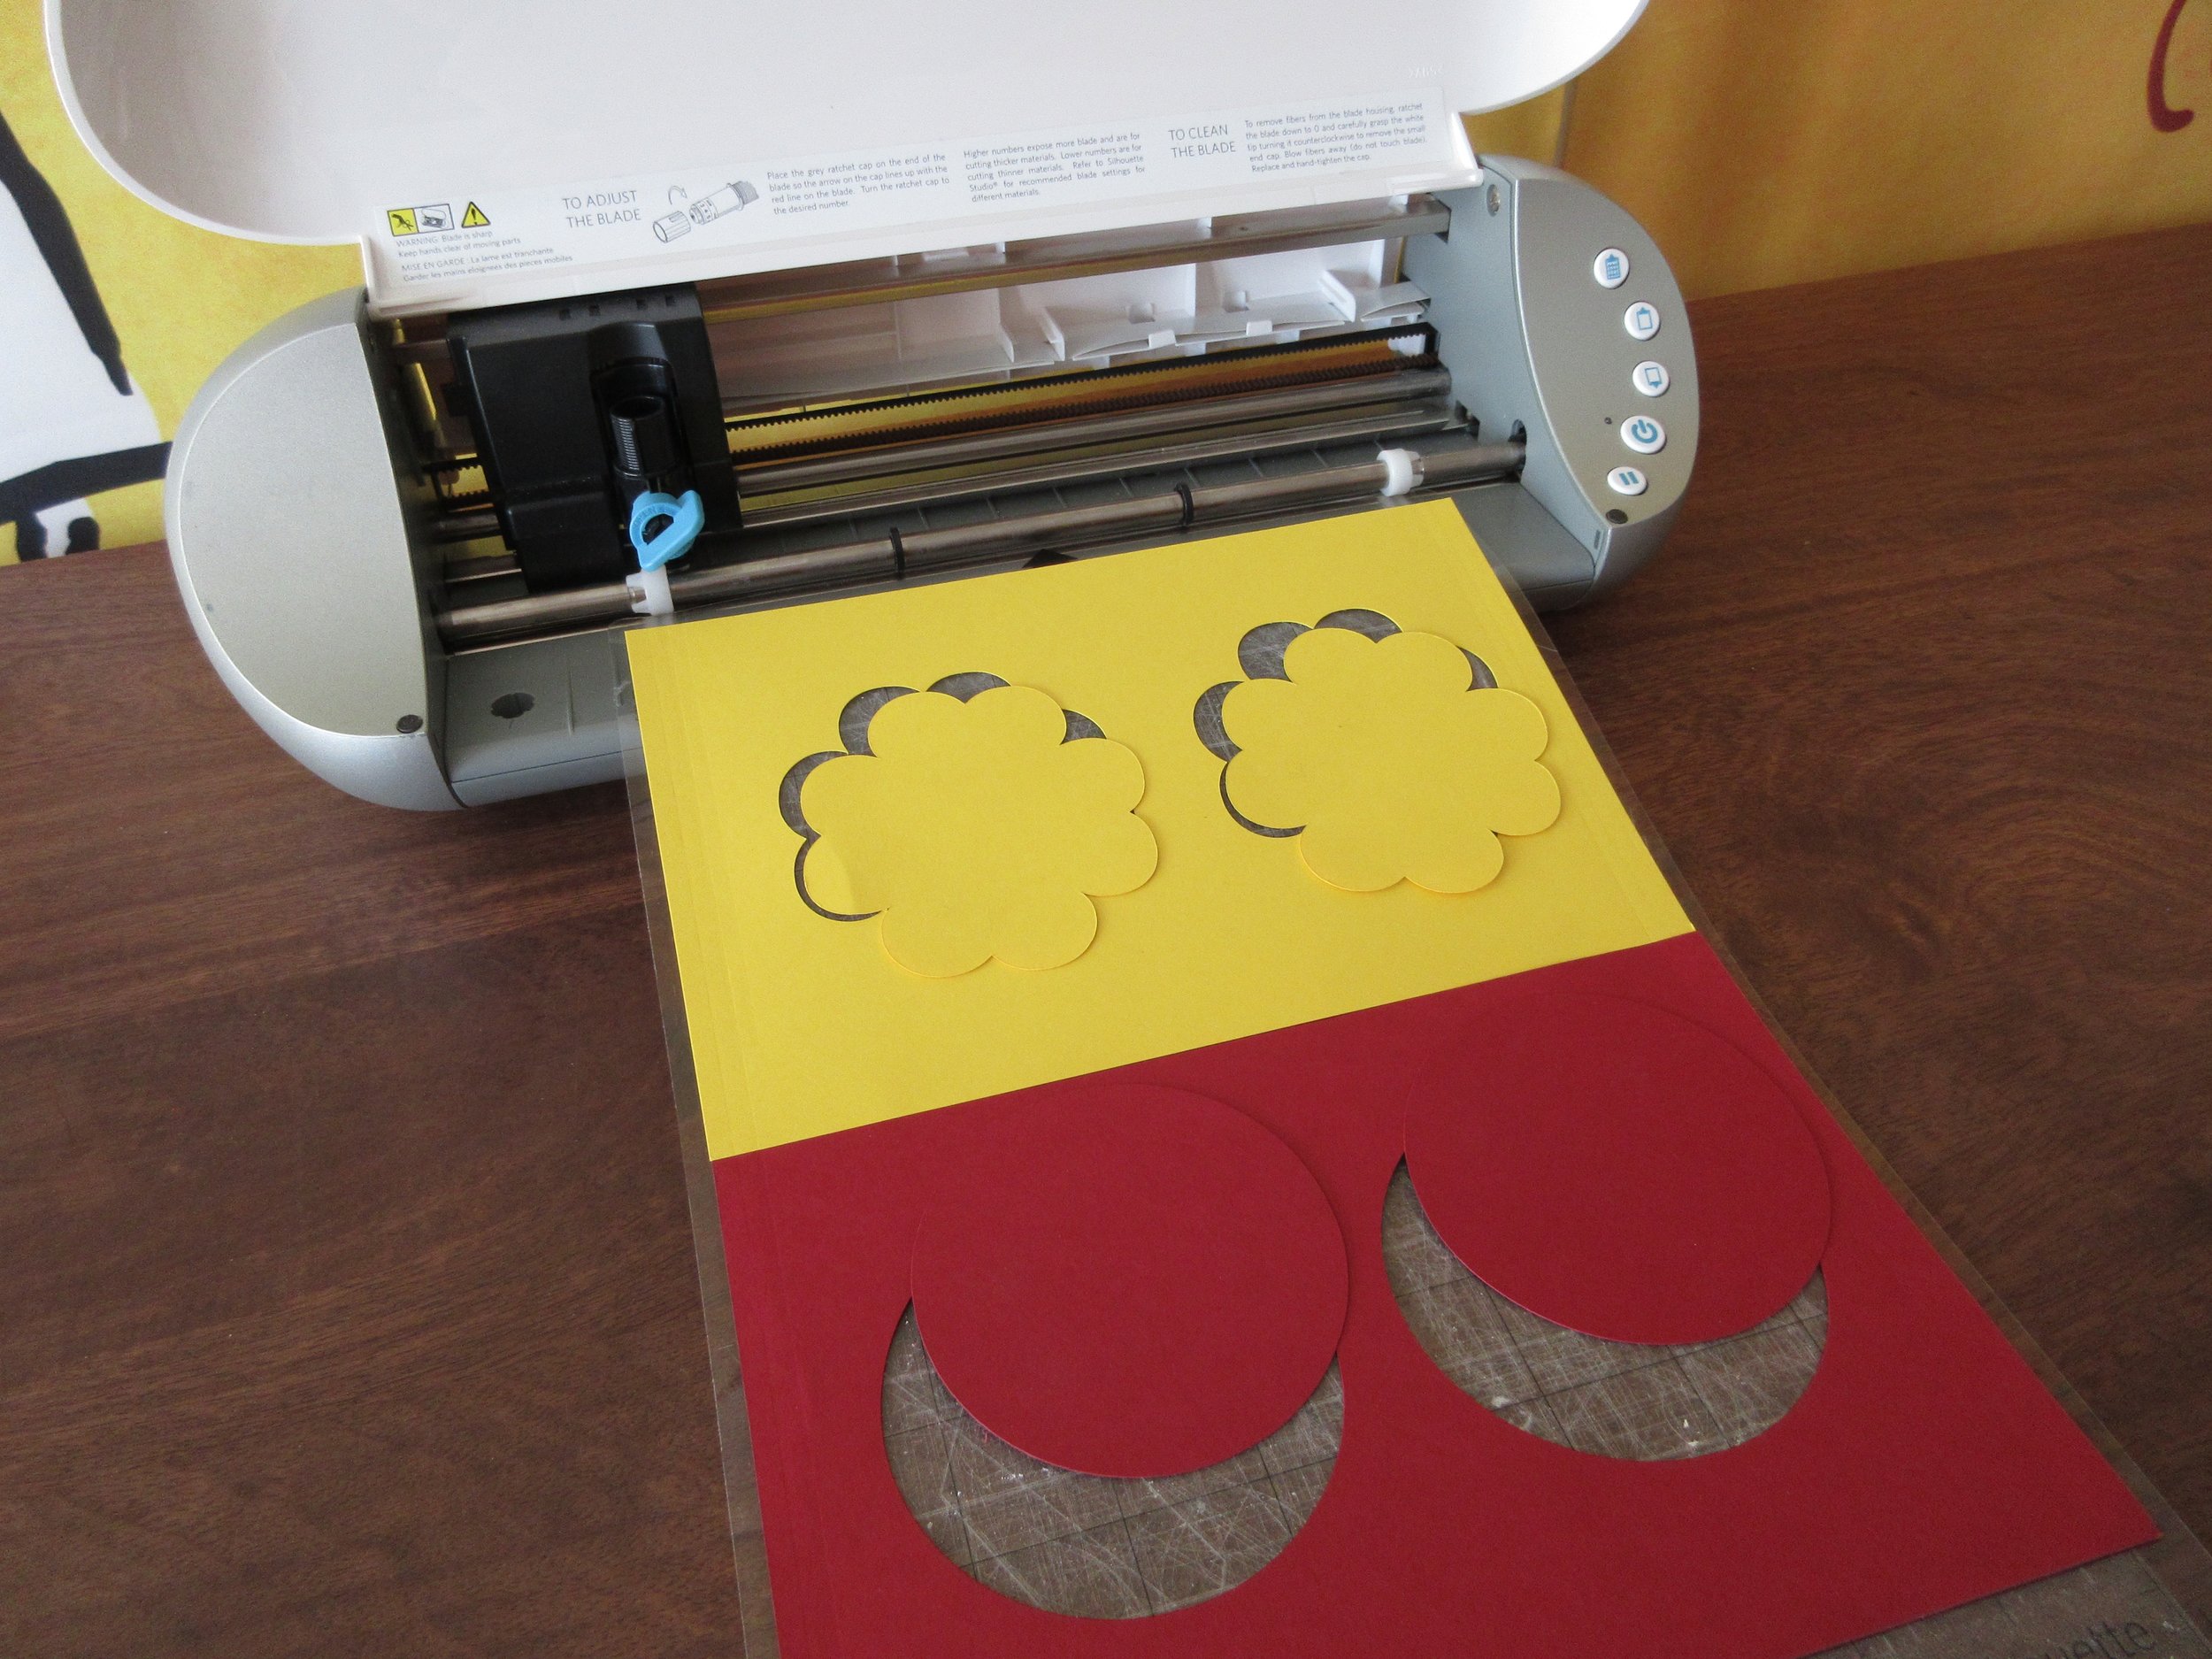
FabFriday: Add a Splash of Color to your Fab@School Maker Studio Projects!

Welcome to FabFriday, a blog series that highlights tips and tricks for using Fab@School Maker Studio. Through this series, we will focus on different materials, design tips, and construction techniques to make the most out of your paper engineering experience.
Color is a great way to add a creative flair to your Fab@School Maker Studio projects. There are plenty of colorful techniques to try, all with their own advantages.
Colored Cardstock
Cardstock paper comes in a wide variety of colors. Try fabricating ready-made and custom creations in your favorite colors. This is good for whenever your project has a large areas of flat color, or a simple color scheme. Layering and mixing different colors is a lot of fun, so make sure you have lots of different colors to experiment with!


Try cutting your page into two colors when fabricating to make parts in two colors at the same time! How can you position cut shapes in your workspace so that you can cut two colors at once?

Printing with Registration Marks
You can also print Fab@School Maker Studio projects before fabricating. This is key when including Library images and imported pictures in your projects. Remember to use registration marks when printing and fabricating. Learn more about registration marks with our Fabrication Quick Start Guide.


I used printing with registration marks to create this pizza box for Arno's Pizza. This Pizza Troll is from the award-winning math and logic game Zoombinis, developed in partnership with TERC, a not-for-profit leader in K-12 math and science education, the Learning Games Network, a not-for-profit game company, and FableVision Studios.
Hand Coloring
What’s more fun that drawing all over your creations? Give your projects a unique touch with pens, colored pencils, or markers. After all, it is paper! You can doodle on your prototypes to get new ideas, or add the finishing touch to completed projects!

Combine all Three!
Can you design a Fab@School Maker Studio creation that uses printed pictures, colored paper, and your own drawing? Combining different techniques and trying new things is Fab-tastic!

How are you adding color to your Fab@School Maker Studio creations? Share how you used these tips! Send your photos and ideas to info@FableVisionLearning.com, for a chance to have them featured in an upcoming FabFriday!
FableVision Learning’s Teacher Spotlight: John Long
Let Helping Teachers Develop Students that Learn Through Creating

“My classroom is a bit large these days,” explains John Long, technology program specialist in the Department of Educational Technology for the School District of Palm Beach County. “It involves working with several hundred teachers and thousands of students at about 30 schools a year…I like to consider myself a digital learning architect at any of the 183 schools in Palm Beach County. My role involves designing professional development for the schools and implementing professional learning communities for integrating technology embedded into the curriculum.”
John recently chatted with FableVision Learning about his unique method of integrating technology into the curriculum, his work with programs like Animation-ish and Fab@School Maker Studio, and plans for Dot Day! If you are curious about what he is up to in the classroom, follow John on Twitter: @adigitallearner
Can you share a bit about your creative teaching style?
I focus on coaching, modeling, curriculum design, and creating professional learning networks for educators. I believe it is important for students to create based on their learning instead of constantly consuming content and having to be assessed on it.
I started years ago training in educational technology on how to use programs but they never seemed to understand how to use it in their classrooms. Over the years I changed my methods to include ongoing professional development with time to implement and receive feedback. Then took the professional development into the classrooms and talked with teachers, librarians, administrators, and parents. I researched their standards and curriculum. I have built quite a community of teachers over the past 20 years and decided to head back into the classroom to work directly with teachers and students on integrating. This was the key to getting teachers comfortable with using technology into their curriculum.
The first emphasis was to focus on teaching and learning. It is hard for teachers to see this because they focus on the “wow” or “cool” factor and it is more show and tell and not about learning from technology. The second focus is to design a project where the teacher is comfortable enough to watch and learn. Teachers are still learners too. Focusing on a core set of apps or tools that allow students to create projects. Once teachers get comfortable they turn it over to them and observe and give feedback. Each project and class is different so the learning never stops. This process is my methodology in a nutshell.
You have created a fantastic collection of videos that show how Animation-ish can be used in the classroom. Can you tell us about the subject of some of these videos and the inspiration behind them?

I believe in developing a core set of apps or tools to work with in the classroom and then supplement with more tools based on grade level and subject area. The core set of apps should be used in grades Kindergarten through 12th grade. One of my apps in that core set is an animation app. Animation allows students to design and draw concepts that they have learned and demonstrate that learning. It allows them to synthesize and apply the learning. I learned about Animation-ish back in 2009 talking with a dear friend, Dr. Peggy Healy Stearns. I started to see all kinds of uses in Science but also in language arts. One of my first projects was to create a animated dictionary of words. Here is a great example of this in action..
Animation-ish is great in Science. Using it to document things like the water-cycle, or the butterfly life cycle, and even things like cell mitosis. This got me thinking of another project creating digital student portfolios in iBooks Author or now Book Creator. Students can create e-book portfolios by recreating through word processing, video, pictures, or animation using Animation-ish. I started working with a biology teacher and a fifth grade teacher to design these projects. This is an ongoing project that keeps evolving over the years.

A few years ago, a librarian colleague of mine shared with me her fairytale project, which was part of the second grade curriculum. I got to thinking about making it digital and letting students create a digital fairytale. The premise was to start with writing a fairytale including the characteristics then let the students animate the project. Since it is electronic, let the students read their passage with the animation and create an e-book to share. I decided that I would become the story wizard and began to dress the part. This is a fun and challenging project. We have now completed three digital fairytales. One of the favorite parts of the projects is the students learning how to use Animation-ish. You can see how the project is implemented below.
After we did the second digital fairytale, I thought wouldn’t it be interesting to try a digital mystery and what would that look like? In the digital mystery, I became the digital sleuth to guide them through creating a digital mystery. How do you create a mystery, you have to start with the ending first. Then you need to develop four or five clues guiding the students to veer away from inappropriate types of mysteries. Once you have the ending and the clues decided, you start from the beginning and guide them through creating the story including the clues. You have to keep them focused on the clues, the characteristics, and the ending as they forget and need reminding. You even have to narrow the focus of some of your most “creatives” in the class. Then they can start to use Animation-ish to create their scenes. It was a most rewarding experience with students thanking me. Check out the video with student and teacher feedback.
Do you have any cool Fab@School Maker Studio stories to share?
I have followed the development of Fab@School Maker Studio for 6 years since Dr. Peggy Healy Stearns showed it to me in Denver, CO at the 2010 ISTE conference. I was so excited to see this product was the missing key to teaching STEAM in the classrooms. I first used (Fab@School Maker Studio) a few years ago to design a jack-o'-lantern with an electric circuit with fifth graders and now use it with other groups. It is perfect to build something and teach. I always refer back to the literacy aspect as most schools need to still focus and that is the hook to using it.
We are just getting started in Palm Beach County and with all large districts, it takes time but as the video below will show - we are Going Places...
You love to find creative ways to mark International Dot Day. What has been your favorite celebration and what do you have planned for this year?
Terry Shay challenged me at 2013 ISTE in San Antonio, Texas to bring International Dot Day to Palm Beach County. This is a big task due to the nature of a large district with over 13,000 teachers and 187,000 students.
I am sure that some teachers in this district celebrated International Dot Day way before I brought it up. I had heard about it but never really did it. So, I decided to take him up on his challenge. I went back home and discussed with my supervisors and they agreed to support it. It took six weeks to approve it and it finally became a bulletin, which is how information is officially communicated to the schools.
The first year was a test and I developed some ideas to support International Dot Day. I came up with the basic illustrations and language arts activities. I even came up with the idea to create the first “Dot”cumentary to share how people use it in their classrooms. The first year was definitely a trial run. After the first year, I spent a whole year thinking of new ways to develop ideas for the next year. It is truly a yearlong process. We have had math teachers, science teachers, art teachers, music teachers, and everything in between participate. I have had librarians use it for teaching digital citizenship about making their digital footprint and leaving their mark. Each summer after school is out, I work on the “Dot”cumentary from that year as a way to gear up for the next year.
2013 “Dot”cumentary
2014 “Dot”cumentary
2015 “Dot”cumentary
In 2014, one of my professional learning networks called eMobilize developed a workshop around The Dot as a way to promote and build projects for International Dot Day. The workshop is called the Excellent Learning Adventure and the premise is to learn to use the iPad with Common Core (aka Florida Standards) to help students make their mark in the world through learning. We conduct the workshop a month before International Dot Day so that teachers become aware and promote creativity.
2015 Excellent Learning Adventure
Each year gets better and better with more people learning about it and innovating. The past school year, I started working with a librarian and art teacher at a middle school. The librarian wanted to do a digital project but didn’t know how to get started and lacked the confidence to try. She works well with the art teacher and she wanted to do something with International Dot Day even though it was January. The art teacher was using Photoshop in their class. I brainstormed with both of them and came up with a project. The art teacher would teach them Photoshop by making backgrounds out of dots. Then I would work with the librarian and art teacher to coach them on how to film their students in front of a green screen talking about “how they will make their mark” in the world. It was amazing what came out of the middle school students.
You can see it here:
Check out his awesome Dot Day ideas for the classroom, here.

Let's Have a High-Tech Dot Day!

Want to incorporate technology into your Dot Day festivities but don't know how to get started? Check out these high-tech-inspired projects! And be sure to share your own ideas with us on Facebook, Pinterest and Twitter:
Facebook: FableVision Learning, International Dot Day, #DotDay
Pinterest: International Dot Day Board
Twitter: @FableLearn, @DotClubConnect, #DotDay

1. Fabricate Dot Day Projects With FabMaker Studio
Students can use FabMaker Studio to make their mark. Try your hand at creating a Dot Day pop-up or assembling an automaton (found in the ready-mades folder). They can also let their creativity run free by creating their own Dot Day projects!

2. Make Your Mark Move With Animation-ish
Have your students create animations using Animation-ish. Already have the program and ready to get started? Download Peter H. Reynolds' official International Dot Day starter animation for Animation-ish here.

3. Experience Augmented Reality With QuiverVision's 3D Coloring App
Imagine turning your 2D Dot Day dot design into a 3D sphere. With QuiverVision's coloring page and 3D Coloring App you can do just that! Print the coloring page, download the app (Apple App Store, Google Play), and you'll be all set to start making your mark!
Celebrating Dot Day this year? Remember to register here!

FableVision Learning is Ready for a FAB-tastic Boston Mini Maker Faire
Artists, Engineers, Tinkerers…Oh My! Where can one find these people and many other AWESOME-ly creative things? At the Boston Mini Maker Faire, of course!
On July 23, Boston Children’s Museum will host the city’s first ever Mini Maker Faire from 10 a.m. to 5 p.m. and the FableVision Learning team will be there with hands-on STEAM projects fabricated in Fab@School Maker Studio.


What's a Maker Faire? Picture a science fair like the ones you would go to as a kid but hands-on. People of all ages will come together to witness and interact with new forms of creativity and the new technology used to express that creativity. From traditional to technologically-produced works there’s no innovative limit at the Maker Faire.
Since the launch of the first Maker Faire in 2006 in the Bay Area, there have been many others happening all across the globe including cities like Seoul, Berlin, Lisbon, Tokyo, and Oslo. In addition, there have been over 120 independently organized Mini Maker Faire events and we are SUPER thrilled that Boston is hosting one.
So, come join us and get hands-on with Fab@School Maker Studio - make an animal mask, pinwheel, pop-up creation, and so much more! We hope to see you there.
For more information about Boston Mini Maker Faire, click here. Interested in attending? Click here to buy a ticket.

FableVision Learning Teacher Spotlight: Maryann Molishus
Maryann Molishus
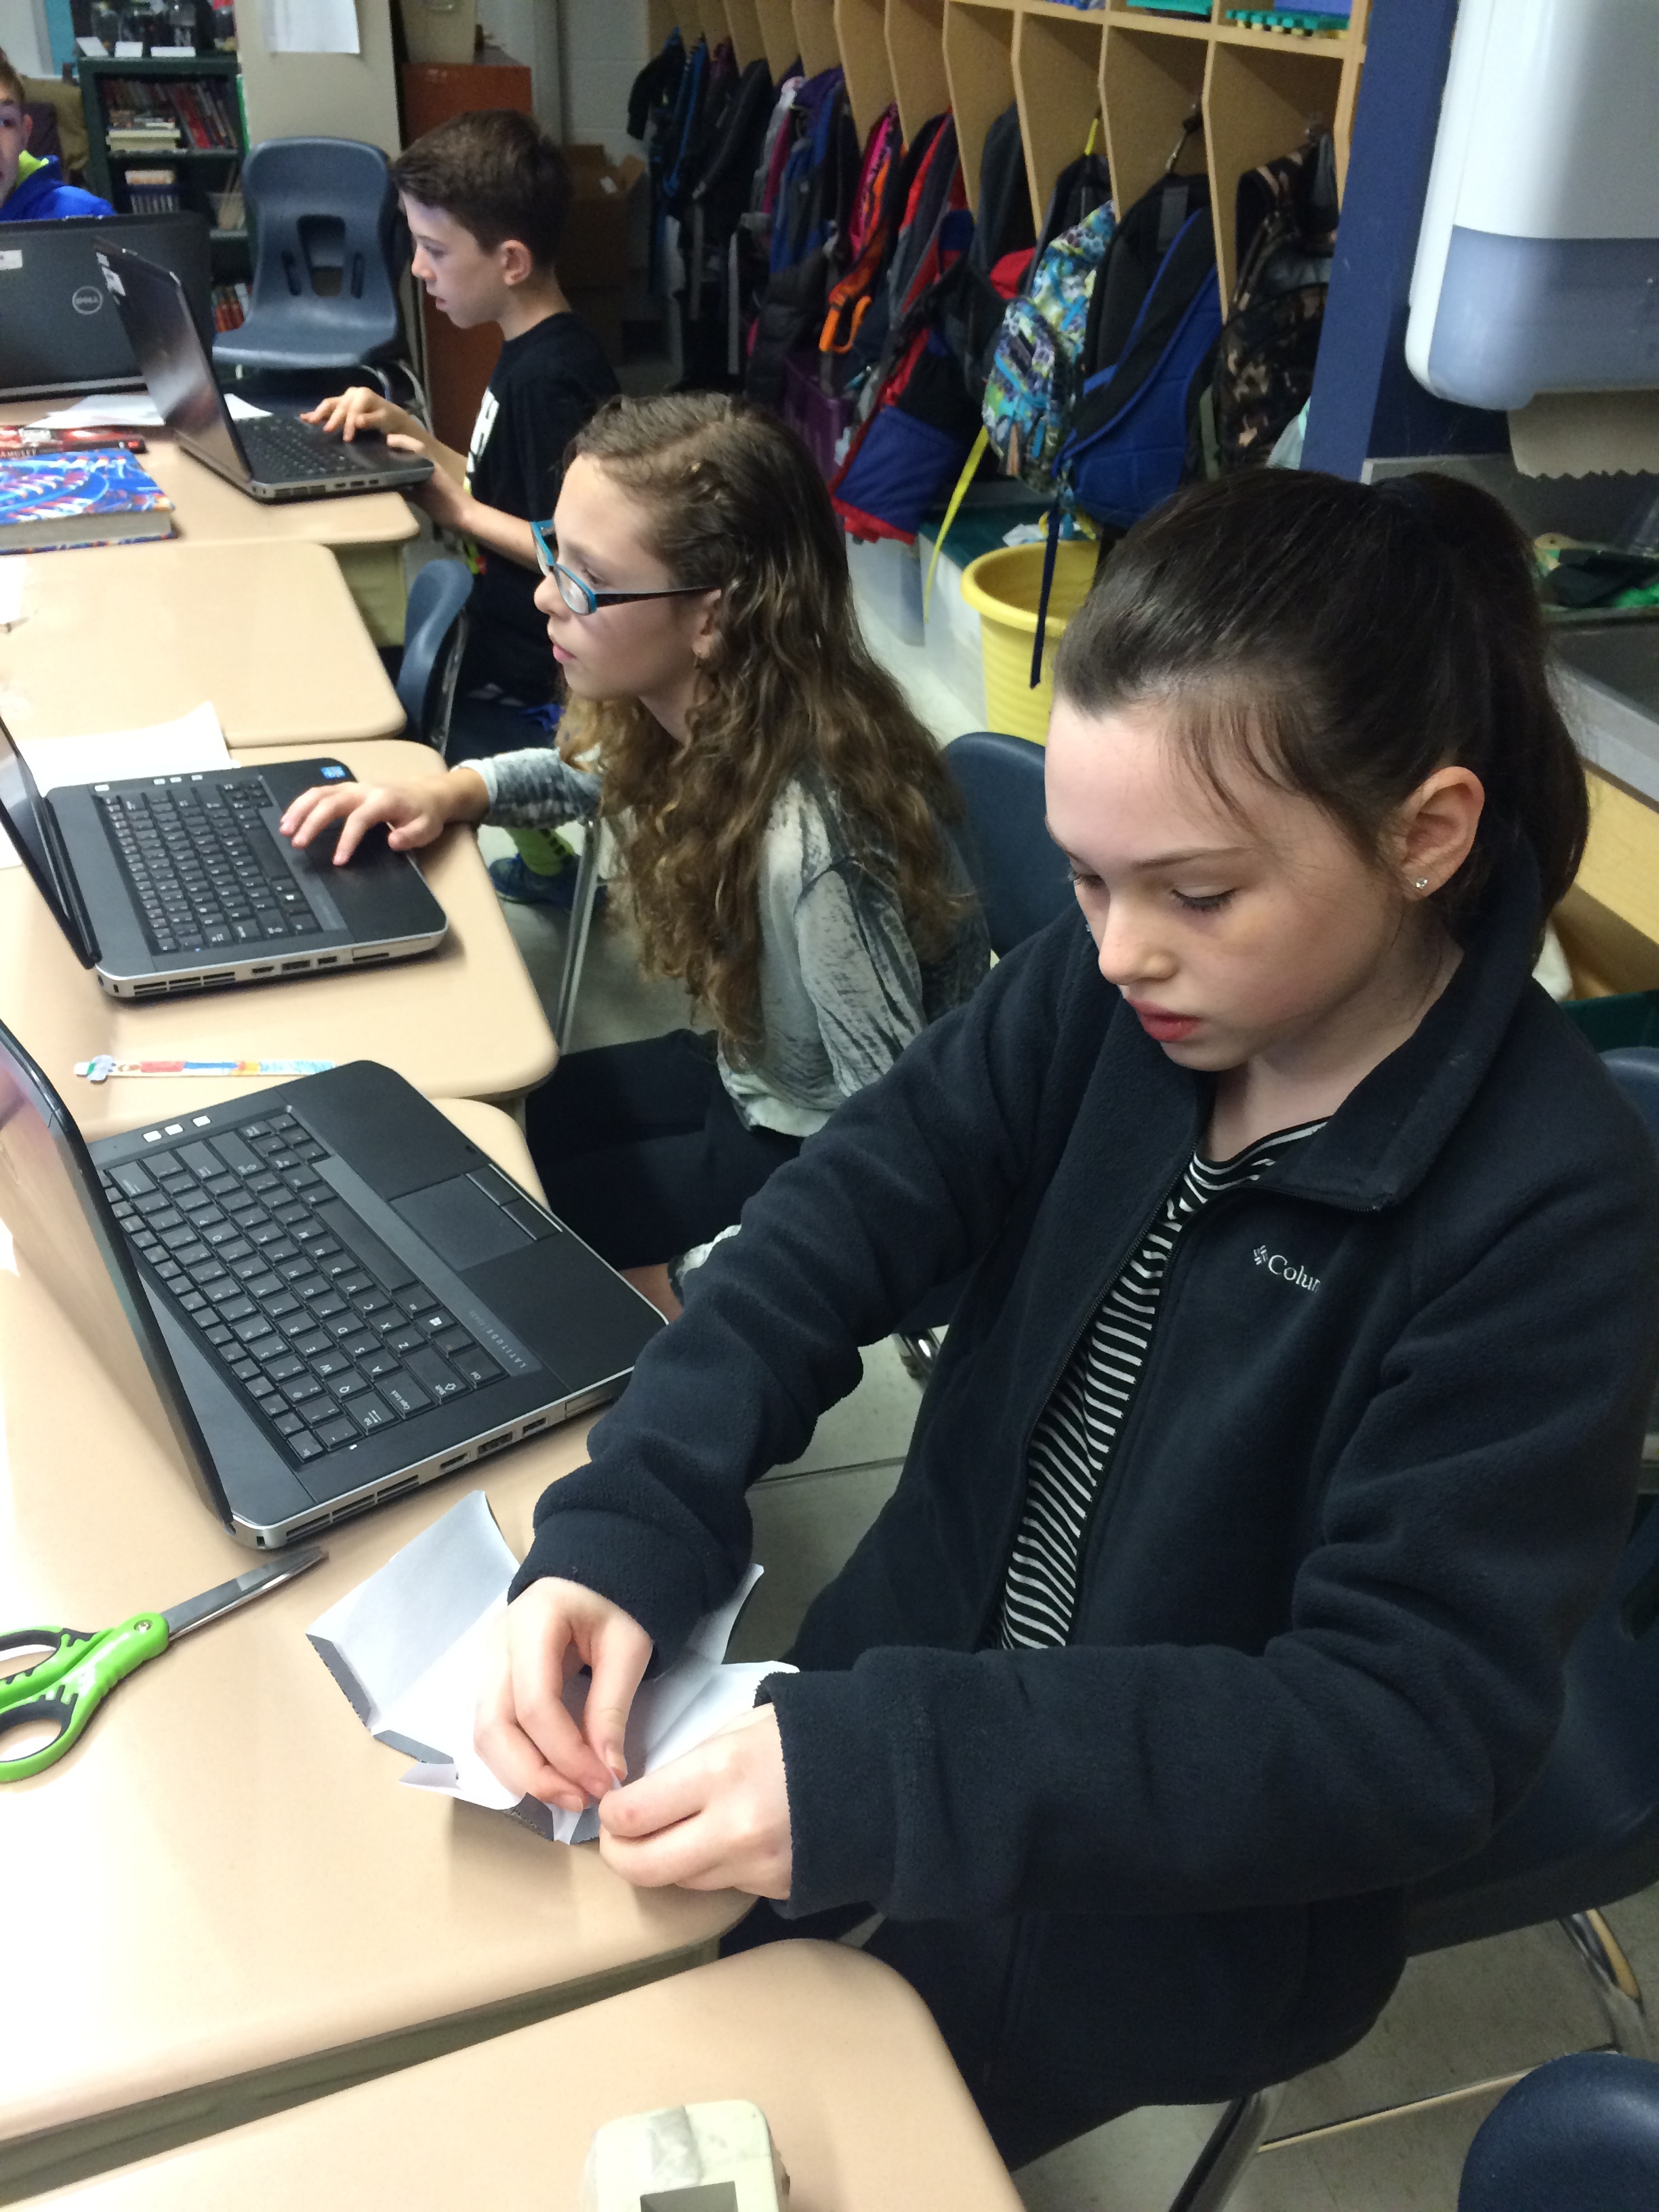
Maryann Molishus is not just any fifth-grade teacher, she is an advocate for hands-on, experiential learning and a champion for the importance of a positive classroom experience in STEM (science, technology, engineering, and math).
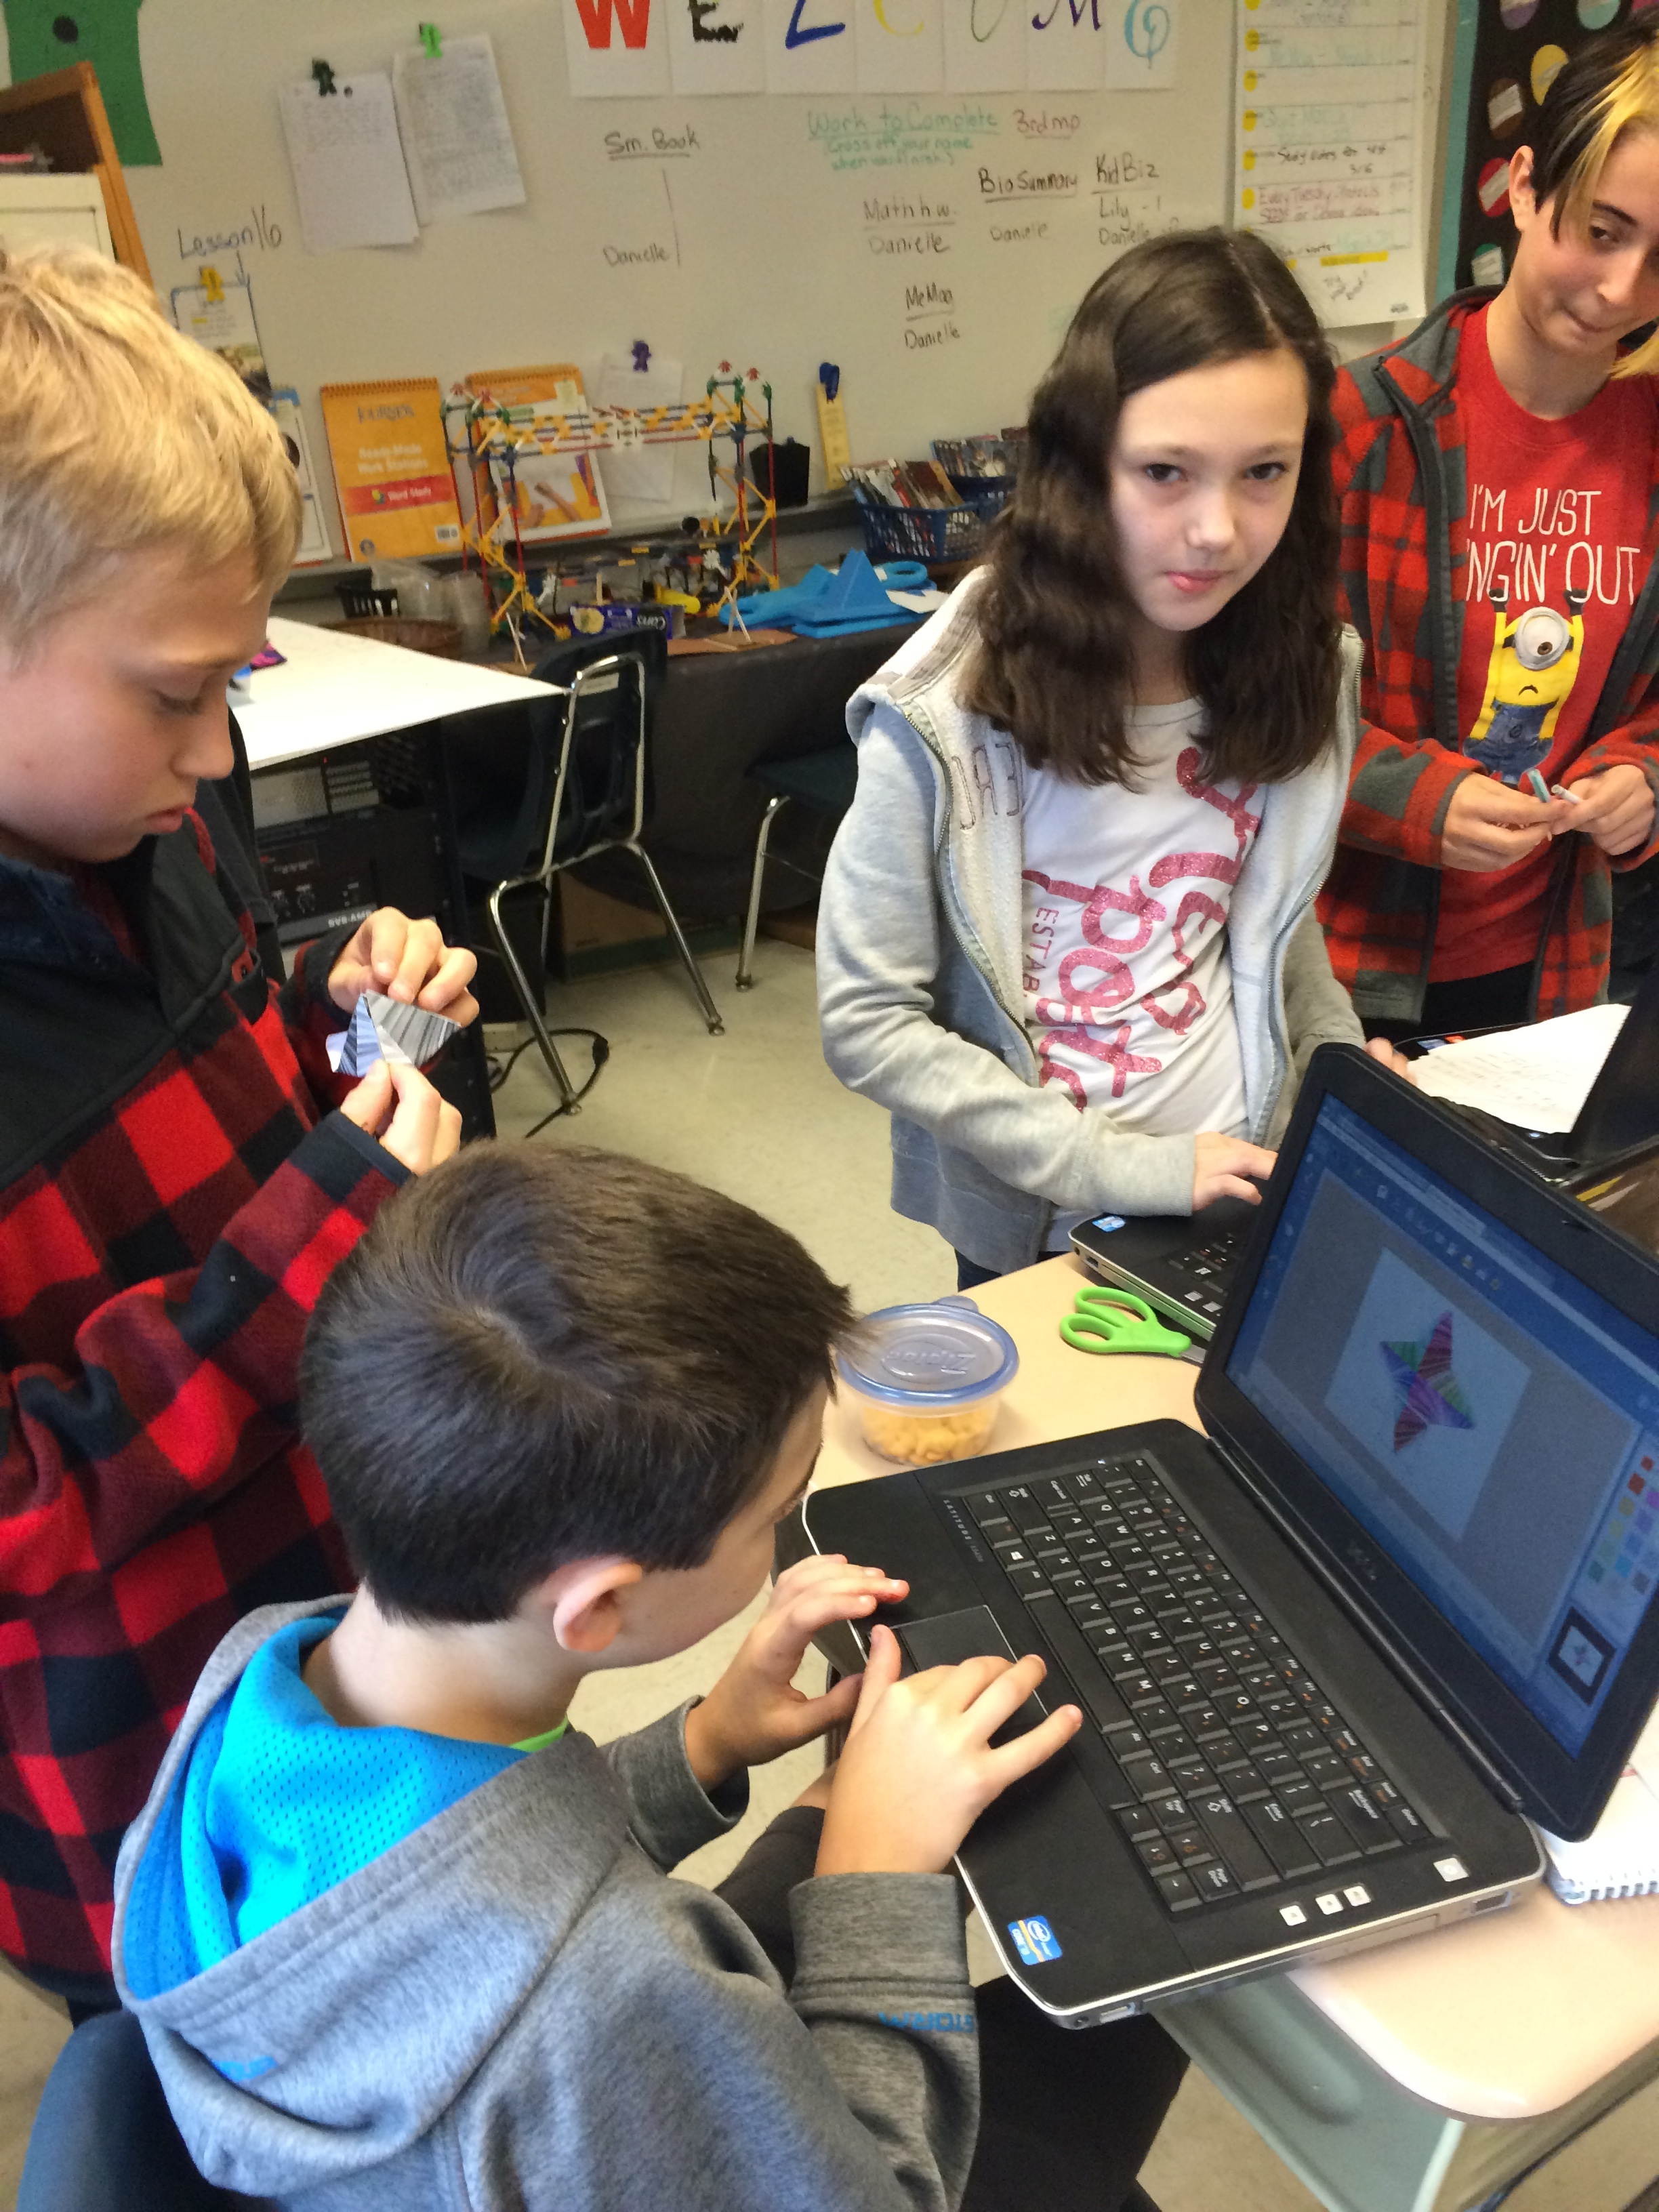
Many students learn to dislike these subjects in elementary school; Maryann is inspiring her students at Goodnoe Elementary School in Newtown, Pennsylvania to love them using Fab@School Maker Studio.
Maryann rallied a few colleagues and three amazing fifth-grade students to apply for a grant from their district’s Council Rock Education Fund to develop a makerspace-type program. With the grant in hand and the support of their principal they were able to get started.
“Our principal gave the OK to purchase a class set of accounts for Fab@School Maker Studio, and it is the perfect fit for elementary students,” she shared. “The last piece, the creativity and collaboration needed to design interesting products, comes from our fantastic students! Our intent is to spend at least this school year learning how the grant materials can best be used by our school population and then put together a program we can share with all our elementary schools.”
Maryann, a FabAwesome FableVision Learning Ambassador, was kind enough to share her and her students’ experiences using Fab@School in their classroom. Read on!

How did you hear about FableVision Learning and then become an ambassador?
In 2004 it seemed that wherever I went I was crossing paths with Peter and Paul Reynolds and the folks at FableVision. In quick succession I heard Peter speak during a virtual author visit with hundreds of students across Pennsylvania, then at a live meet-up in Philadelphia at what was then NECC (now the ISTE Conference), and we had a mutual connection to the Pennsylvania Keystone Technology Integrators Program that had just begun. Soon after I volunteered to be part of Paul Reynolds’s graduate research project, The North Star Virtual Community. I began using The North Star Classroom Program in my classroom and we even did a performance of The North Star Musical Journey with one of my second grade classes. It was some time later that I connected with the amazing Terry Shay and the ambassador program and began participating in fun events such as International Dot Day.
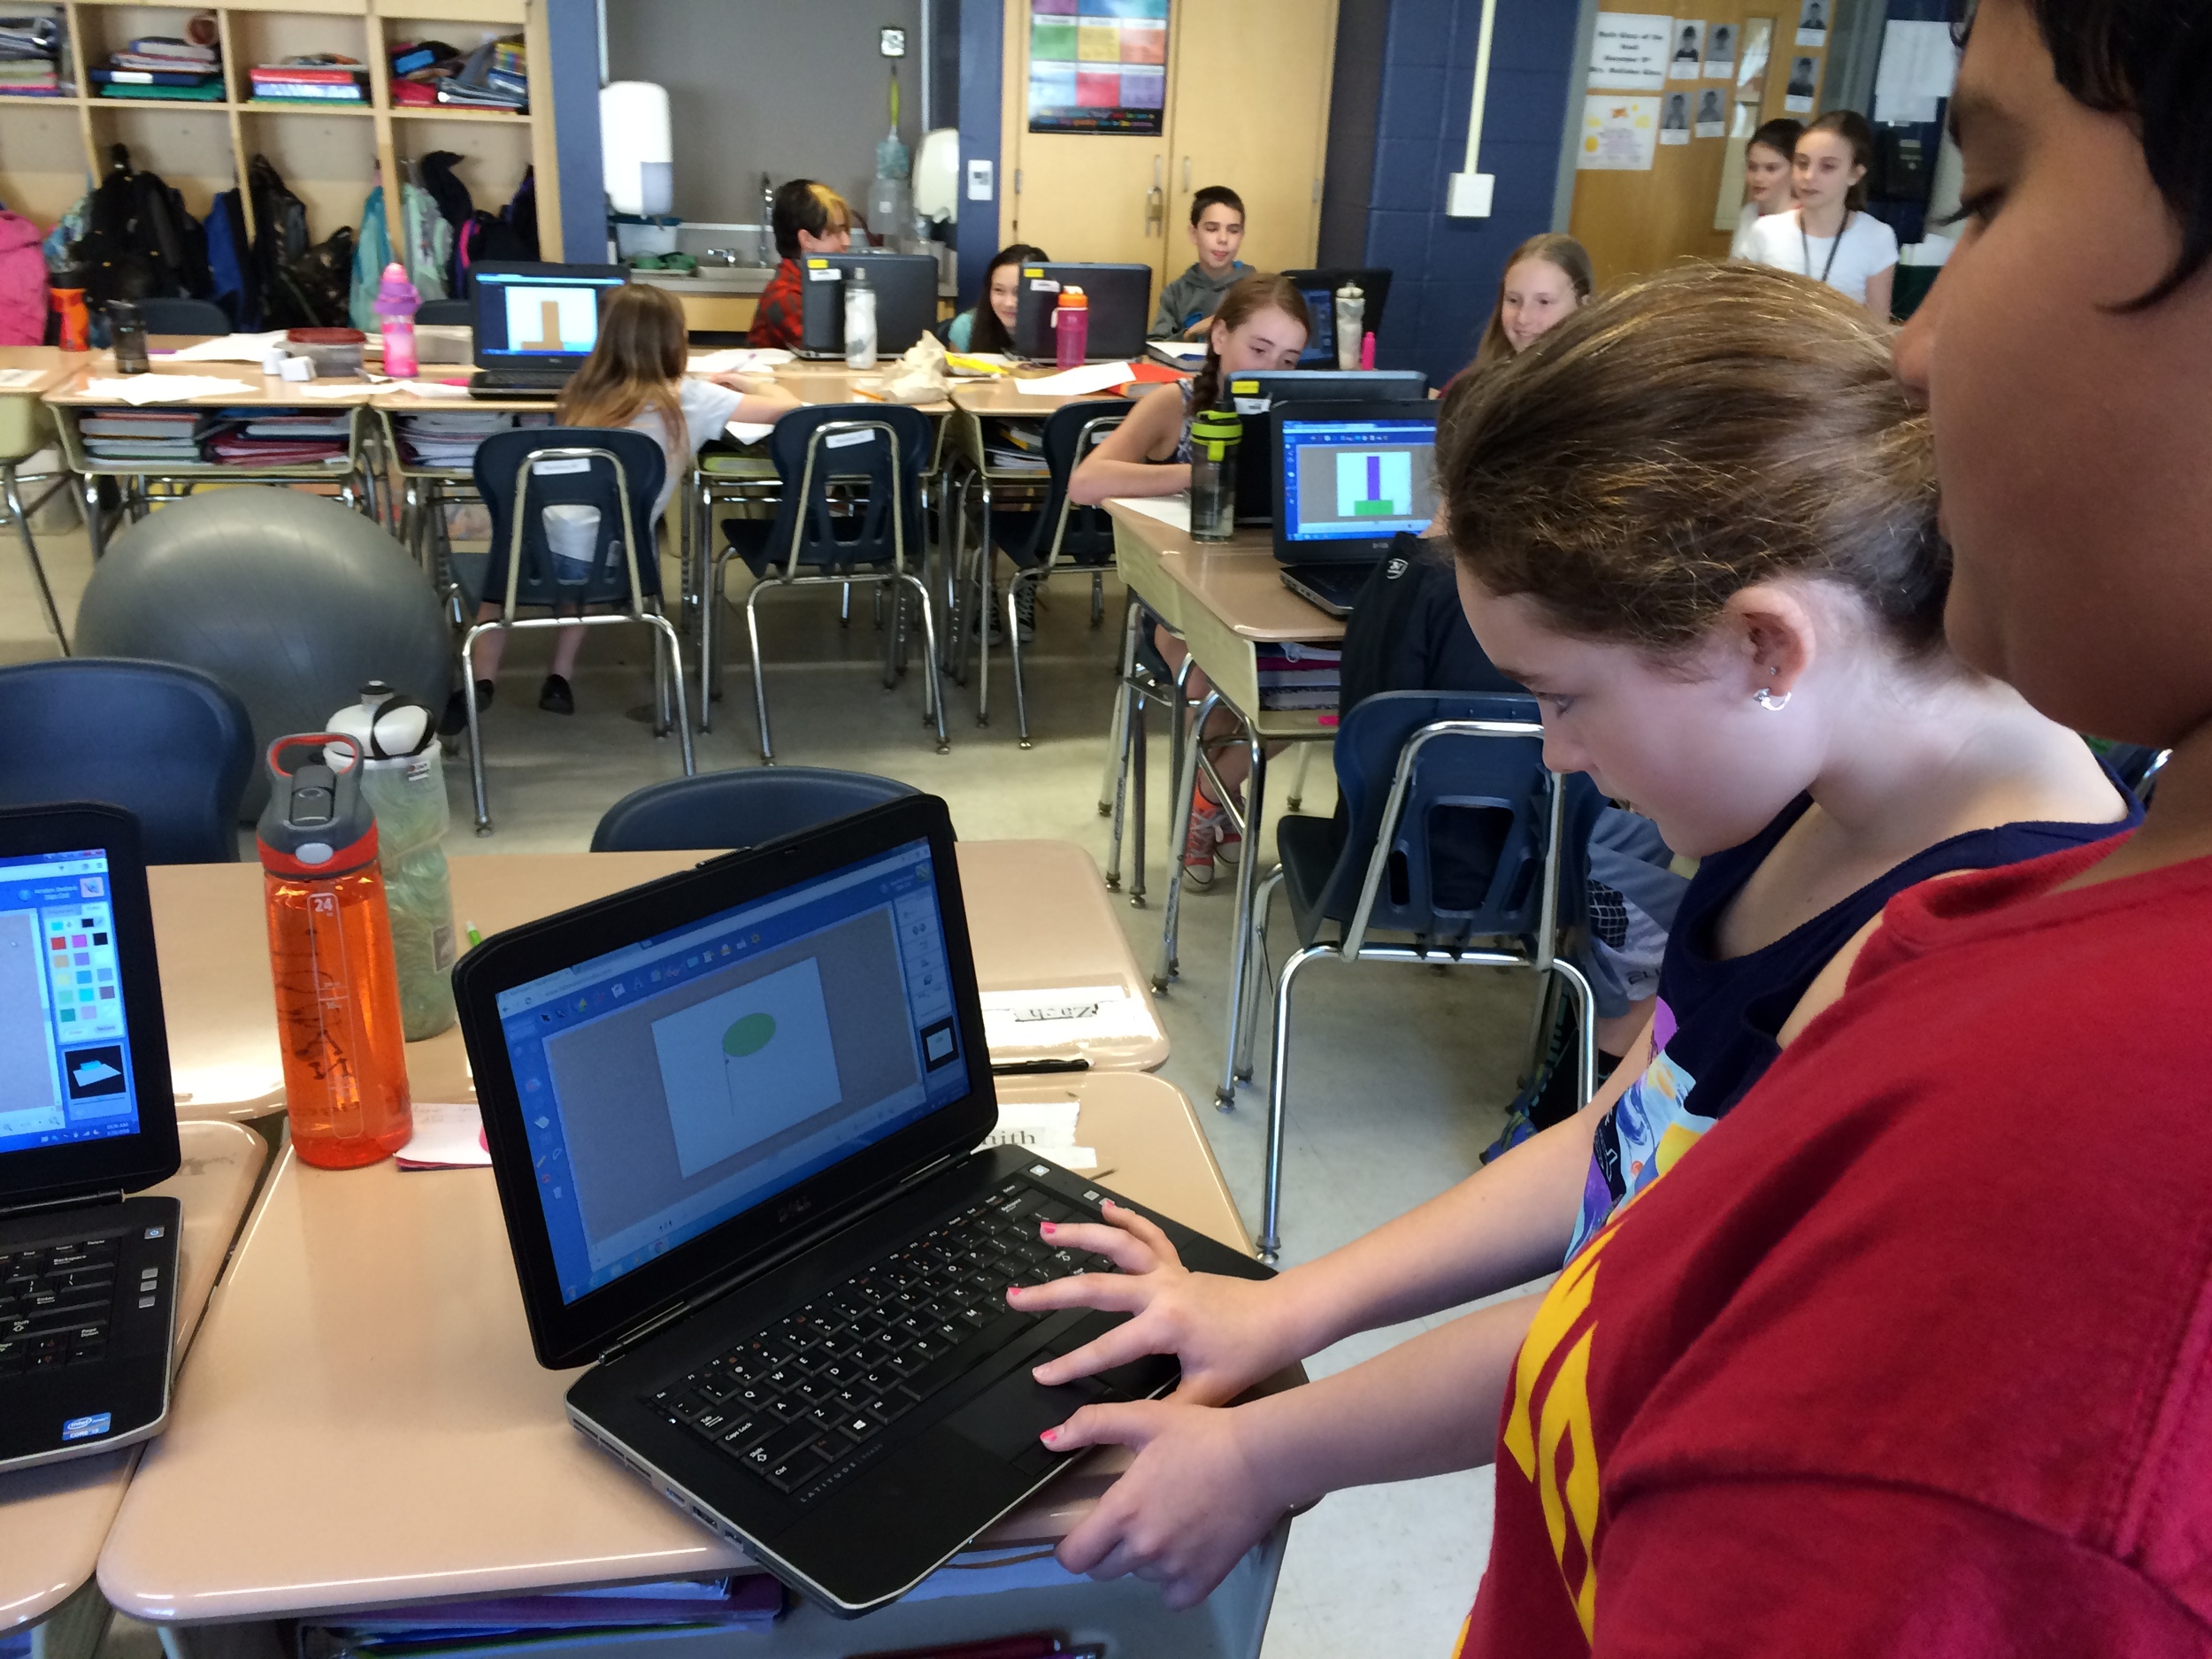
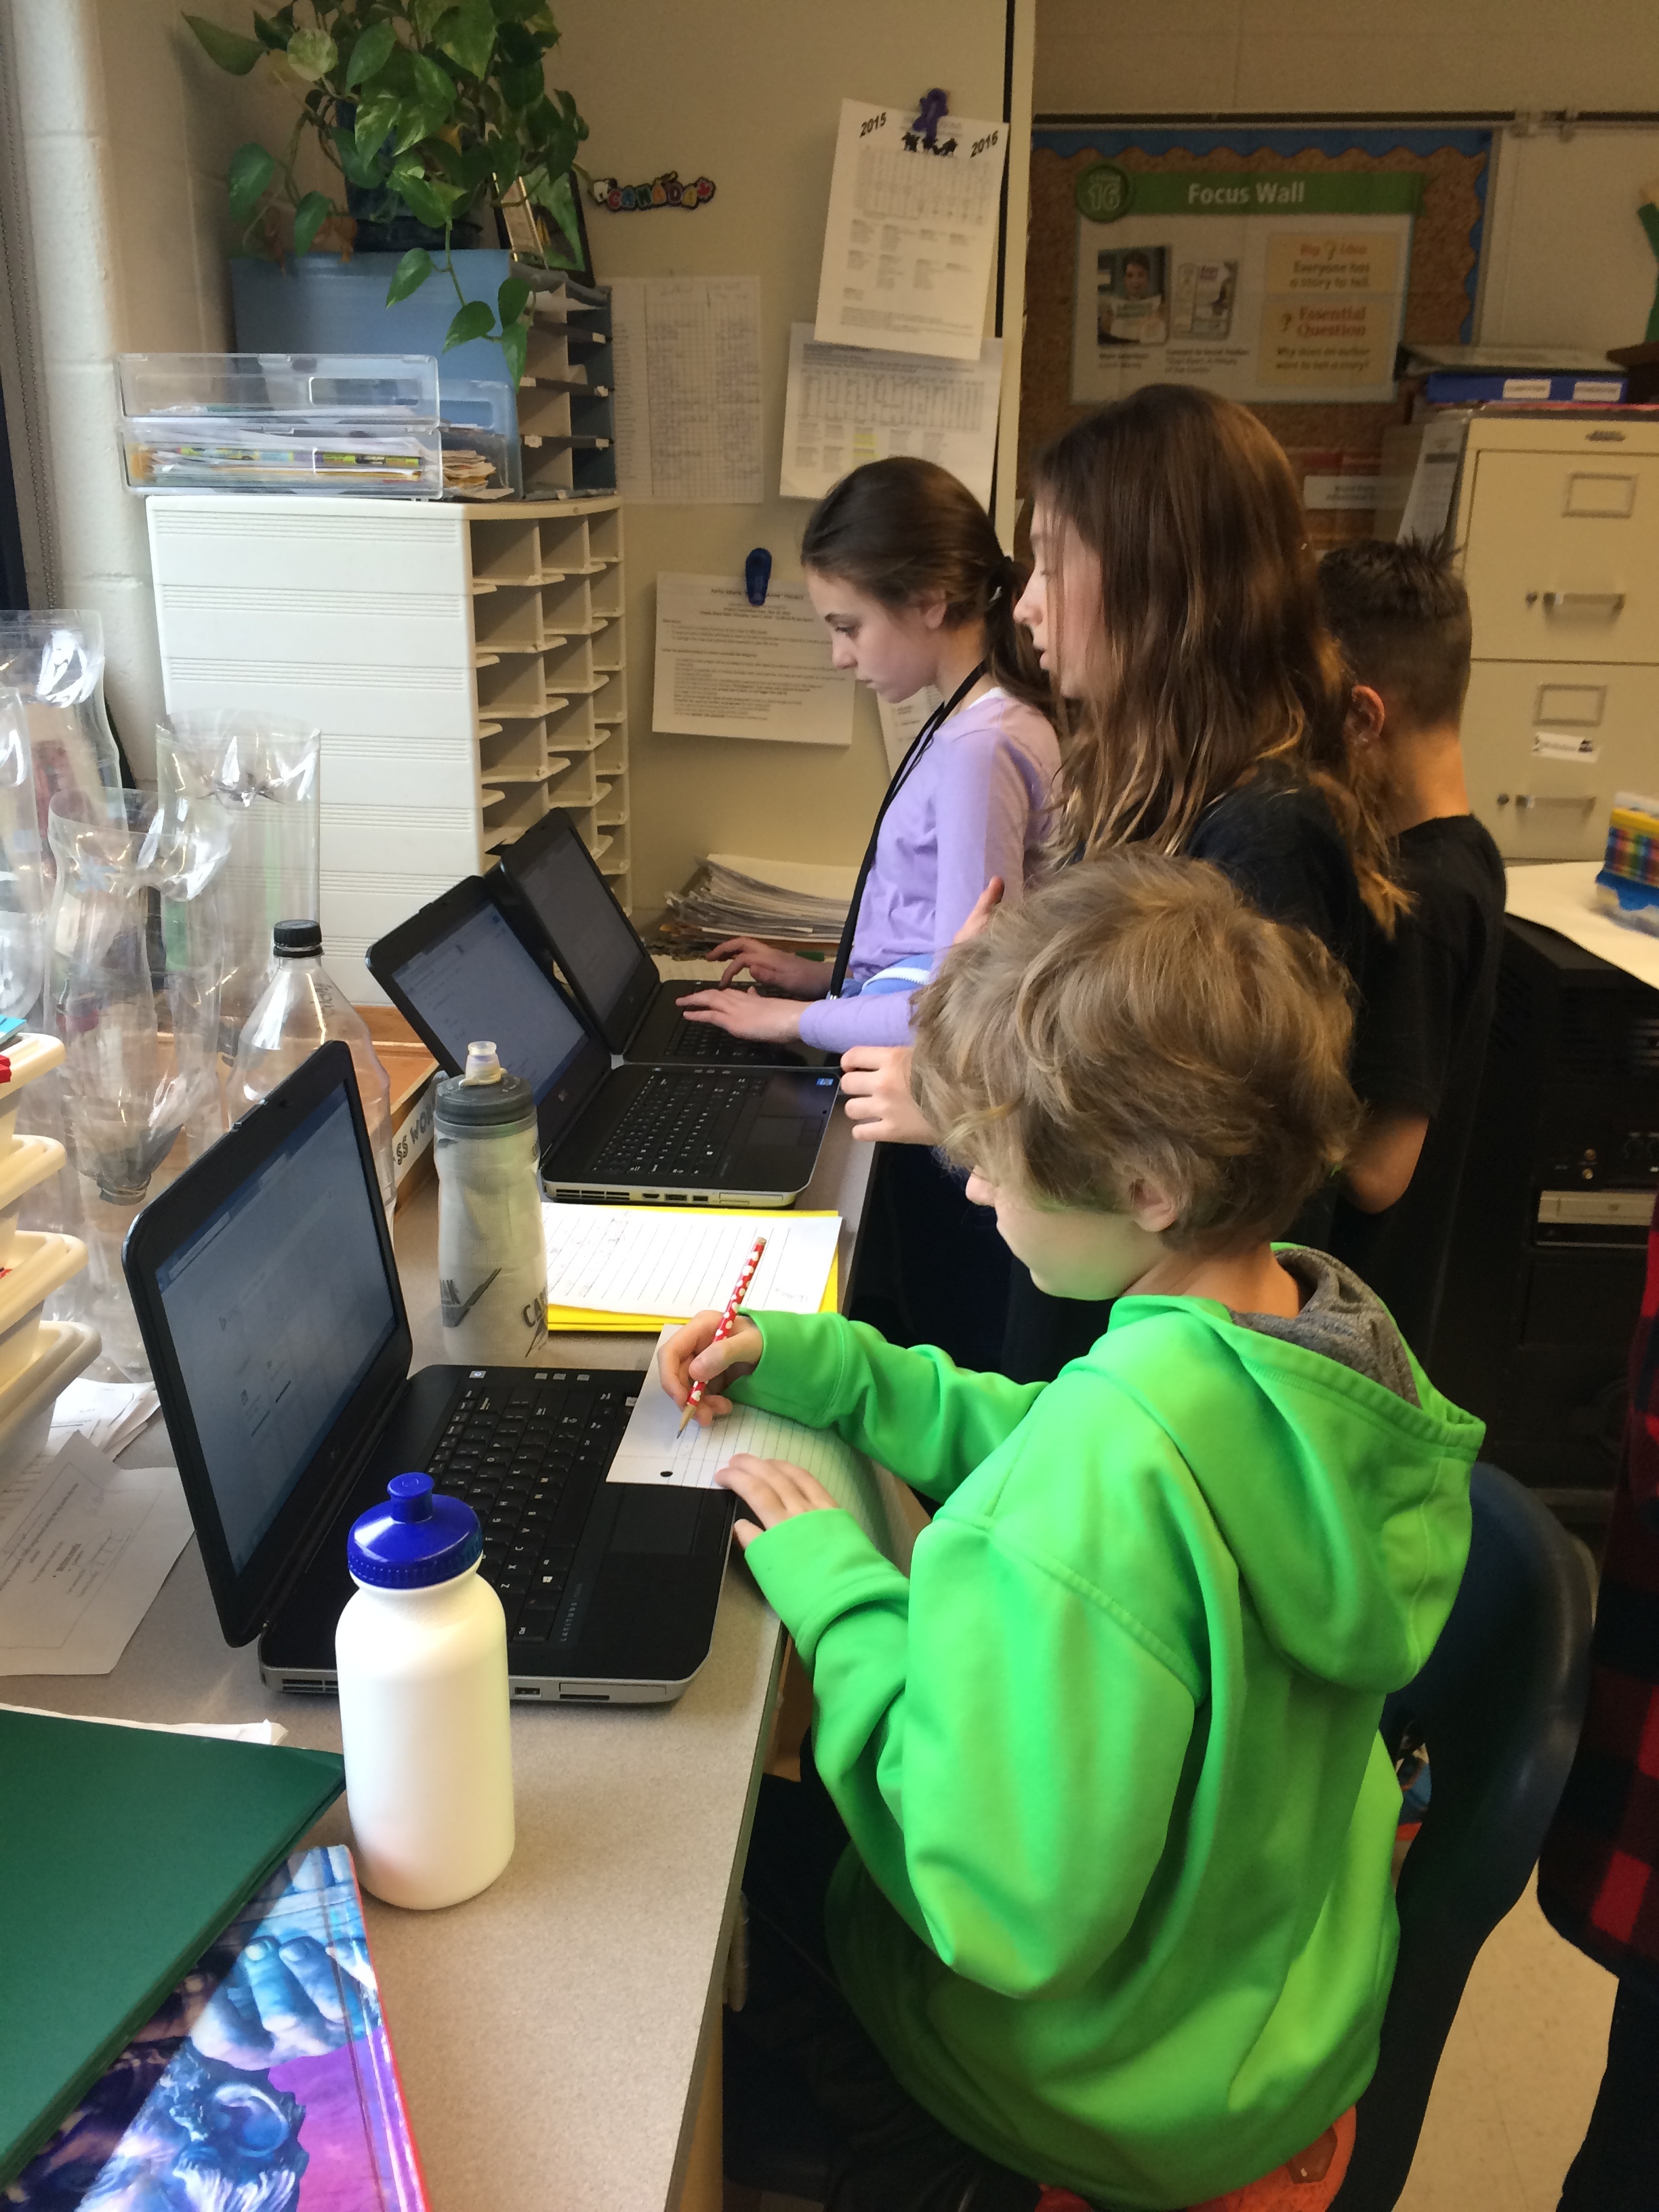
Tell us a bit about your classroom and what the students are working on.
Creativity and collaboration at work!
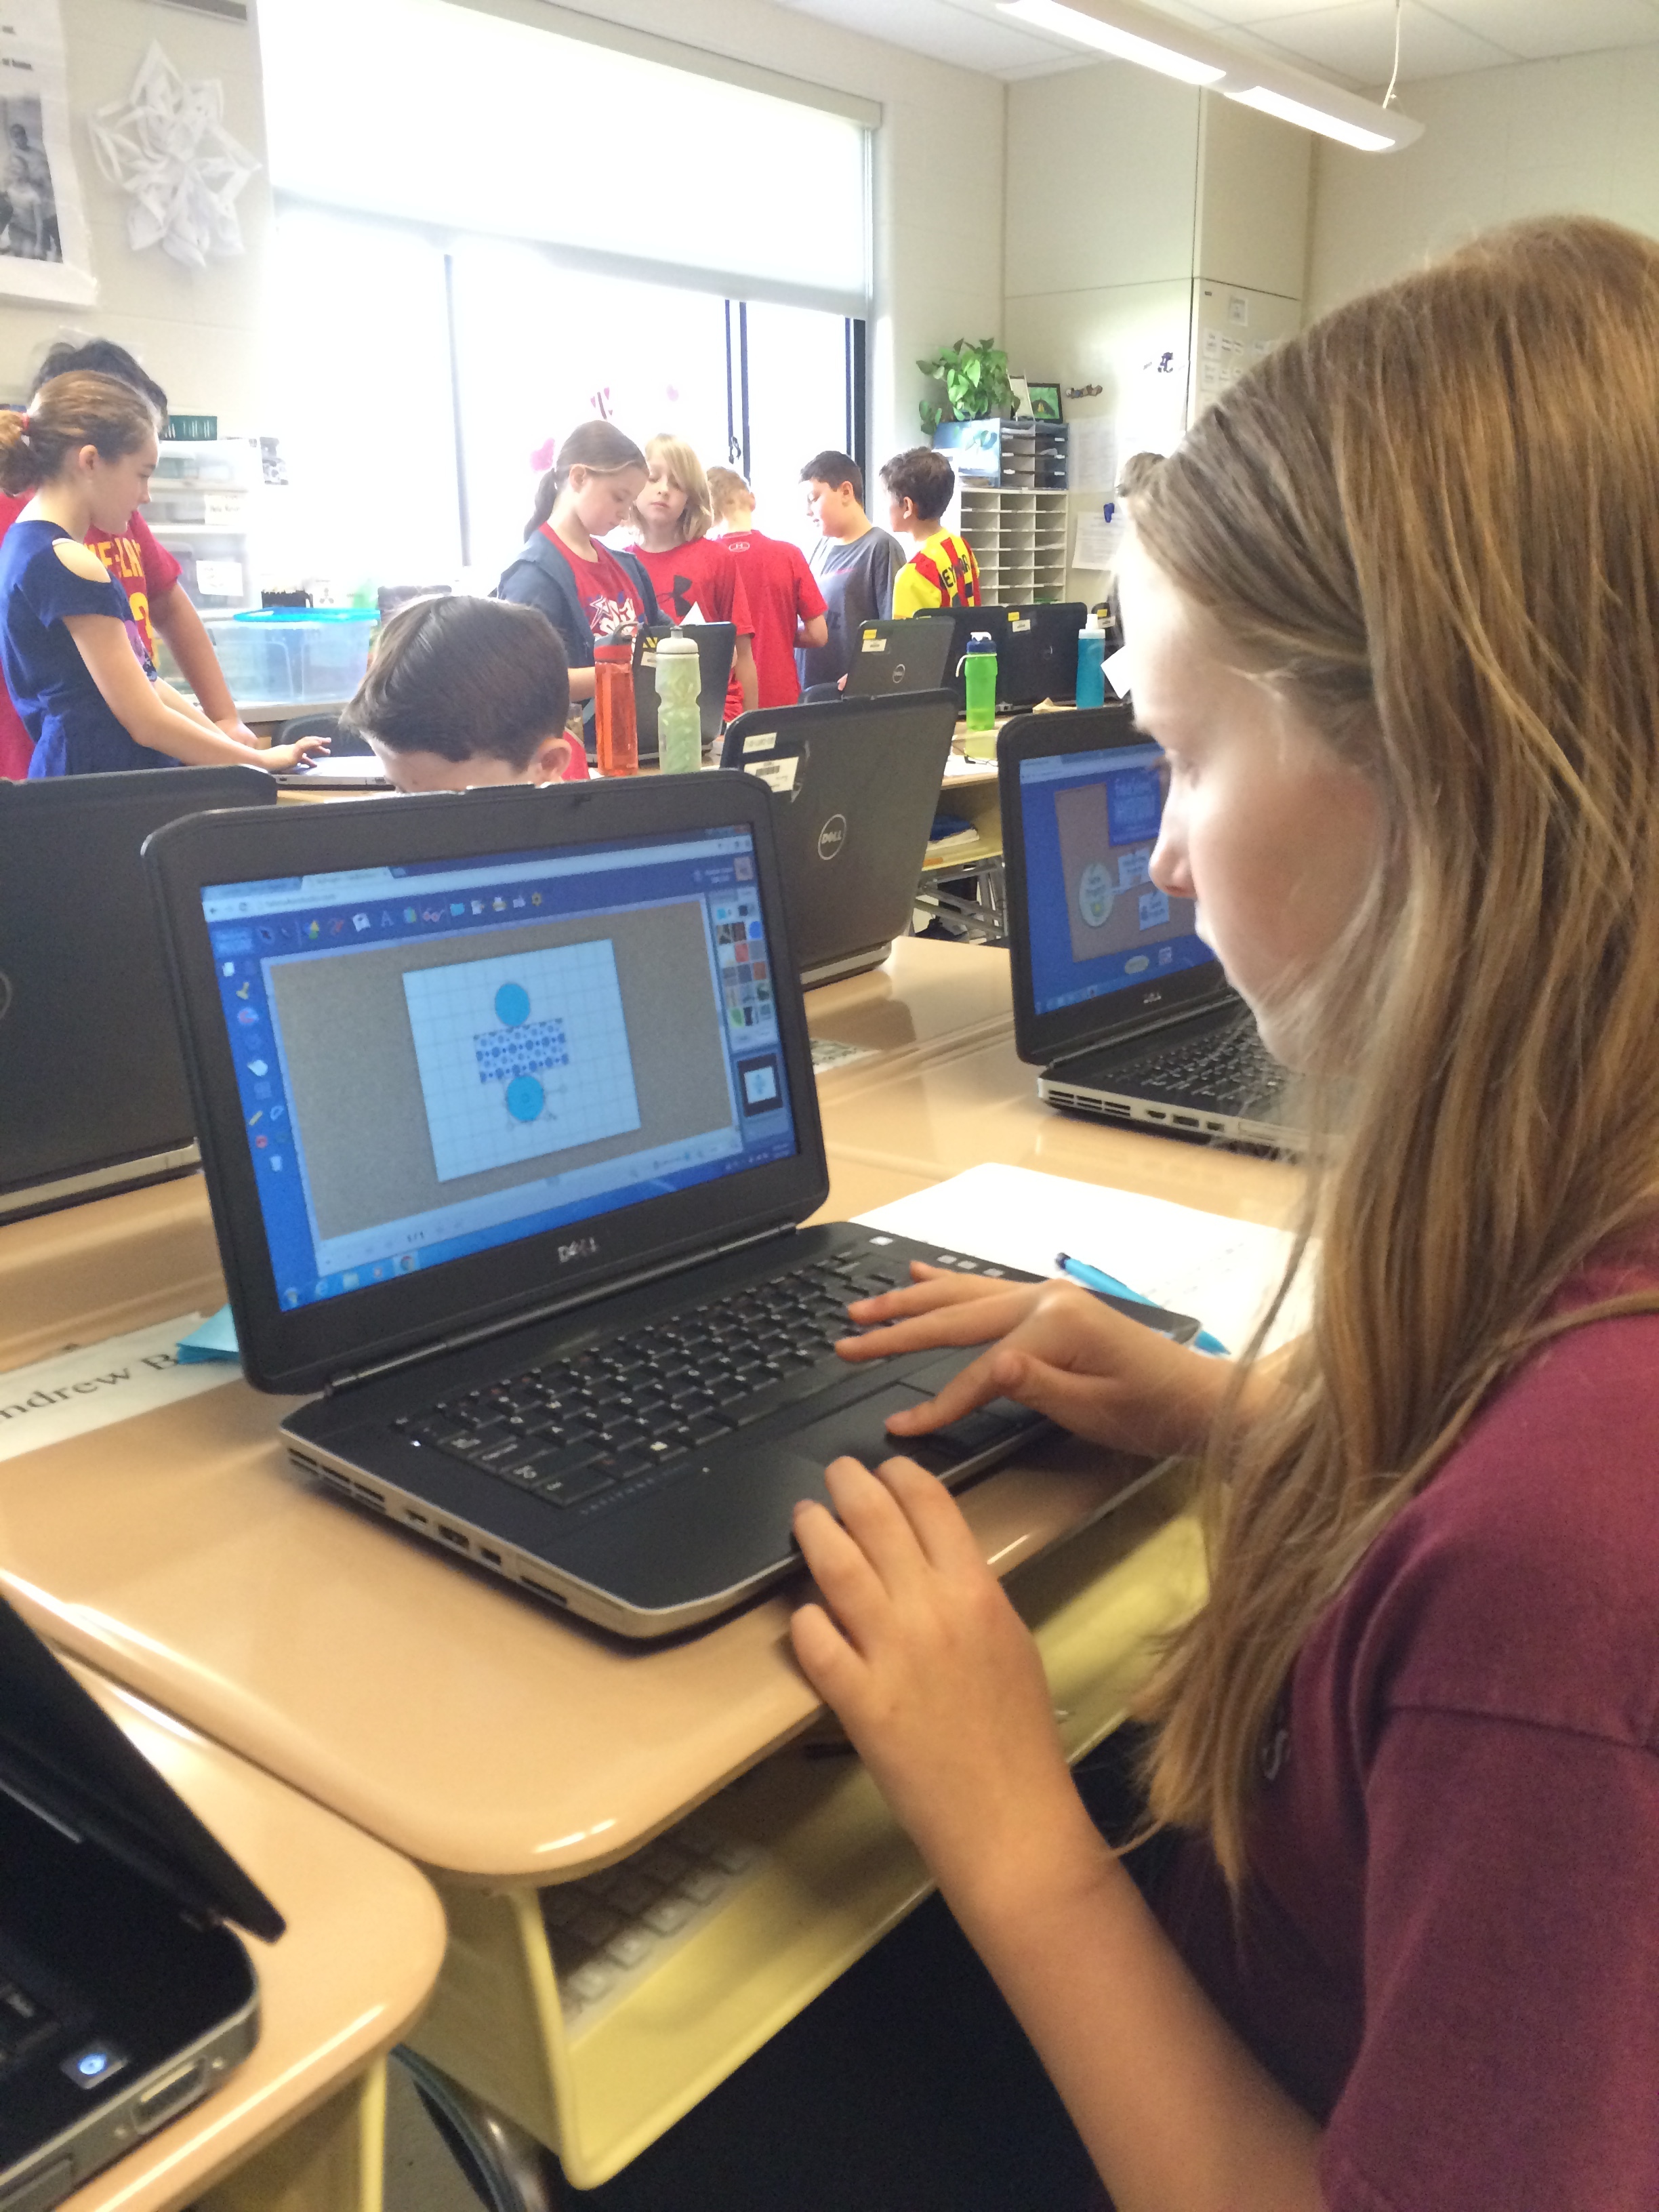
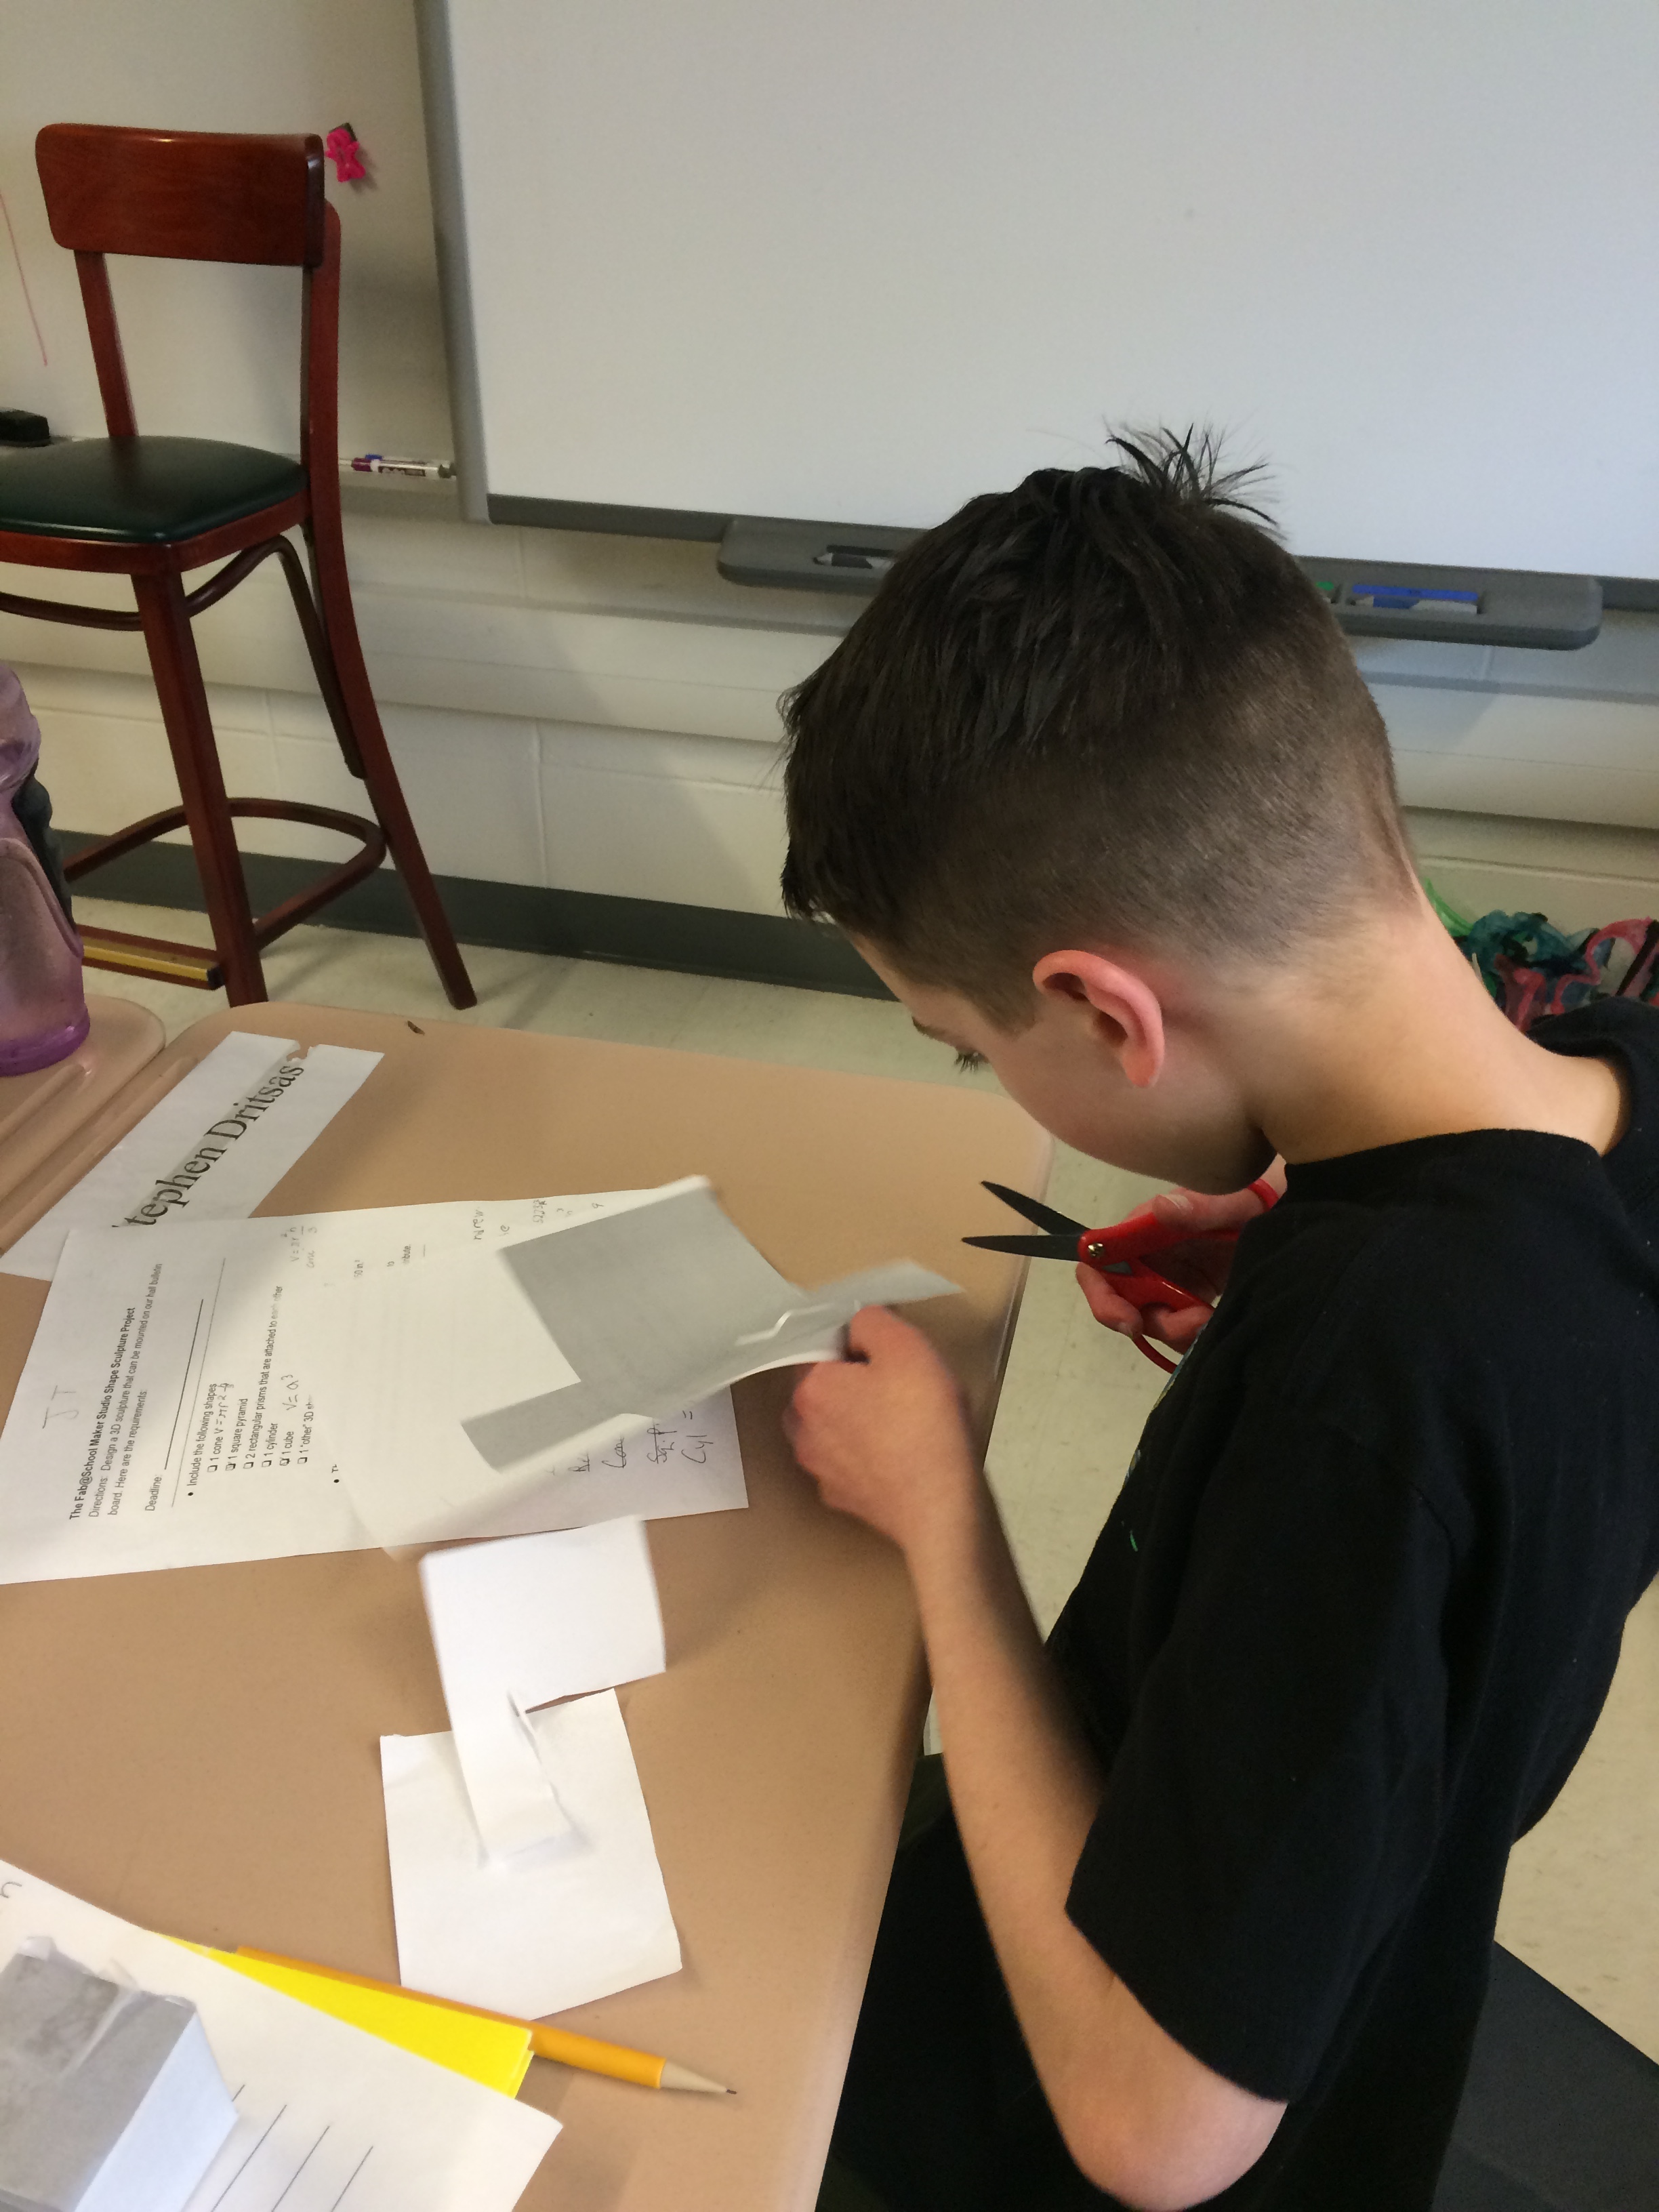
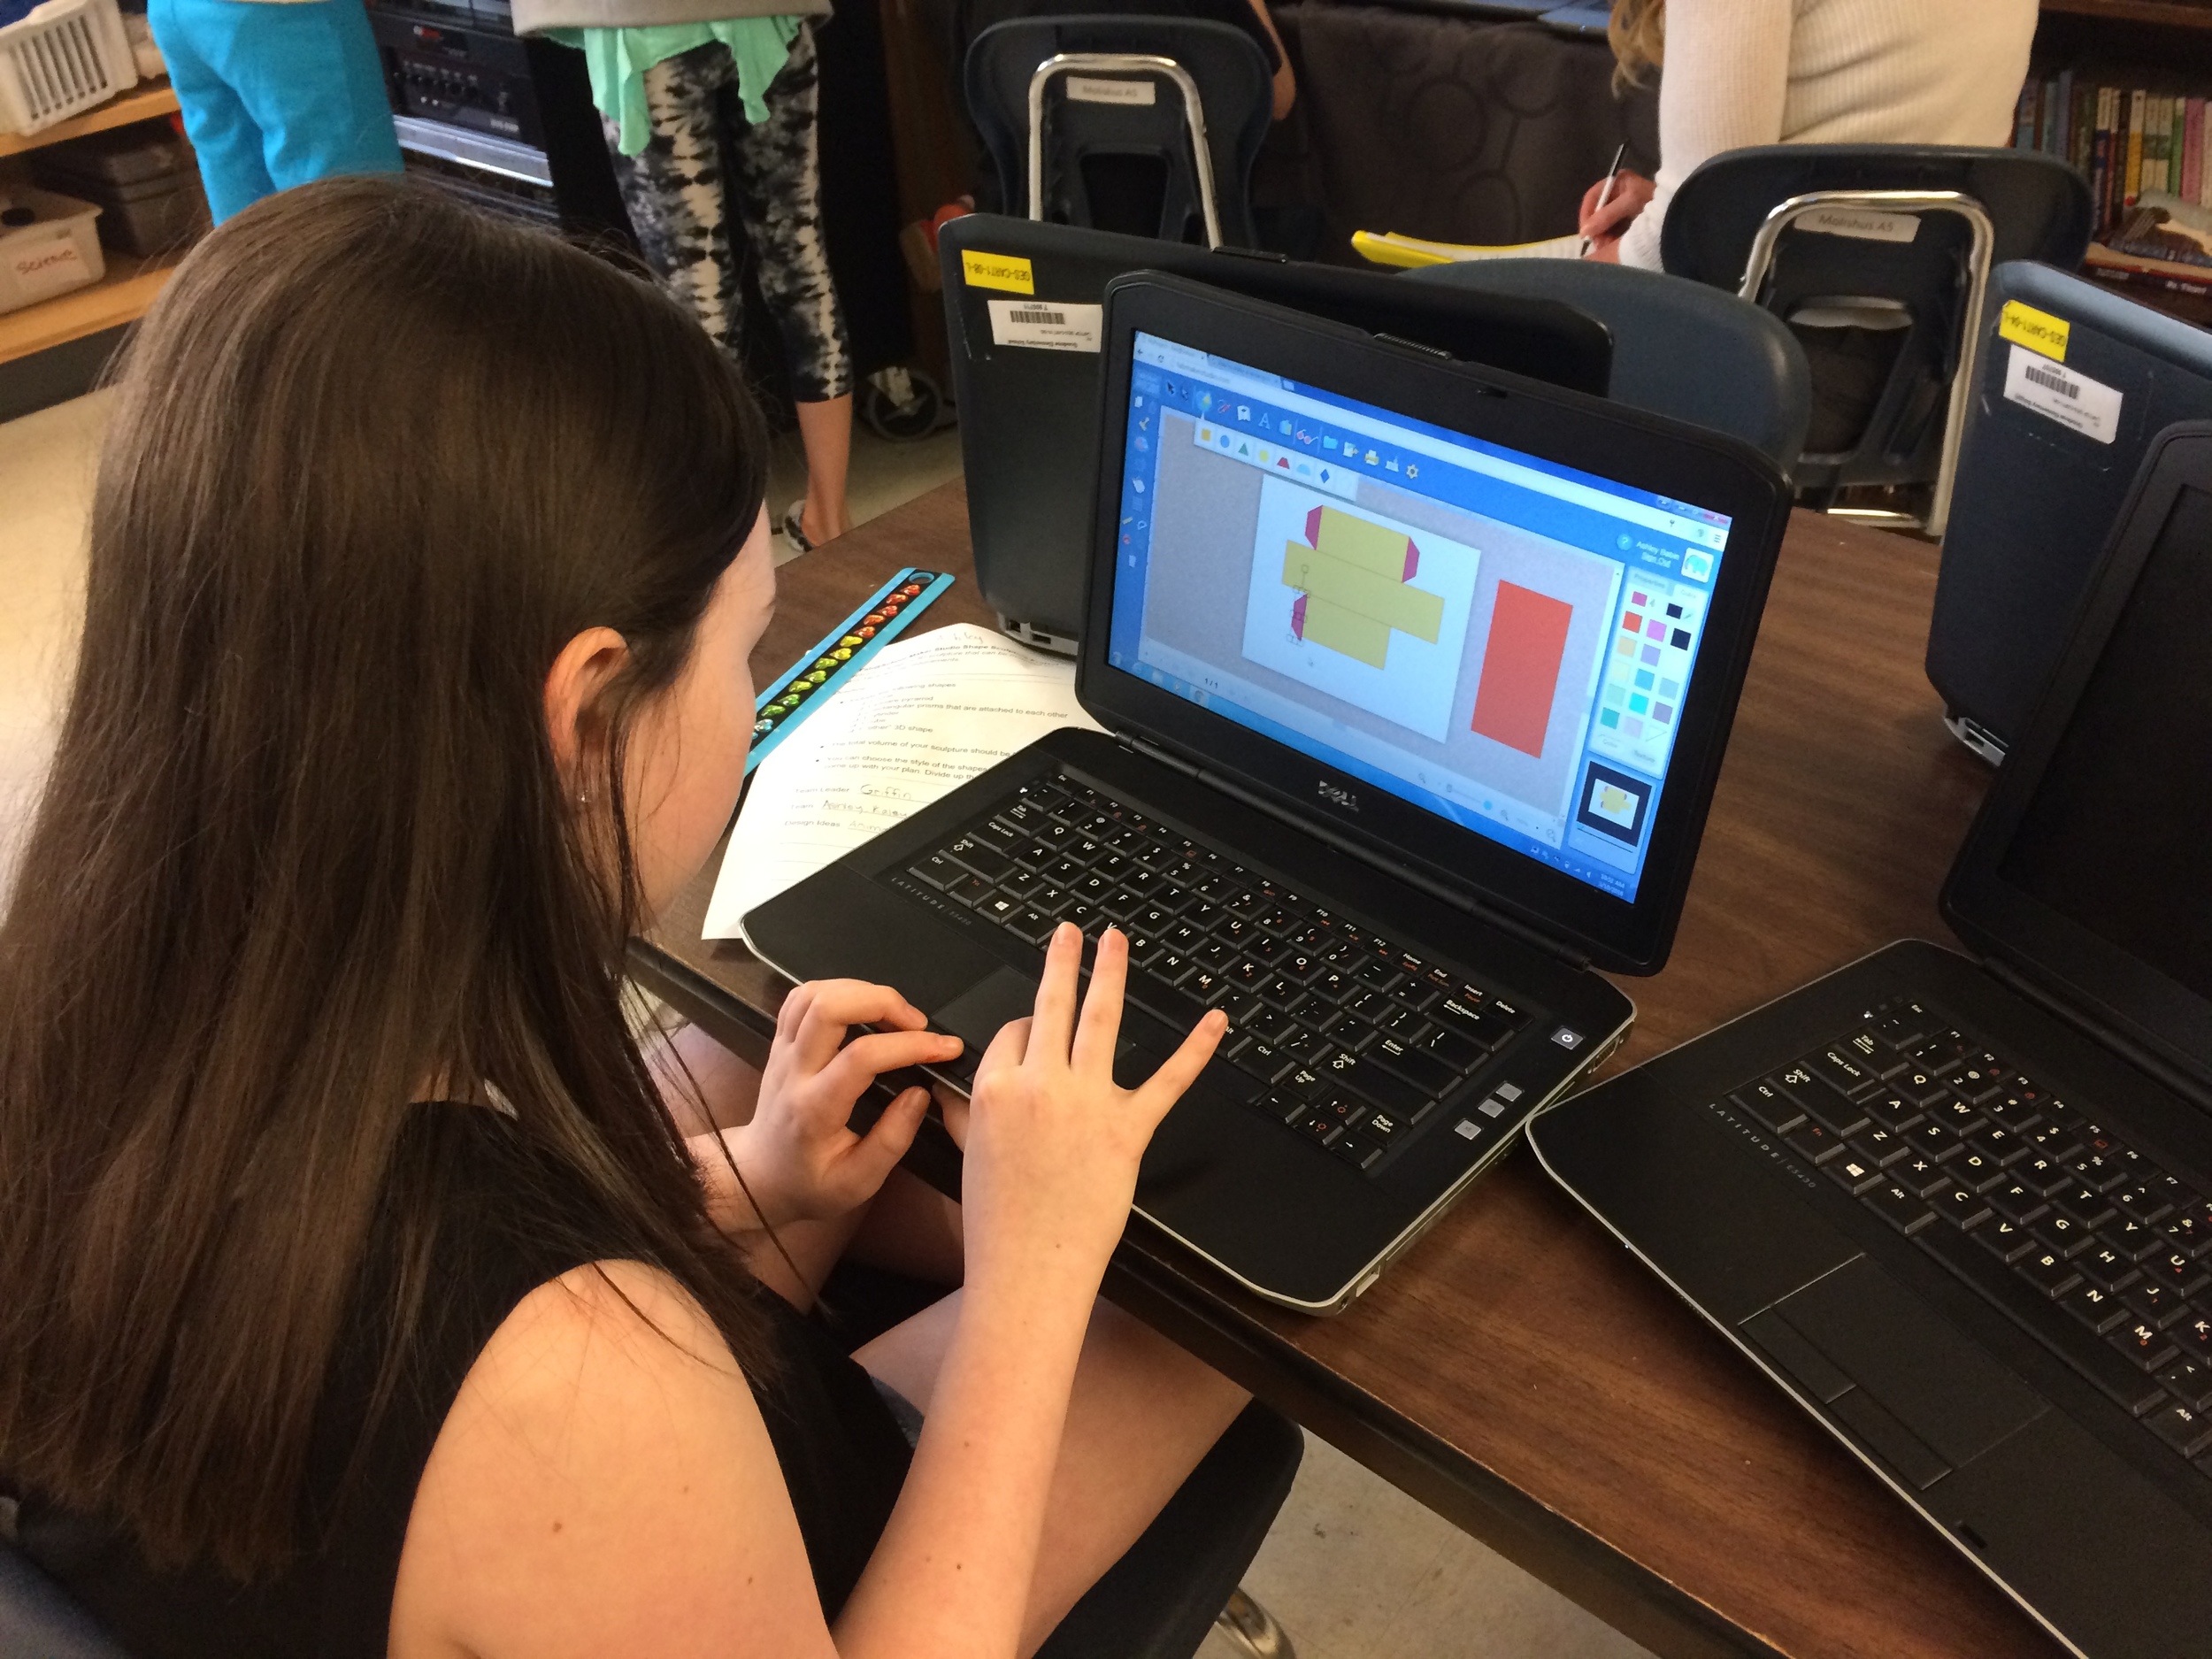
I am currently teaching fifth graders at Goodnoe Elementary School in Newtown, Pennsylvania. It’s my fifth year in fifth grade, after teaching second grade at the same school for eleven years. Additionally, I moderate a grades 5-6 STEM Club once a week during recess and lunch. The 5-6 STEM Club students are working on a variety of projects and are learning new skills such as computer programming and digital fabrication. Currently, our fifth graders are working on an interdisciplinary project. They are combining math, engineering, art, and some very much needed collaborative skills to create a “solid sculpture” that will be displayed on our hallway bulletin board.
How are you using Fab@School Maker Studio into your classroom?
There are a couple of ways we are using Fab@School Maker Studio. First, my homeroom is working on their “solid sculptures.” Small groups have been given the challenge of collaborating to create an interesting sculpture that includes a cone, cube, two rectangular prisms, a cylinder, a square pyramid, and one other solid shape. The total volume of each sculpture needs to be between 60-250 cubic inches. The colors, patterns, and configuration of shapes is their creative choice. The small groups are working hard to learn how to use Fab@School, how to calculate volume, and how to design the various shapes. We began the project by assigning student trainers that took on the role of ‘team leader’, introducing their group members to the new program and guiding them on how to use it. Team leaders are also responsible for keeping the group organized, maintaining the design notes, and making sure everyone in the group is participating.
Students are also using Fab@School in our new “STEM Special”. This STEM Special has been put in place in lieu of our weekly computer lab block. Students work on independent digital projects, some of which involve electronics and cardboard, and many that include designs students are creating using Fab@School.
Finally, we also offer a weekly STEM Club to all students in a more informal setting. The students are just beginning to learn Fab@School and are so excited to start planning their projects!
What are some of the challenges/lessons you are tackling with Maker Studio?
One of our primary challenges at the moment is setting up our hardware to work as effectively and efficiently as possible. As the class begins to learn and use Fab@School Maker Studio, we are working out how to get the printing and cutting process to work optimally using our current district hardware. We are learning what works best and what our major hurdles are so we can sort those out with our administration and tech support. We want to make the best choices in our setup so we can hopefully share the program with all of our students.
Can you share one wonderful aha teaching moment you’ve had this week?
Yes, a wonderful aha moment occurred when I first introduced Fab@School to my class and they began their Solid Sculpture project. The small groups busily assigned jobs, got some training on the program, and began researching volume formulas they would need for their solid shapes. After a little over an hour, time was up. As I instructed the students to clean up their materials, one student called out, “What, time’s up? We didn’t even do any math today!” After spending an hour focused on geometry and measurement, it was quite surprising that the students didn’t realize that they were, in fact, doing math. I took the opportunity to explain once again just what they were doing and its connection to our math program. Project-based learning is a great way to learn as it allows students to become fully invested in their work, so much so that they forget they are even doing “school work.” I can honestly say that the students are actively and happily engaged in mathematical conversations at a fifth grade level and more!

Fab@School Team Joins Global Early Childhood Fab Lab Partnership
To help tackle the disruption in the STEM education/career pipeline, FableVision and The Reynolds Center have spent the past five years collaborating with University of Virginia’s successful Fab@School Initiative to bring meaningful STEM teaching and learning to many younger learners and their teachers.
This past January, after years of development, testing and research led by Dr. Glen Bull and Dr. Peggy Healy Stearns, the FableVision/Reynolds Center teams released Fab@School Maker Studio digital design and fabrication software, which is the keystone tool in the Fab@School initiative. Made possible in large measure by the generosity of the Cisco Foundation, Fab@School Maker Studio is an easy-to-use web-based digital design and fabrication tool, which invites students in grades 3-8 to experience STEM and STEAM learning in a more engaging, personally meaningful way.
Maker Studio offers a unique onramp to creating with cross-curricular activities from simple to sophisticated and support for a variety of materials and a range of tools from scissors to inexpensive 2D cutters to 3D printers and laser cutters – all with a single tool. Beginning with paper, cardstock, and cardboard, Maker Studio provides an accessible, low-cost way to imagine, design, invent, and fabricate 2D designs, pop-ups, and 3D projects like geometric constructions and working machines. Maker Studio is part of the national Fab@School research initiative and committed to championing equity & access to quality maker education.
Last year, our Fab@School team was also tapped to join the global Early Childhood Fab Lab Partnership, led by the Teaching Institute for Excellence in STEM (TIES) and MIT Fab Foundation to bring the Fab Lab learning experience to early learners (PreK to Grade 2). Other Early Childhood Fab Lab partners include the Bay Area Discovery Museum, the Center for Childhood Creativity, Virginia Tech’s Institute for Creativity, Arts, and Technology. To support the Early Childhood Fab Lab mission, with generous support from the Noyce Foundation, the FableVision/Reynolds Center teams are now working to create an early education version (PreK-2) of the recently-developed Fab@School Maker Studio software for both formal and informal spaces.

FableFive: Peggy Healy Stearns, Lead Software Designer for Fab@School Maker Studio

Teacher, software designer, and maker movement enthusiast, those are three ways to describe Dr. Peggy Healy Stearns. She's also the lead software designer behind FabMaker Studio, FableVision Learning's new digital/3D Fabrication program for the classroom. And she's no stranger to the classroom, in fact you could say that is where it all began.
"In 1983, when I was teaching 8th grade, I touched my first computer. It was like magic," Peggy said. "I immediately saw the potential and knew I wanted to design software. I bought an Apple IIe, learned to program, and headed to graduate school to earn my doctorate and start my software design career."

For this month's FableFive, Peggy shared a bit about her background in software design, her role in the Maker Movement, and of course Fab@School Maker Studio
1) How did you get connected with FableVision?
While designing my first software programs for Sunburst Communications, I worked as a district technology coordinator and taught at the University at Buffalo. In 1991, I brought my idea for a program called The Graph Club to Tom Snyder Productions (TSP). That’s when I met Peter H. Reynolds, then TSP’s Vice President and Creative Director. Peter designed the graphic interface for The Graph Club and we worked together on collaborative activities based on a mystery theme. Peter wrote his first published book, Fizz and Martina’s Incredible Not-for-Profit Pet Resort, as part of the original Graph Club curriculum. I went on to design Neighborhood MapMachine, Community Construction Kit, Diorama Designer, and Rainforest Designer, and then came back to Peter with the design for a program called Stationery Studio. By then, Peter and his twin brother Paul had founded FableVision. The first version of Stationery Studio was released in 2003 and a new enhanced version in 2010.


2) How did the Fab@School Maker Studio Journey Begin?
In 2008, Glen Bull at the University of Virginia was exploring how 3D printers and inexpensive digital cutters could support STEM education. When Glen came across my software programs, Community Construction Kit and Diorama Designer, he realized these programs addressed similar concepts, except kids cut by hand instead of using electronic cutters. Glen asked me to design onramp software for the Fab@School coalition, which sought to establish the curriculum, instructional resources, software, professional development, and research to support the use of digital design and fabrication in STEM education. I asked Peter and Paul to collaborate on the development of what came to be Fab@School Maker Studio. Since then, the Fab@School collaborative has grown to include multiple school districts, Canon, SITE, the Smithsonian, the FabFoundation, TIES, and other partners.


3) How do you see the Maker Movement impacting the classroom?
The Maker Movement, a powerful example of hands-on project-based learning, has tremendous potential to positively impact the classroom. Making stuff is intrinsically motivating and gives students the opportunity to explore, invent, problem solve, discover, and apply what they’ve learned in an immediate and meaningful context. Making is not so much about the product, but the process, and how children are empowered to construct their own learning. Curiosity and discovery are natural by-products and fuel further explorations and discovery.
Maker projects, like real life, tend to be cross-curricular, so learning takes place in a richer, more meaningful environment. Although we think of the Maker Movement primarily in terms of STEM and STEAM, maker projects offer rich opportunities to integrate multiple curricular areas. When students make things, they have something concrete and of personal interest to talk about and develop language skills in a meaningful context. The Smithsonian Invention Kits go a step further and incorporate history, culture, and consumer science.
The University of Virginia’s preliminary research suggests that these maker projects positively impact measurable learning outcomes.
4) What are some simple ways for schools to create a Maker Space?
Maker spaces don’t have to be hi-tech. You can start with Legos, K’NEX, cardboard, tape, yarn, markers, scissors, and other readily accessible materials. First, create an attractive and inviting space where students feel free to explore, create, collaborate, and invent. Create a culture where mistakes are not only acceptable but understood as a critical part of the process.
In terms of digital design, the big buzz has been about 3D printing. We suggest an affordable, accessible onramp – paper and card stock. With just Fab@School Maker Studio and a single electronic cutter for under $150, students can create pop-ups, 3D models, working machines, and even the Smithsonian Invention Kits. Some projects can be cut by hand, so no cutter is required.
5) What has been your favorite moment working on Fab@School and what is your favorite project to fabricate?
December 2009: Paul made the leap of faith and committed FableVision to the Fab@School journey and Maker Studio development. At that point, few people had heard of 3D printing or even digital design and fabrication, and almost no one saw it’s potential in the classroom. Peter and Paul had faith in the vision and jumped on board this unique creative journey.
Also, Fall 2015, Paul personally took charge of Maker Studio development and brought Andrea Calvin on board, our new FableVision Learning Vice President. Our dream team, with John Lechner, Bill Norris, and Adam Landry, turbo-charged the project and readied Fab@School Maker Studio for release.
Now for my favorite project to fabricate, I like projects with moving parts. I believe they’re not only more motivating, but also provide more opportunities for learning across the curriculum. Projects with moving parts can be simple pop-ups or more involved like an automaton and the curriculum-rich Smithsonian Invention Kits being developed at the University of Virginia.


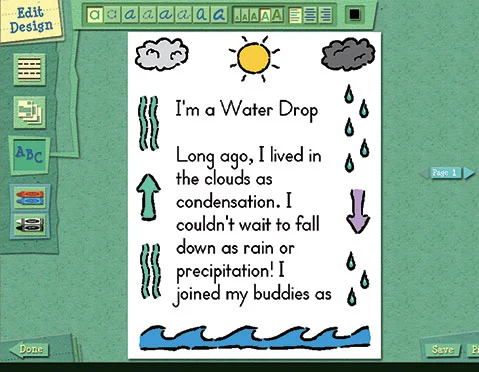
Problem Solving with Fab@School Maker Studio: The Heart of Pop-ups

The following blog post is by Peggy Healy Stearns, Lead Software Designer, Fab@School Maker Studio at Reynolds Center for Teaching, Learning, and Creativity.
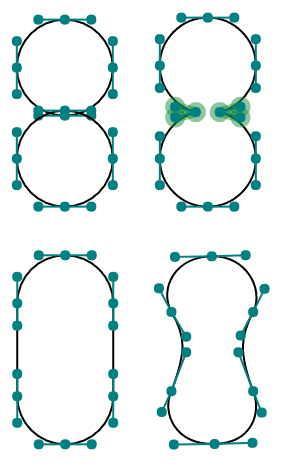
I’m a huge fan of pop-ups – pop-up books, pop-up cards, pop-up displays. I love the way pop-ups combine math and engineering and literature and creativity. So, when we designed Fab@School Maker Studio, I wanted to give kids tools that let them easily design their own imaginative pop-ups. That’s why, in Maker Studio, we created ready made pop-up elements that kids can resize, combine, and color to create an endless variety of imaginative constructions.


Maker Studio’s 3D view lets kids view, open and close, and rotate their constructions so they can refine their designs before they fabricate with scissors or an electronic cutter.


Creating a simple pop-up like the heart above provides a motivating and memorable way for students to integrate problem solving and math skills. For example, in creating this heart pop-up, students consider:
Measurement: How big can the pop-up be without protruding beyond the edge when the card is folded? Can you figure out a rule?
Symmetry vs. asymmetry: Does it matter if the design is symmetrical? Why or why not? Choose a design and tell whether it’s symmetrical or asymmetrical, then predict whether the design will work as a centerfold pop-up. Experiment to see if you’re right.
Parallel Lines and Angles: This pop-up is attached at both sides. Do the side fold lines need to be parallel to each other? Do they need to be parallel to the centerfold? How will the pop-up fold if the lines are not parallel? Play around and see what you discover!
As students think through and construct even a simple pop-up, they apply math, engineering, and problem solving skills. Pop-ups are also a great way to integrate these skills across the curriculum as students respond to literature, write creatively, or plan projects in science, social studies, and other subjects. Many pop-up projects can be fabricated by hand, making it easy for teachers to use these activities with their students.
If you want, integrate simple circuitry using copper conductive tape, a coin cell battery, and LED lights as shown in the birthday card pop-up above.
These pop-ups and hundreds more were created with Fab@School Maker Studio, the new web-based app designed to encourage STEAM learning across the curriculum. To learn more, go to Fab@School Maker Studio. The heart pop-up and others are included as Ready-Made projects in the software.
We would love to see what pop-ups you create in Fab@School Maker Studio. Share your designs with Andrea Calvin at andrea@fablevisionlearning.com, and you could be featured on our blog!